This is the tuning guide, for when you want to go beyond the defaults and shape the look yourself. It covers the RTX render settings (samples, bounces, denoise), view transform and color, the new lighting controls, camera depth of field, and the procedural sky.
New to RTX Render? Start with RTX Render Open Beta (1): Overview & Getting Started
For materials, see RTX Render Open Beta (3): Material Library. Have questions or feedback, post them in this thread.
This post covers:
- Part 1: Digital Human Shaders
- Part 2: Lights
- Part 3: Camera, F-Stop Depth of Field
- Part 4: Procedural Sky
- Part 5: Materials
- Part 6: View Transform & Color
Part 1: Digital Human Shader
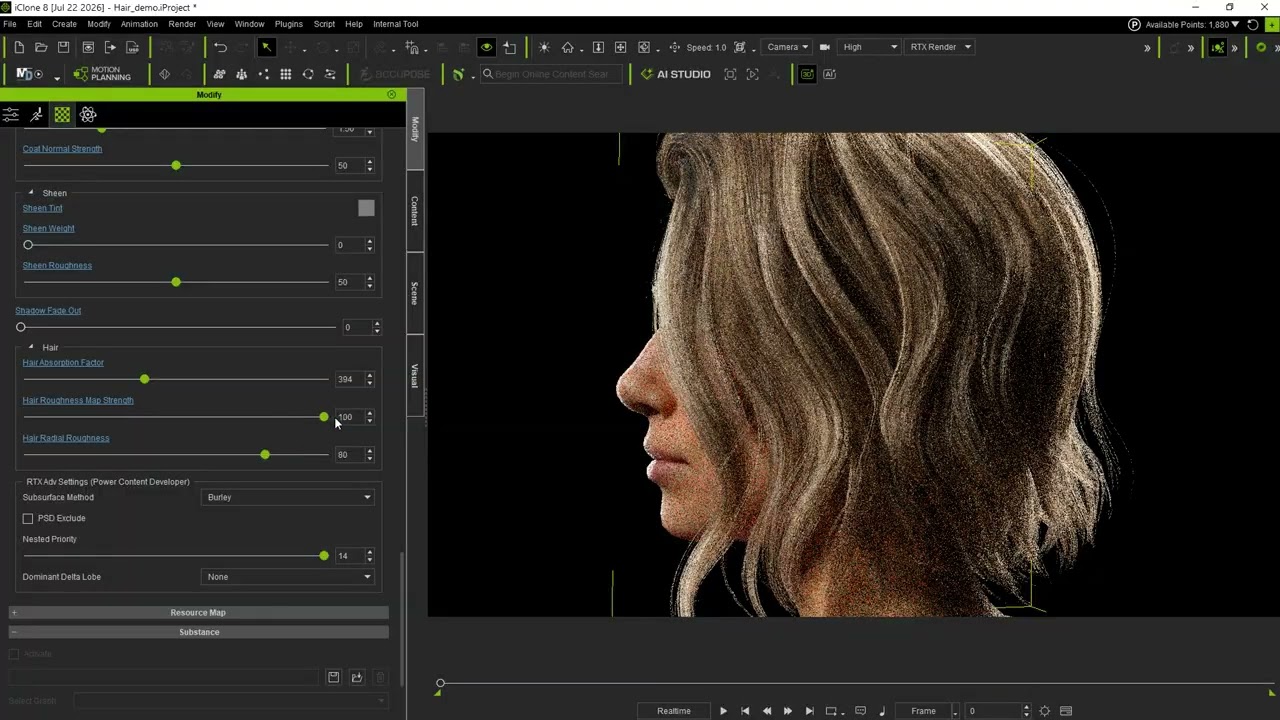
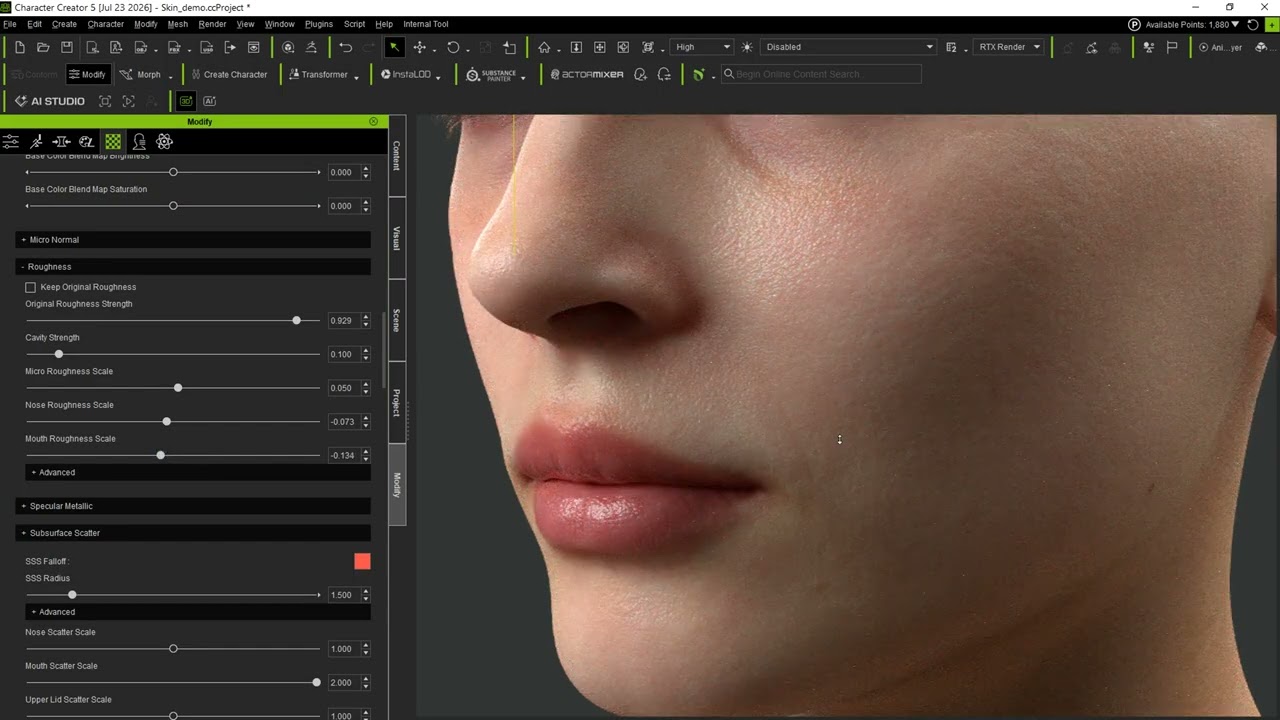
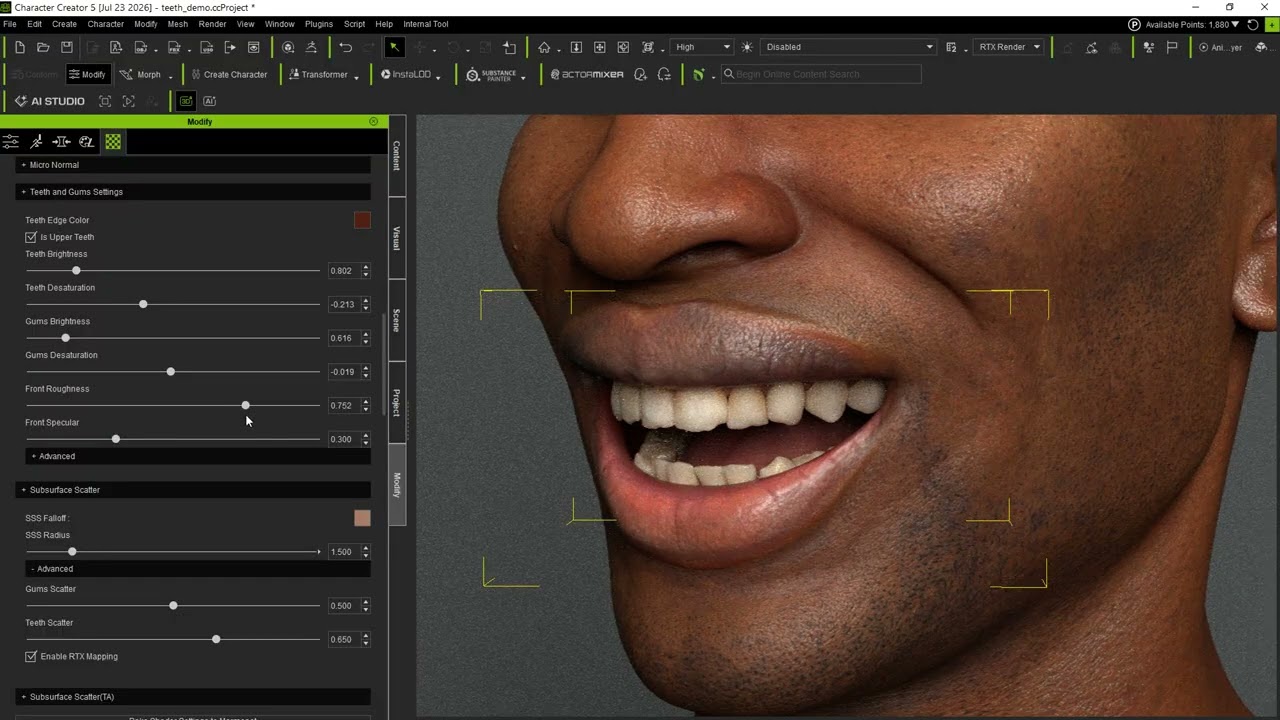
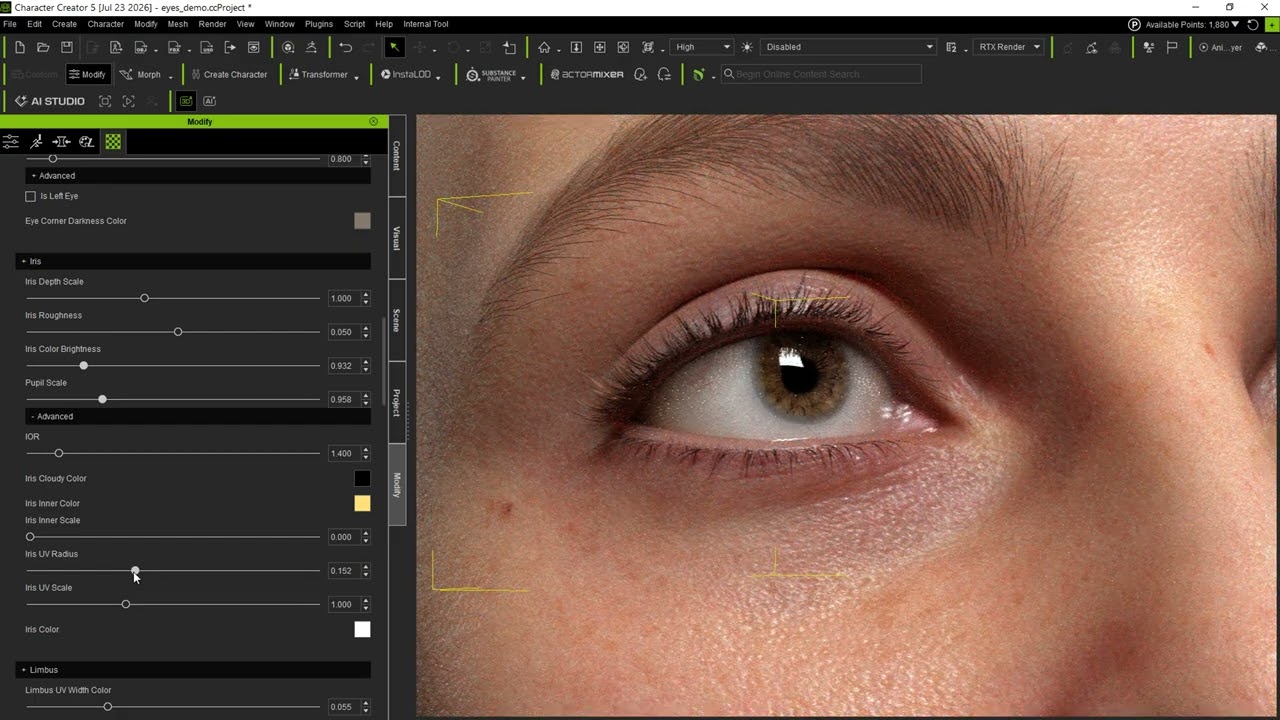
You don’t have to rebuild your character’s materials for RTX. When a project converts, RTX Render automatically maps the digital human shaders across the whole character, hair, eyes, teeth, and skin included, to their path-traced equivalents. Your character arrives in RTX mode already reading correctly: skin with real subsurface scattering, hair lit strand by strand, eyes refracting through the cornea.
Note: More feature guide will be posted soon.
Part 2: Lights
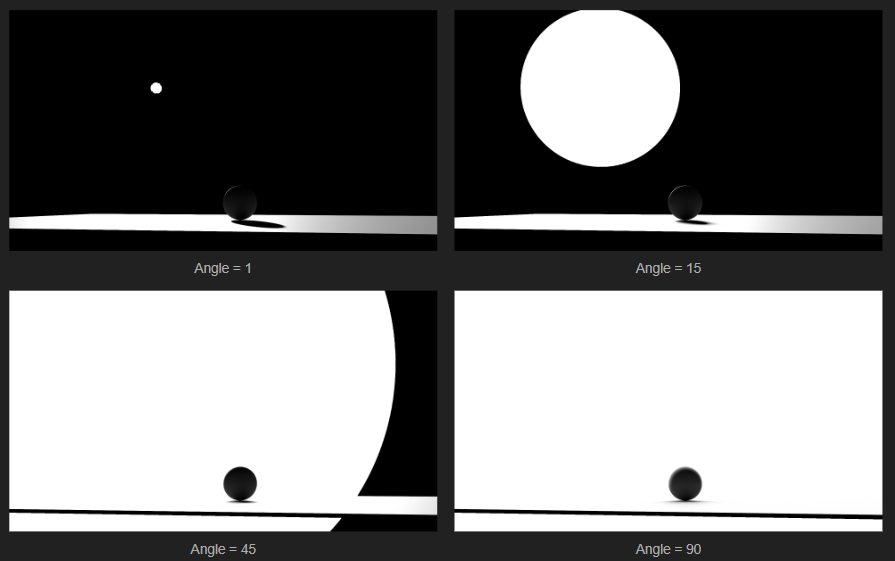
Core principle under path tracing: the bigger the light source, the softer the shadow. Most of the new controls are ways to give lights physical size.
-
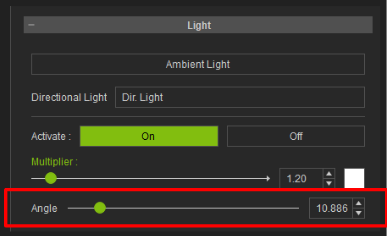
Directional Light Angle (degrees; 90° = half the sky): larger angle = softer shadows. The light’s disk is now visible in reflections, and Angle changes its apparent size.
-
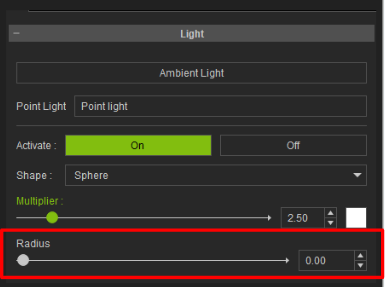
Point / Spot Radius (Sphere type): larger radius = genuinely softer shadows. In DX11, radius only changed the light’s visual size.

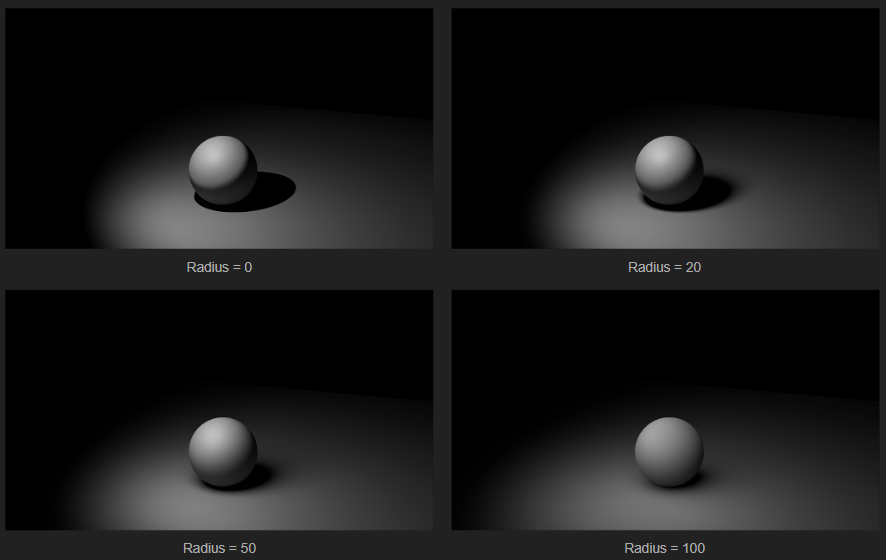
- The None light type is removed; default is now Sphere.
- Rectangle and Tube spotlights do not support Angle and Falloff.
Behavior differences from DX11:
- IBL casts shadows now. Purely IBL-lit interiors may render darker; compensate with intensity.
- Mesh lights are physically present: a light with non-zero radius appears in reflections at all camera angles. Watch that large-radius lights don’t intersect nearby geometry.
- Light Range is not supported; lit coverage will differ after switching.
- Performance: Rectangle and Tube lights currently render slower.
Part 3: Camera, F-Stop Depth of Field
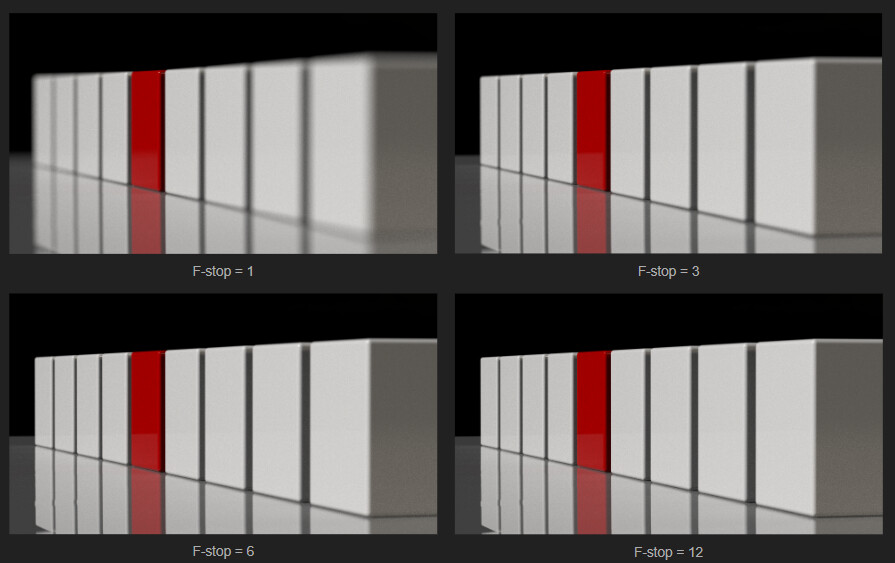
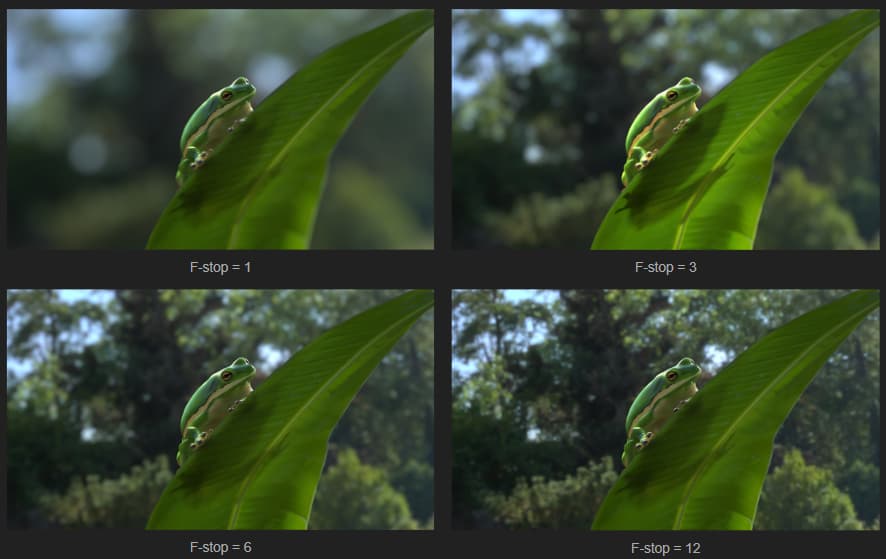
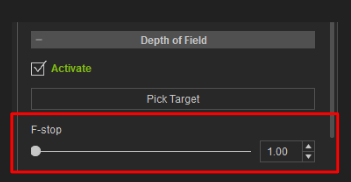
DOF now behaves like a real camera aperture: low f-stop (e.g. 1) gives shallow focus with strong background blur; high f-stop (e.g. 12) keeps everything sharp. Focus falloff is optically accurate, which shows most in character close-ups.
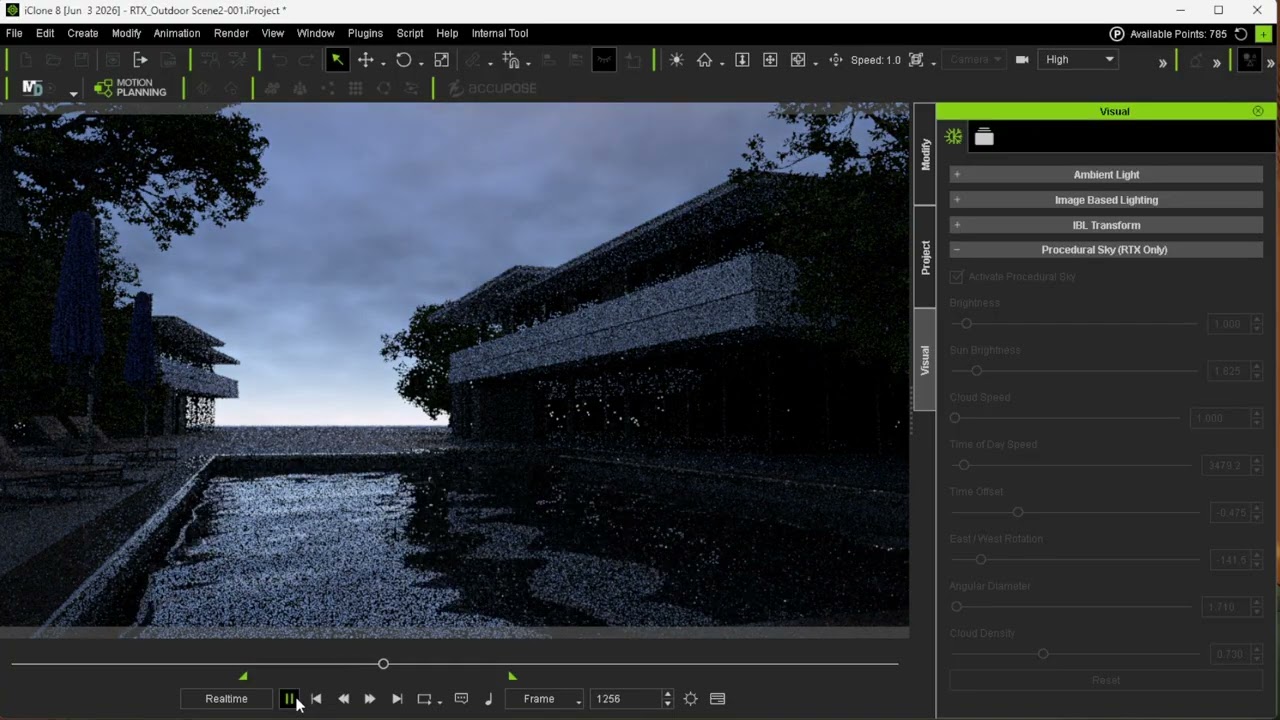
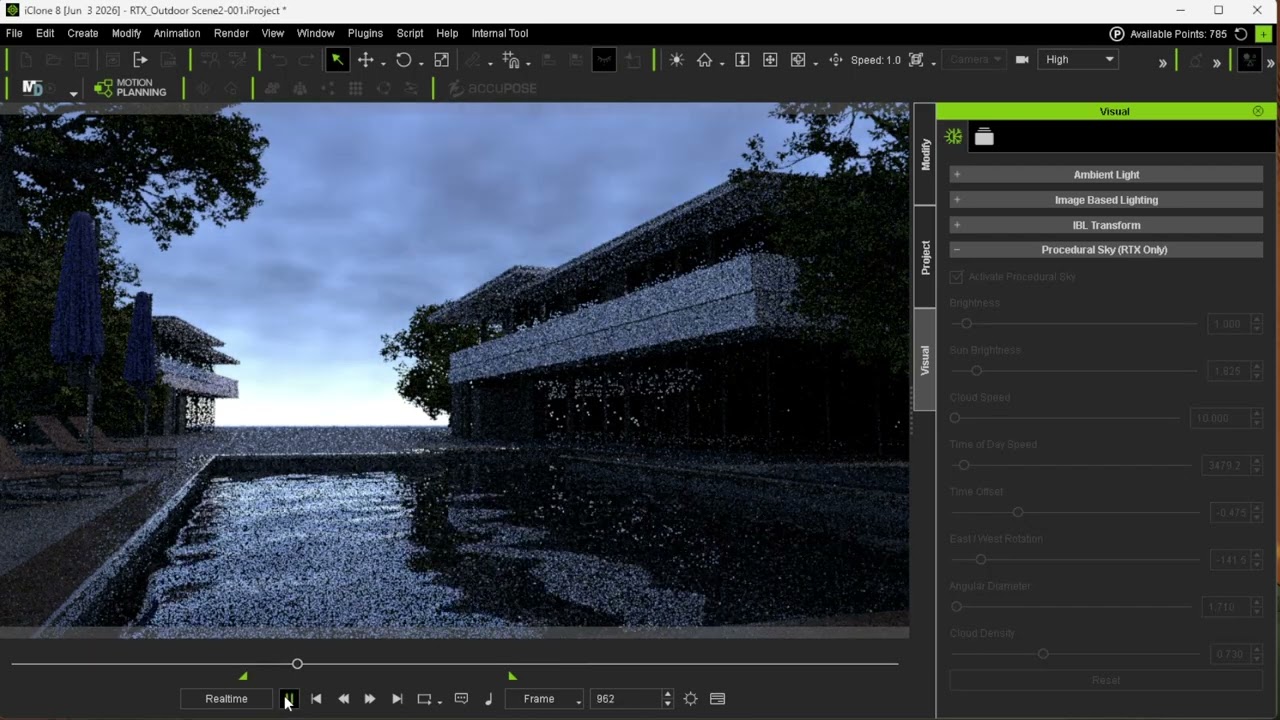
Part 4: Procedural Sky
A dynamic sky that is a genuine light source under path tracing:
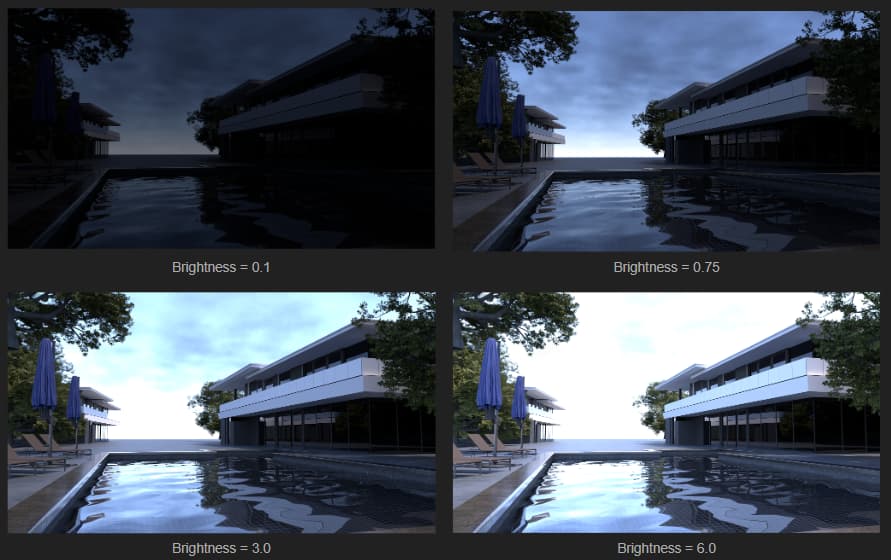
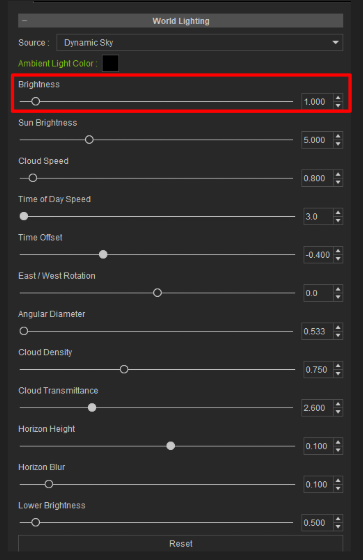
- Brightness: overall sky light (known issue: very high values overexpose the background)
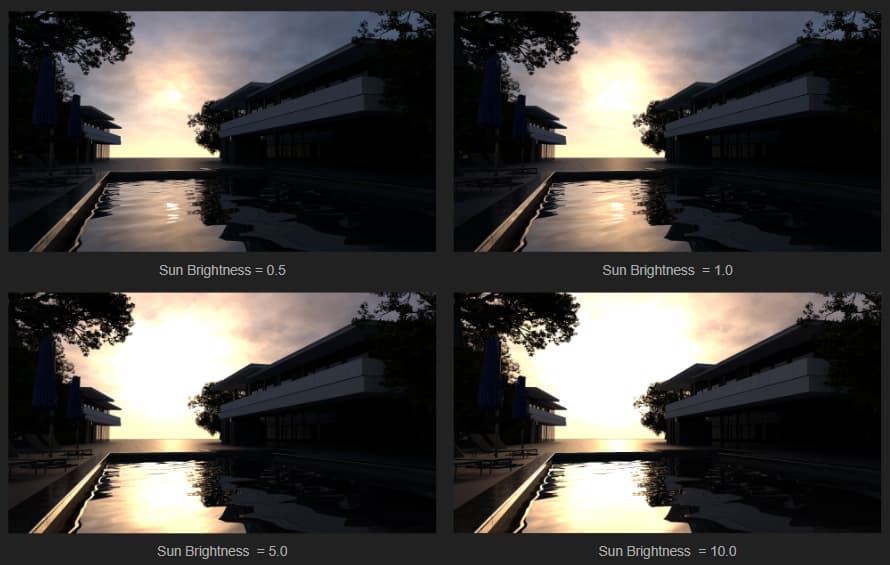
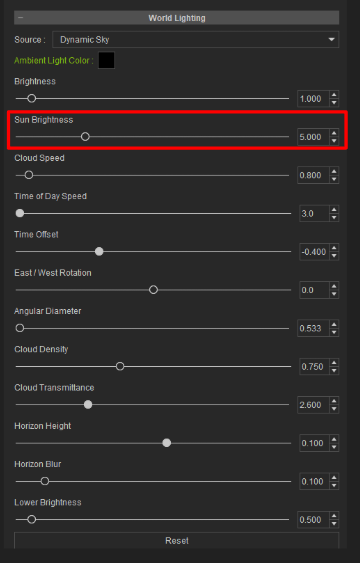
- Sun Brightness: the sun disk’s intensity, mainly affecting glow size
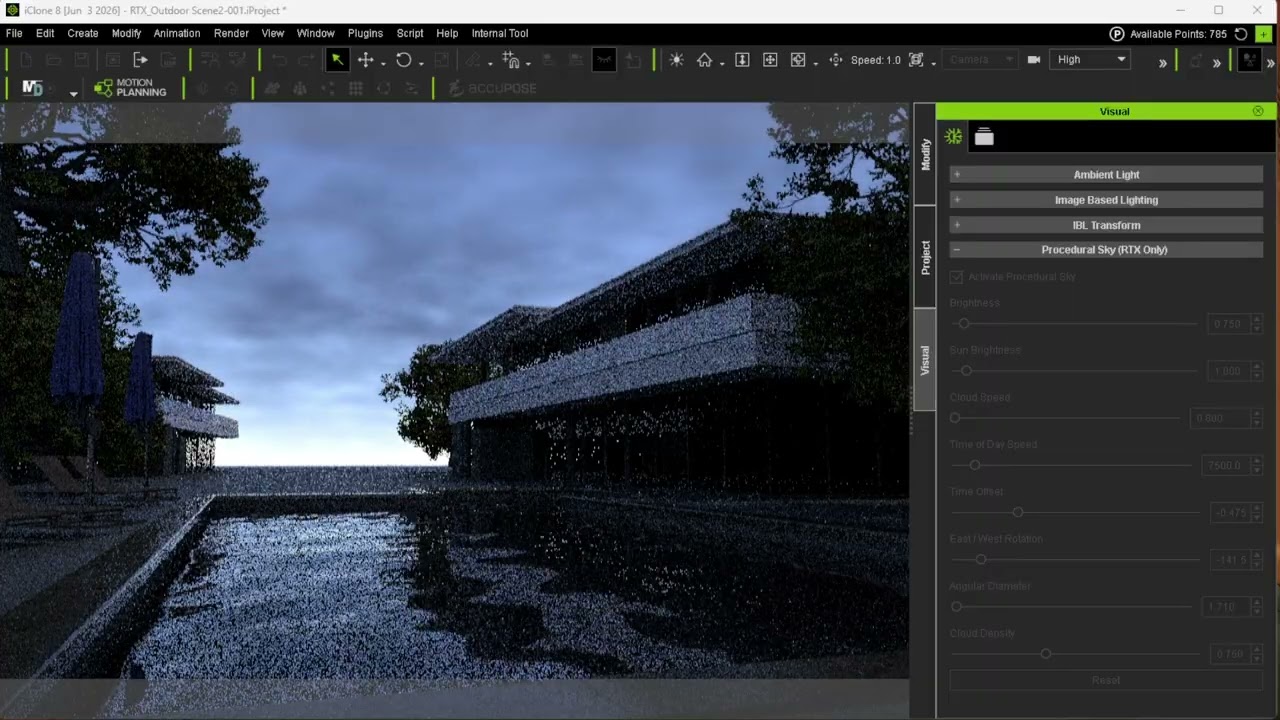
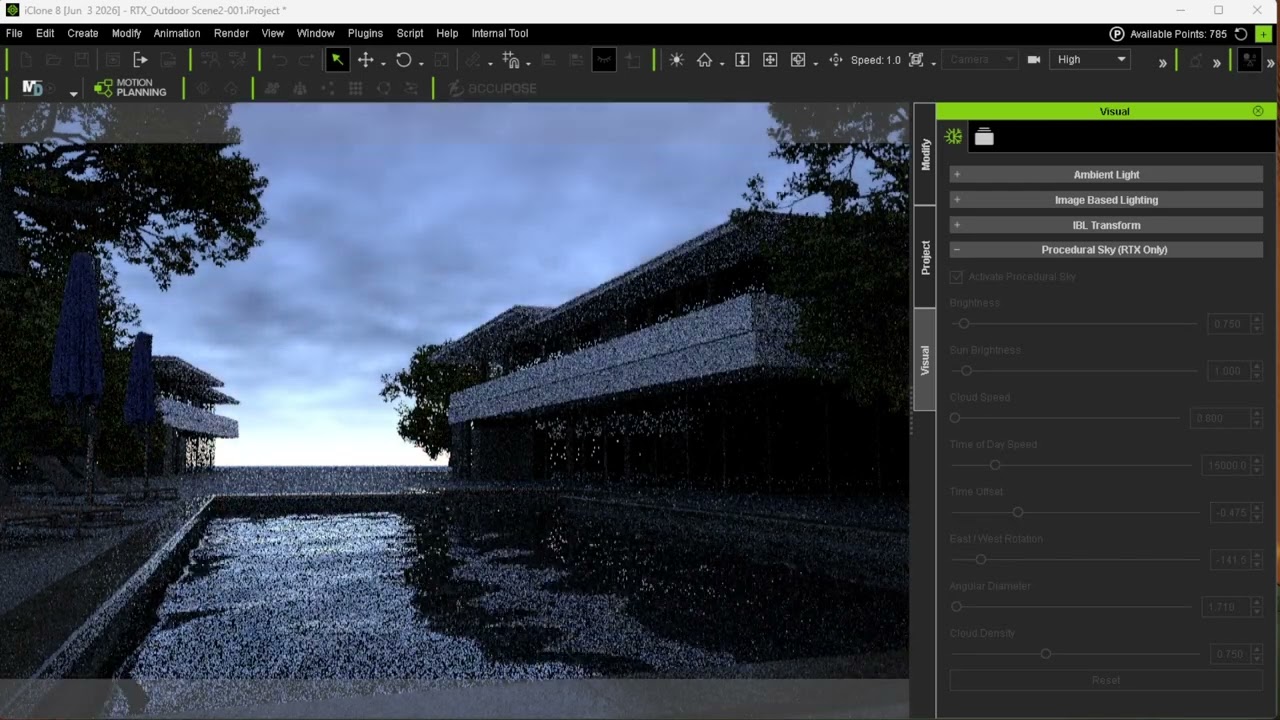
- Time of Day Speed / Time Offset: how fast the sun moves and where it currently sits
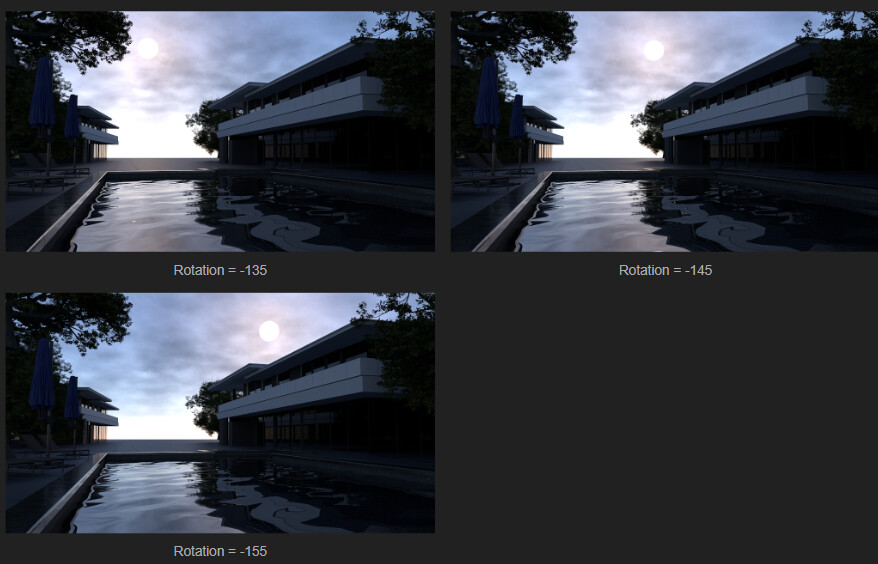
- East / West Rotation (−180 to 180): place the sun to suit your camera angle
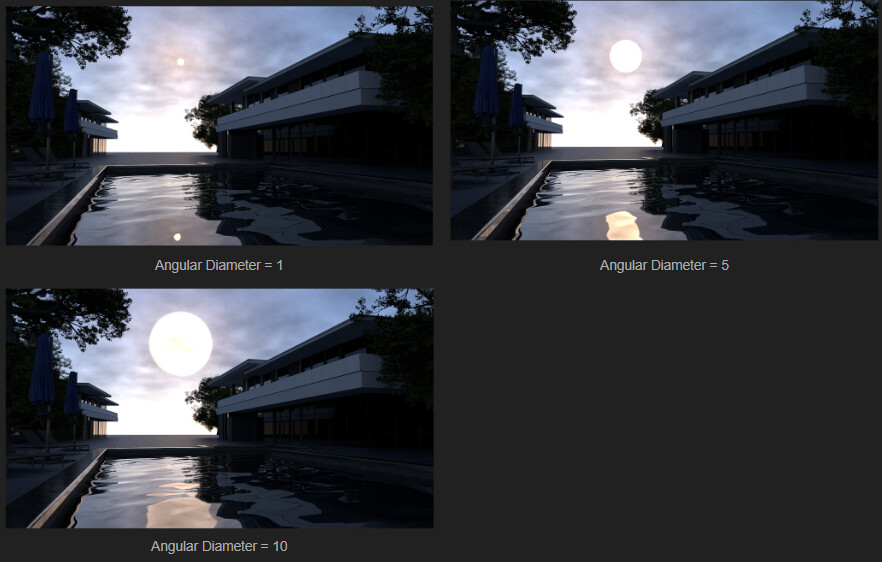
- Angular Diameter: sun size, which also softens or hardens shadows
- Cloud Speed / Cloud Density: animated cloud cover
Part 5: Materials
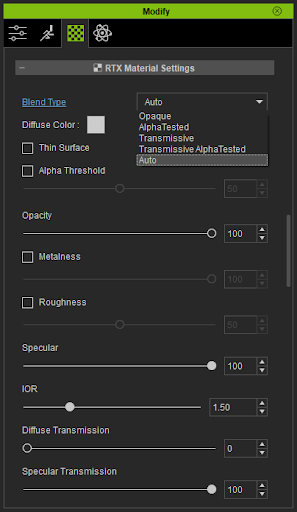
In RTX mode the Material Settings panel becomes a dedicated RTX panel. Self Illumination and Glow Map are merged into one Emissive system.
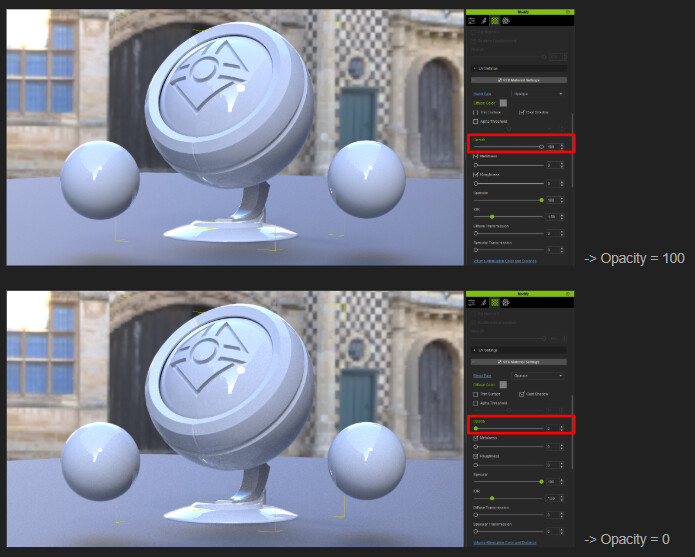
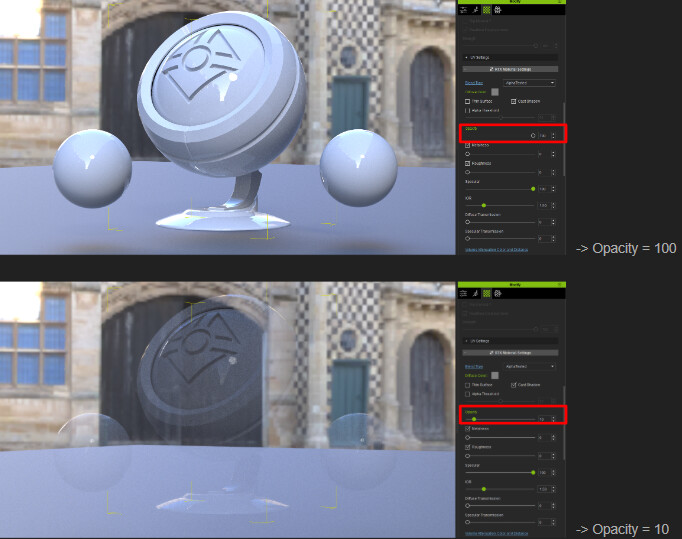
Blend Type
-
Opaque: no alpha, best performance
-
AlphaTested: alpha cutout (leaves, lace, hair cards)
-
Transmissive: light passes through (glass, liquids)
-
Transmissive AlphaTested: both
-
Auto (default): switches automatically based on whether Opacity or Transmission is used. You may feel a brief hitch the first time you drag those sliders; it’s smooth afterwards.
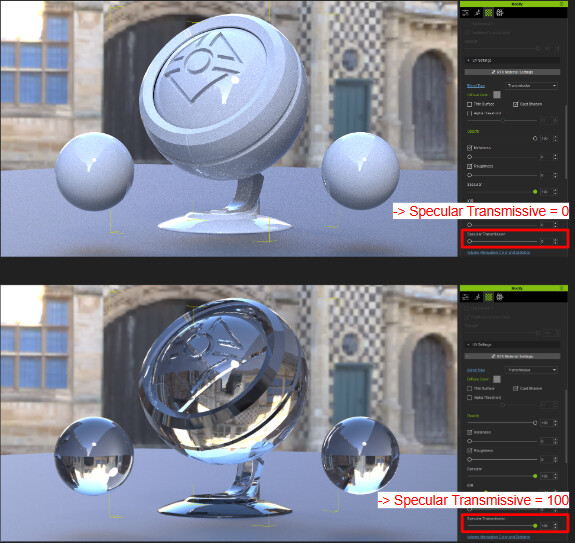
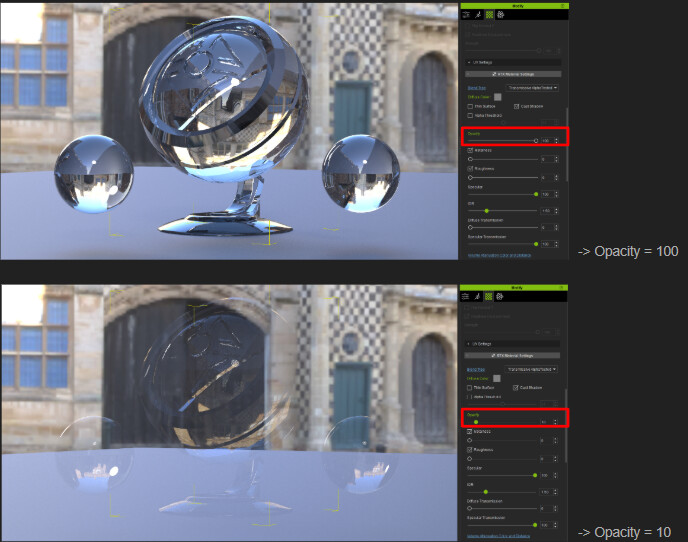
Cast Shadow can be toggled per material.
Core PBR controls
-
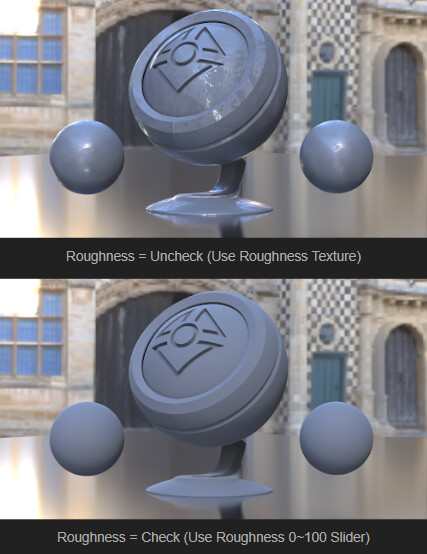
Metalness / Roughness: unchecked = use texture, checked = use the 0–100 slider
-
Specular: 0–100
-
Roughness map gamma: older projects applied a 0.66 correction to match Substance Painter under IBL. Keep old projects at 0.66; use 1.0 for newly loaded textures/FBX so roughness stays as authored.
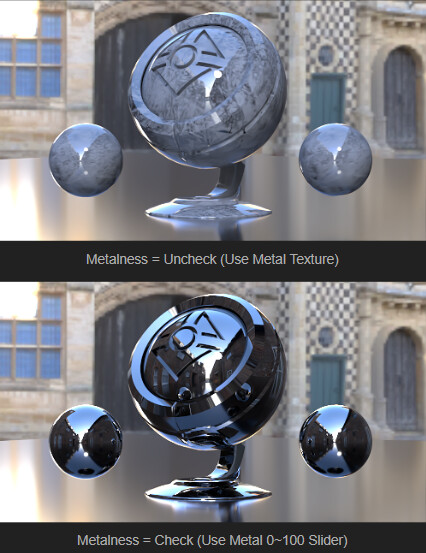
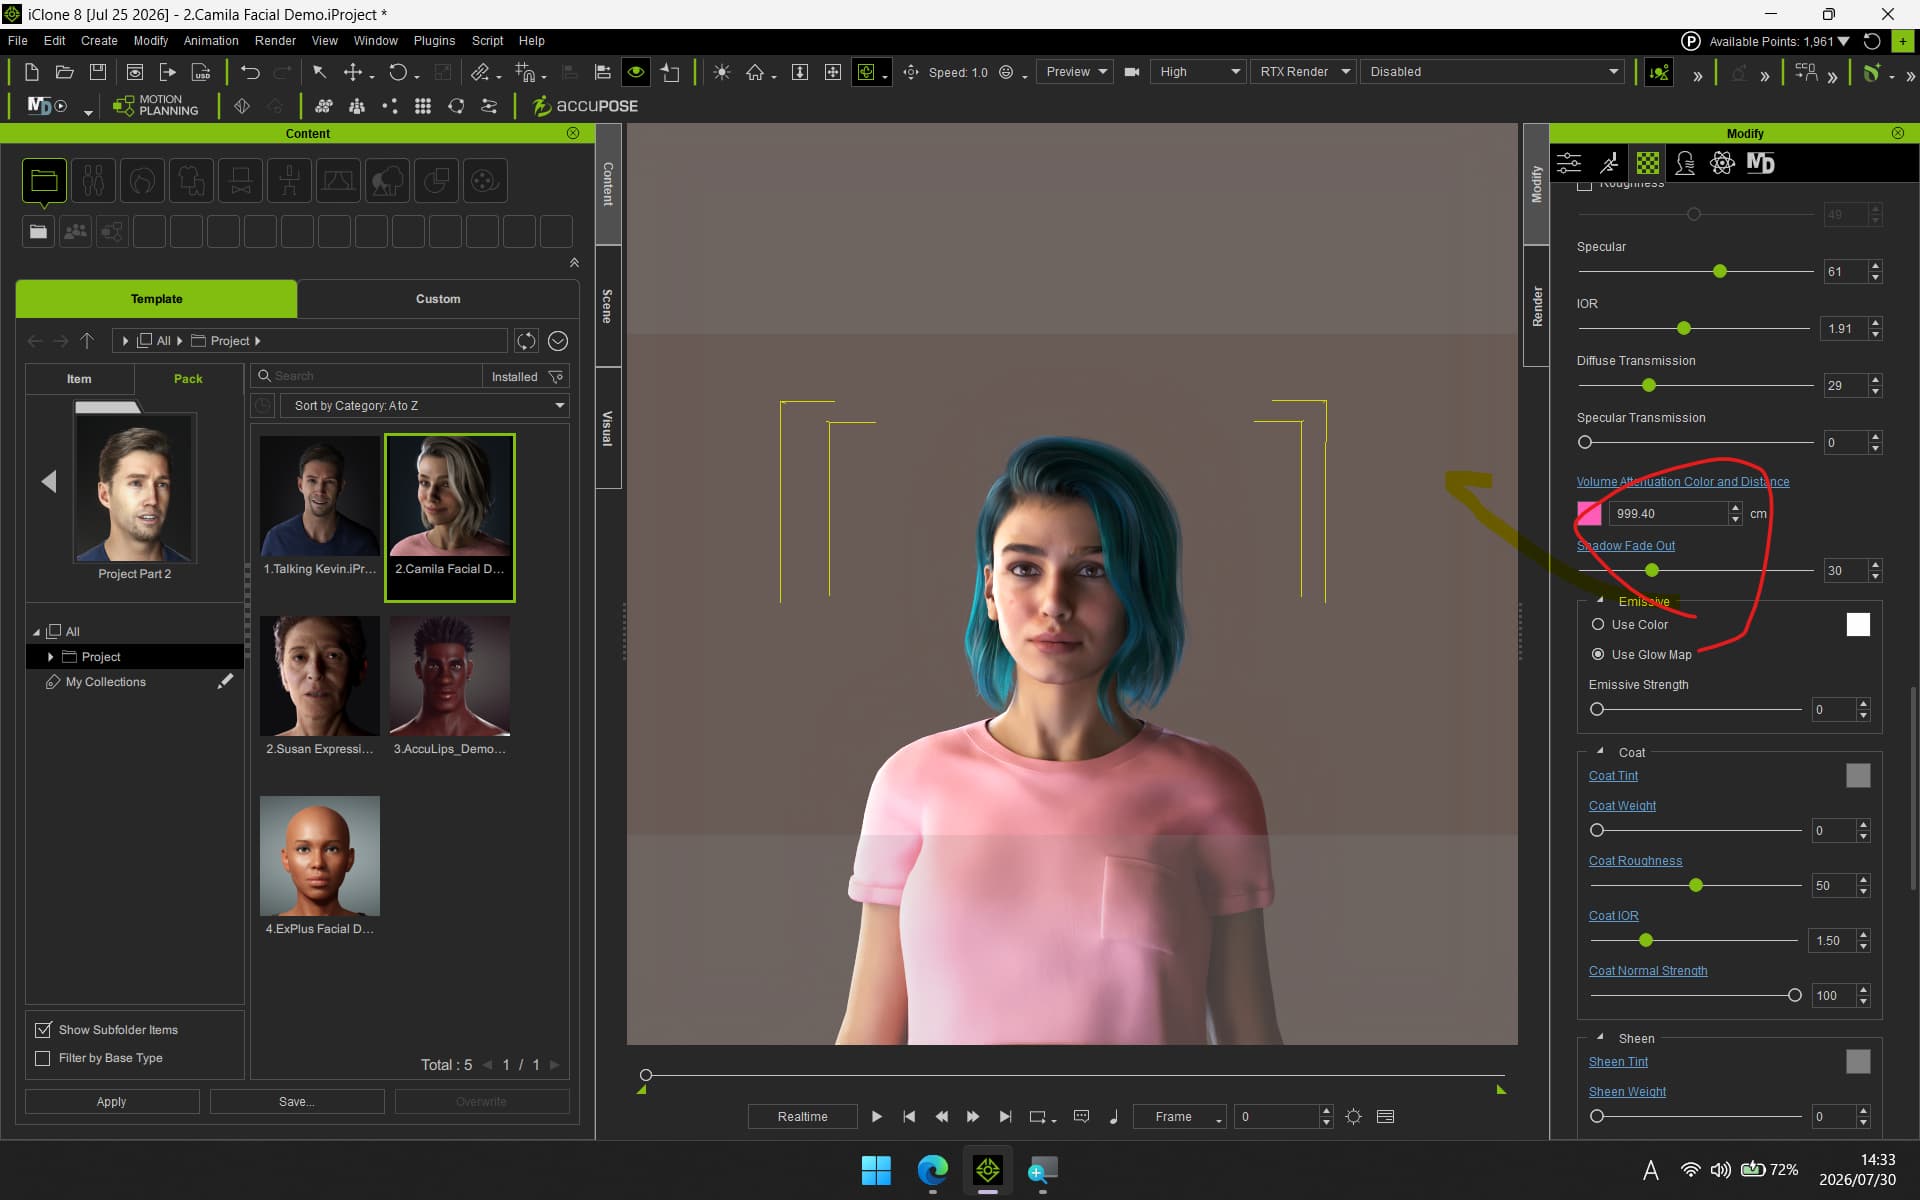
Transmission: glass and liquids
-
Set Blend Type to Transmissive (or Auto) and push Specular Transmission to 100 for glass. On Opaque, transmission will not appear.
-
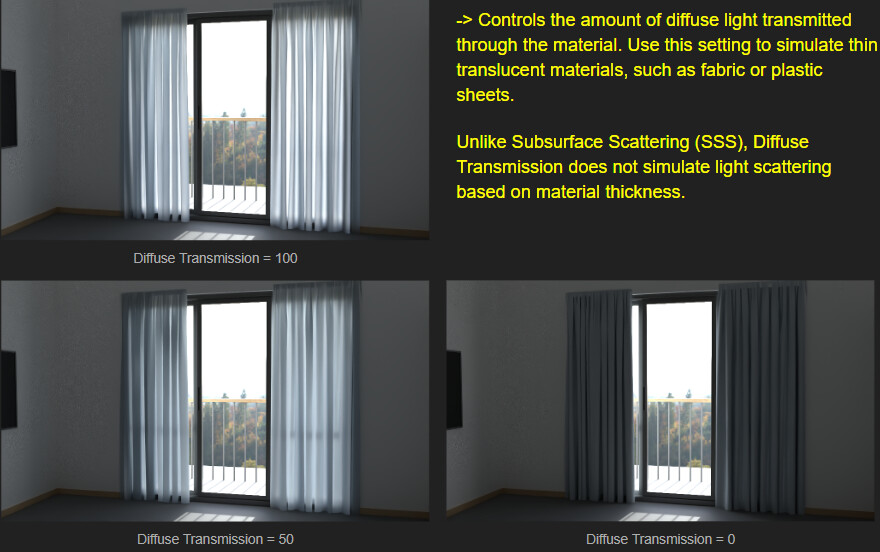
Diffuse Transmission: frosted translucency for thin materials (plastic sheeting, lampshades, thin fabric). Similar in spirit to SSS but simplified, no thickness computation.
-
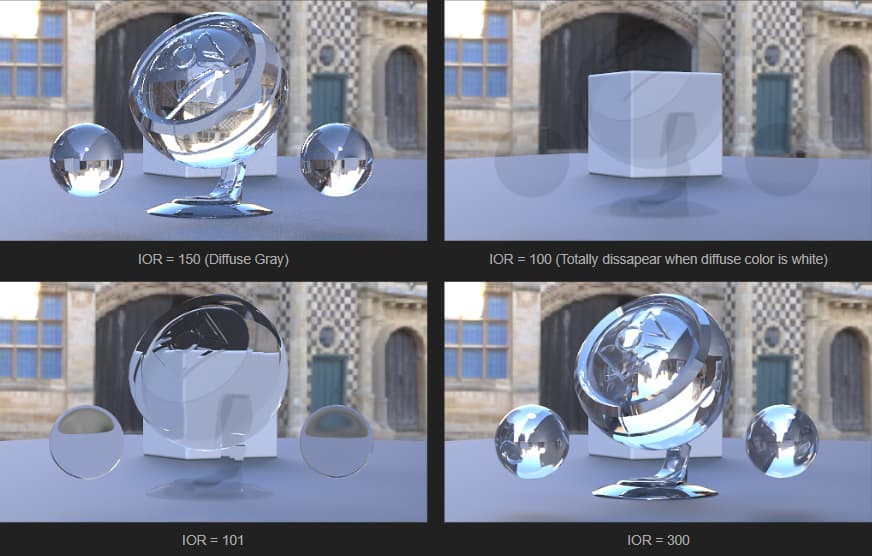
IOR: refraction strength. ~150 reads as glass; at 100 with white diffuse a transmissive object disappears entirely.
-
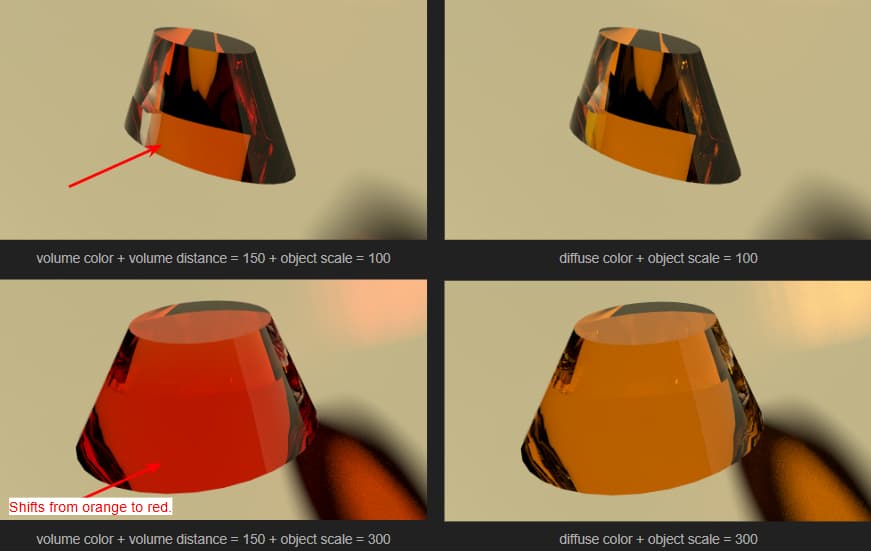
Volume Attenuation (Color + Distance): the correct way to tint glass. Color deepens with the object’s real thickness, like a wine bottle running darker at its thick base. Distance controls how fast light takes on the color. Object scale matters, because light genuinely travels farther through bigger objects.
-
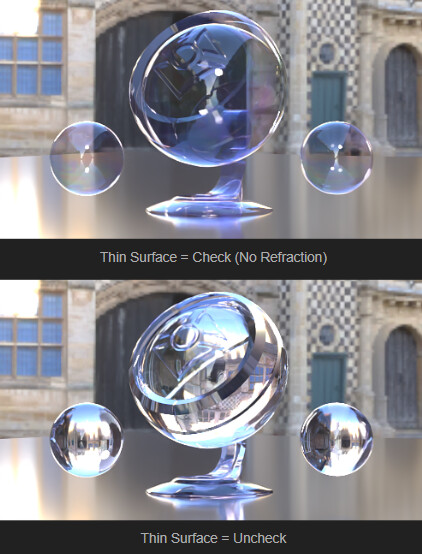
Thin Surface: zero-thickness shell, no refraction. For bubbles and soap films.
Coat: clearcoat layer
A second specular layer over the base: car paint, lacquered wood, piano finish, carbon fiber.
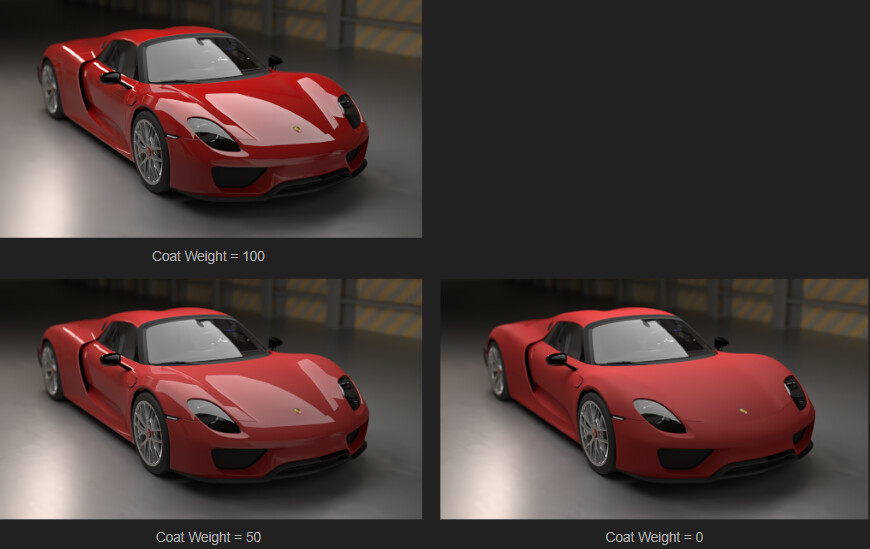
- Coat Weight: strength · Coat Roughness: polish (0 = mirror lacquer) · Coat Tint: the layer’s own color · Coat IOR: its refraction · Coat Normal Strength: blend between coat texture normal (100) and geometry normal (0) · Coat Mask: restrict coat to masked areas

Sheen: fabric
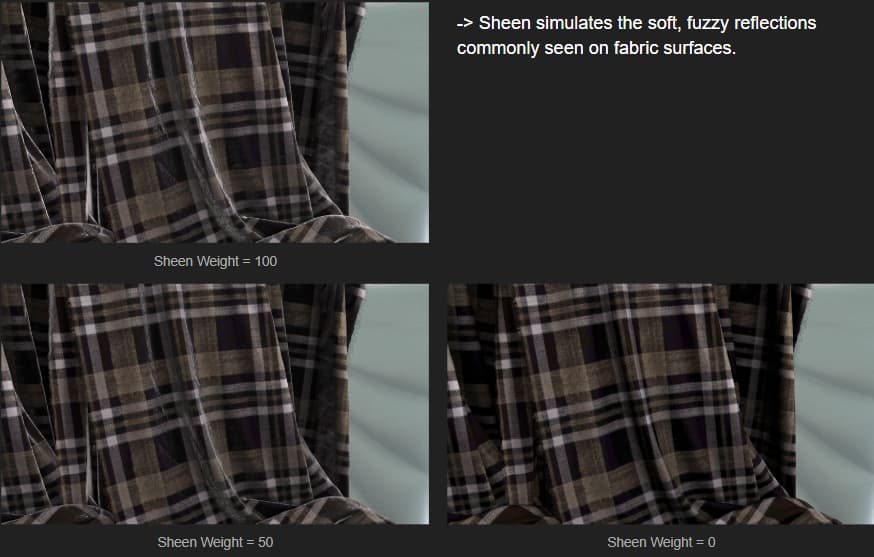
The soft fiber glow that makes velvet, silk, and linen read as cloth.
-
Sheen Weight: strength · Sheen Roughness: how tight the sheen falls · Sheen Tint: its color (velvet often wants a tinted sheen)
Hair
-
Absorption Factor: raise for dark hair; pushes color deeper and richer instead of washing out
-
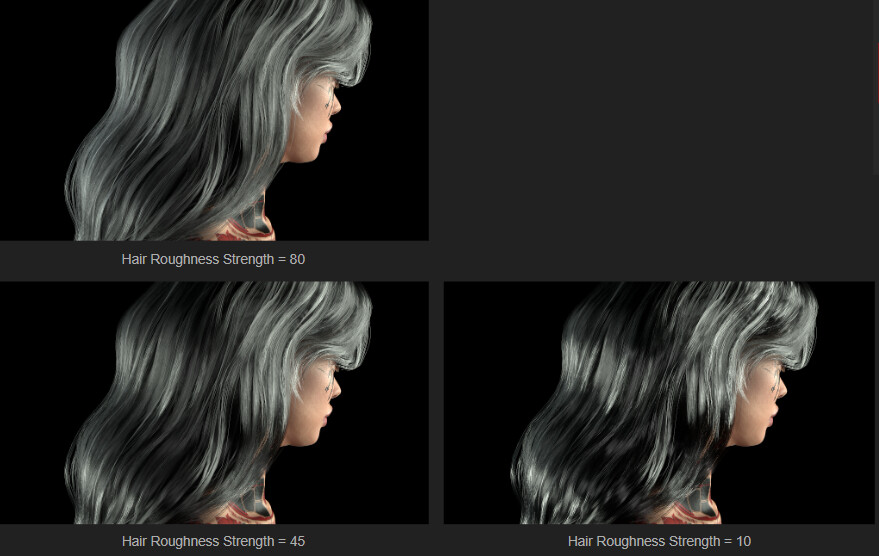
Roughness Strength: roughness along the strand; lower = glossier concentrated highlight
-
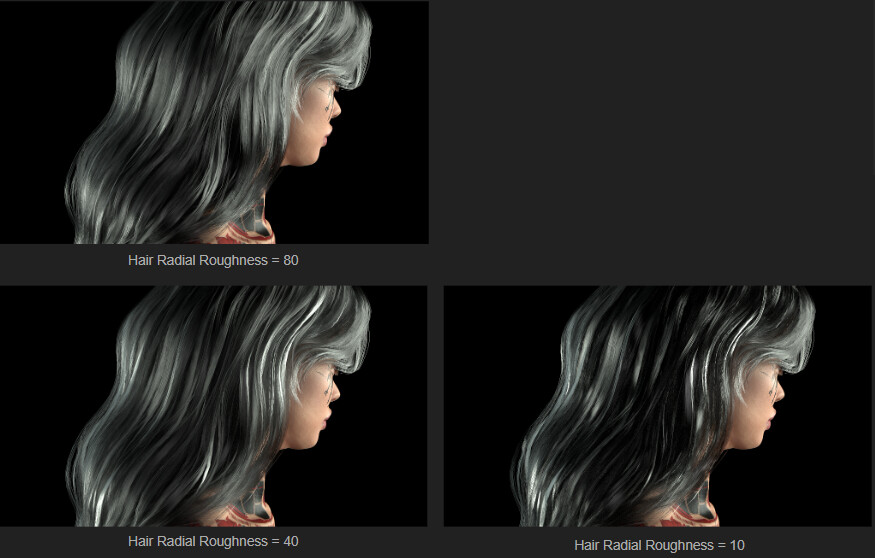
Radial Roughness: roughness across the strand; lower = highlight concentrates on fewer strands
-
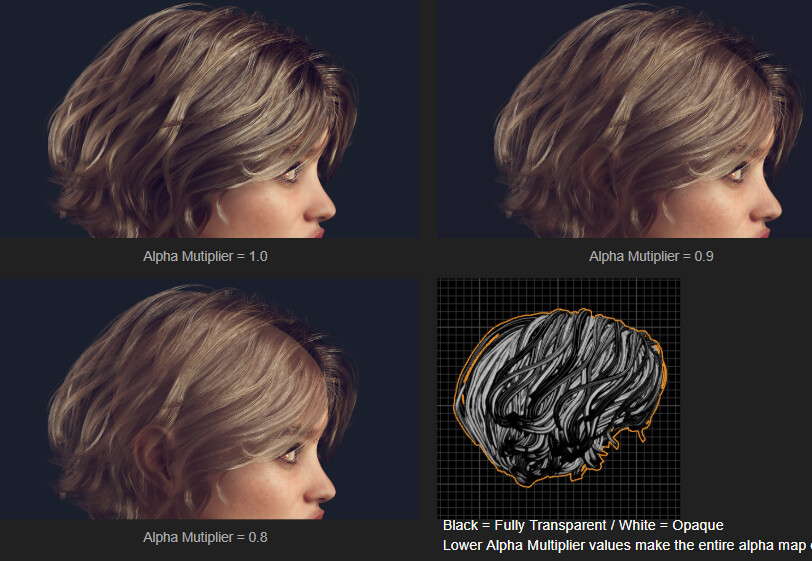
Alpha Multiplier: overall alpha strength; lower = more transparent (beta note: currently also thins the crown)
-
Alpha Power: curve/contrast-style alpha adjustment; higher = more transparent, the opposite direction from Multiplier

Emissive
-
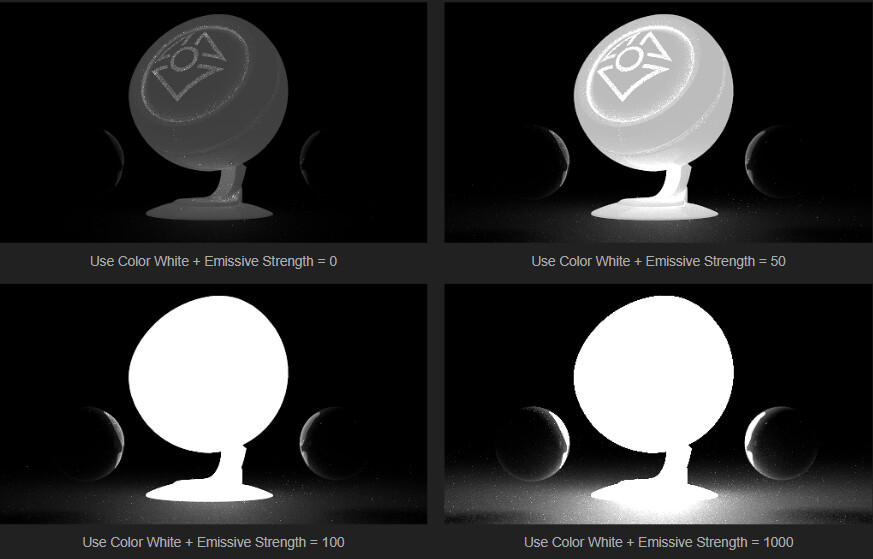
Use Color or Use Glow Map, each multiplied by Emissive Strength
-
Under path tracing, emissive surfaces are real light sources: neon genuinely illuminates its surroundings. Subtle glow ≤100; scene lighting 1000+.
Part 6: View Transform & Color
These controls change how rendered light is mapped to your screen.
-
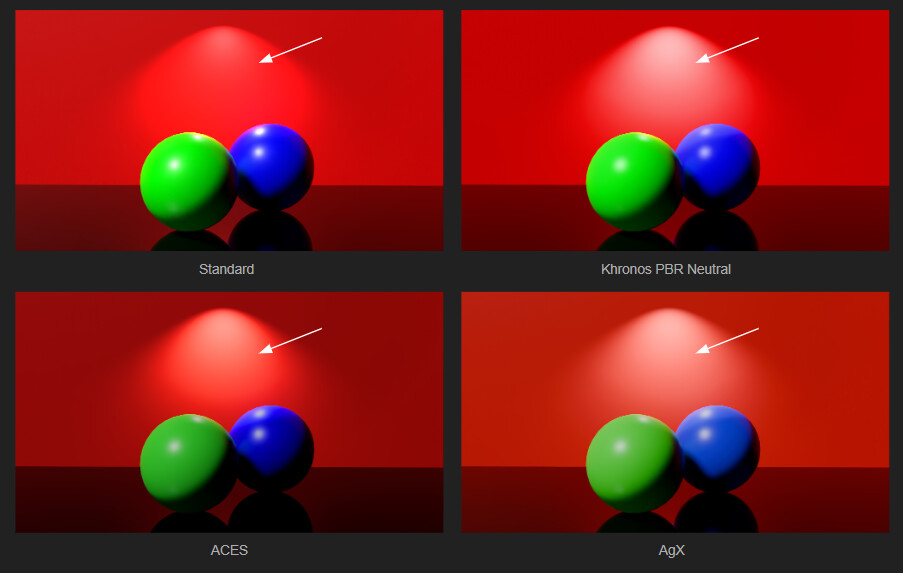
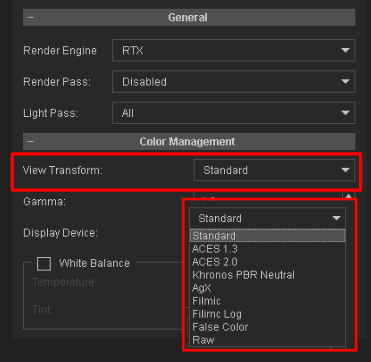
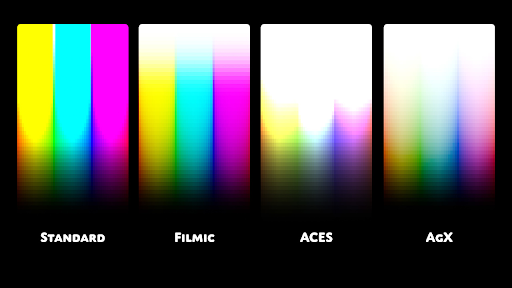
View Transform: Standard is closest to the DX11 look. Raw applies no tone mapping. ACES and AgX represent light response most accurately, including the gradation from bright to dark; recommended for cinematic work.
-
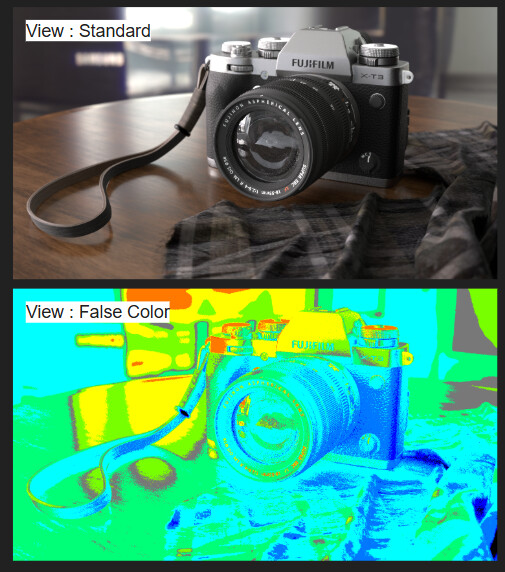
False Color: an exposure-diagnosis view that displays brightness as color, so you can judge how far to push exposure.
-
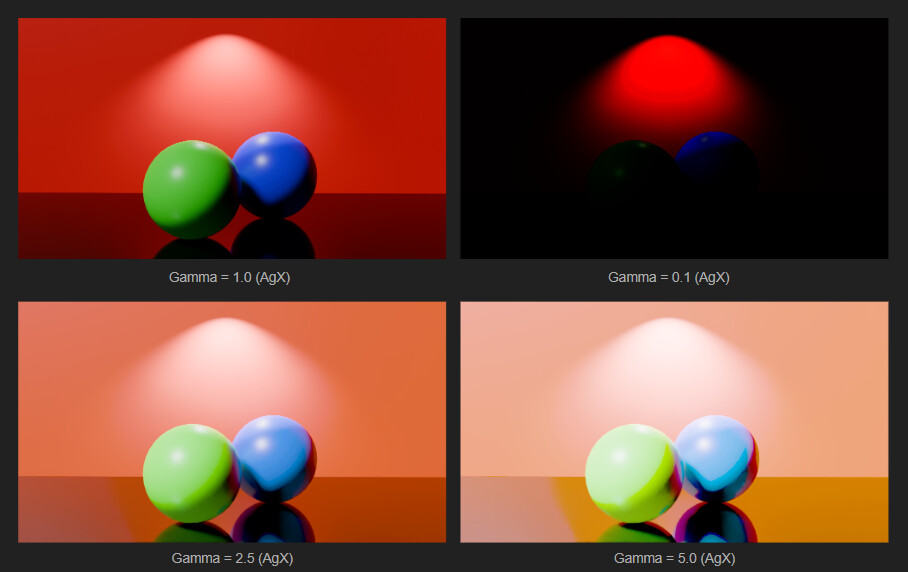
Gamma: overall gamma for the chosen transform.
-
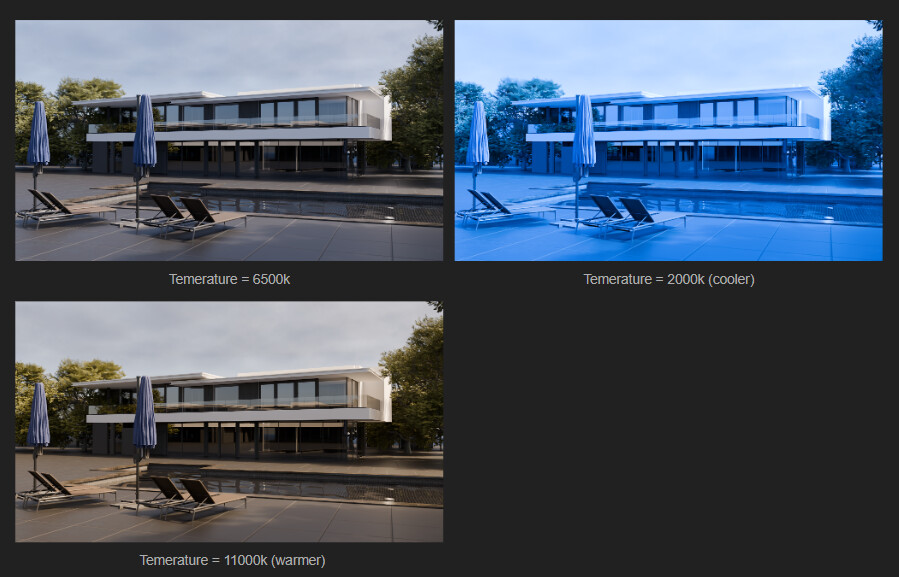
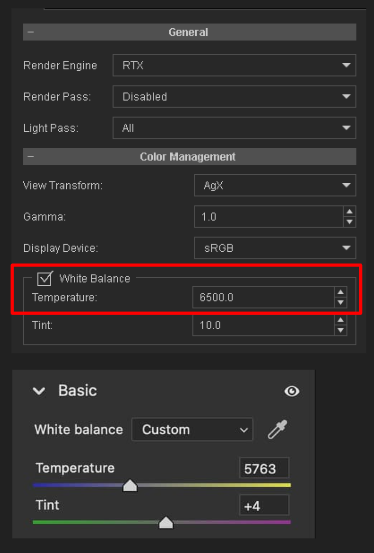
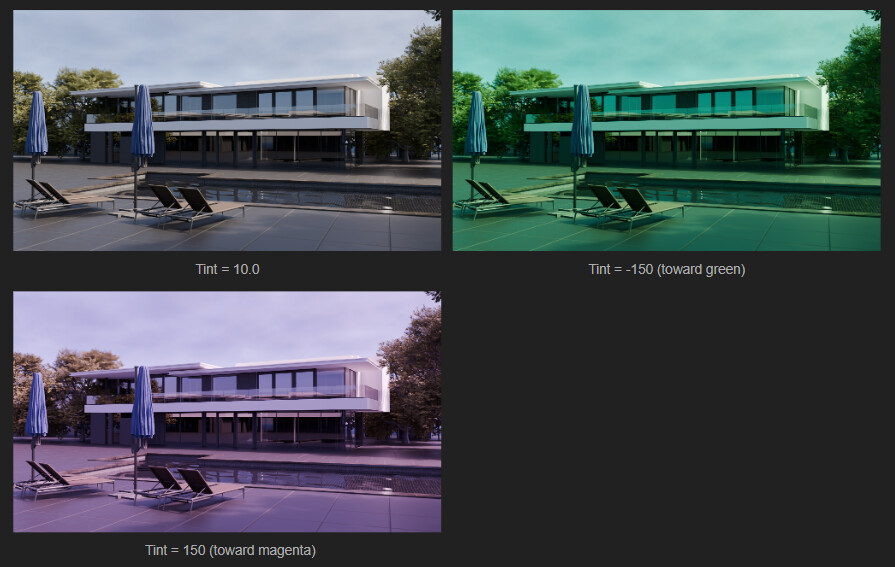
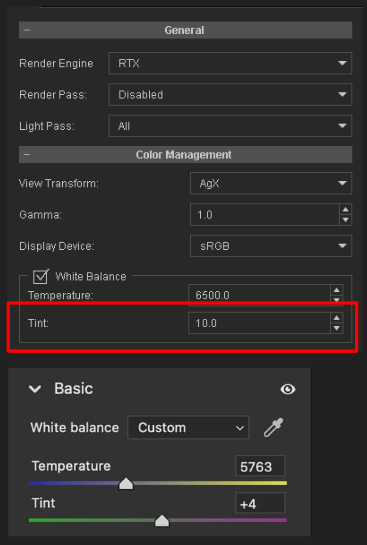
White Balance: like photo editing. Temperature shifts cool/warm, Tint shifts green/magenta. Values are scene-dependent.
You can also preview Light Pass separately (All / Direct / Indirect) to diagnose where the light in your scene is actually coming from.
Quick recipes
- Colored glass bottle: Auto → Specular Transmission 100 → tint via Volume Attenuation Color (not diffuse) → tune Distance
- Car paint: base color + metalness → Coat Weight 100, Coat Roughness 0–10
- Velvet: dark base → Sheen Weight 80+, tinted sheen
- Soap bubble: Transmissive → Thin Surface ON
- Neon: Use Color → Emissive Strength 500–1000+
- Dark glossy hair: Absorption Factor 150–350, lower Roughness Strength
Don’t want to build these by hand? Post 3 has a ready-made library of 55 RTX materials, 18 light presets, and demo projects you can apply directly.
RTX Render Open Beta (3): Material Library