Hi everyone!
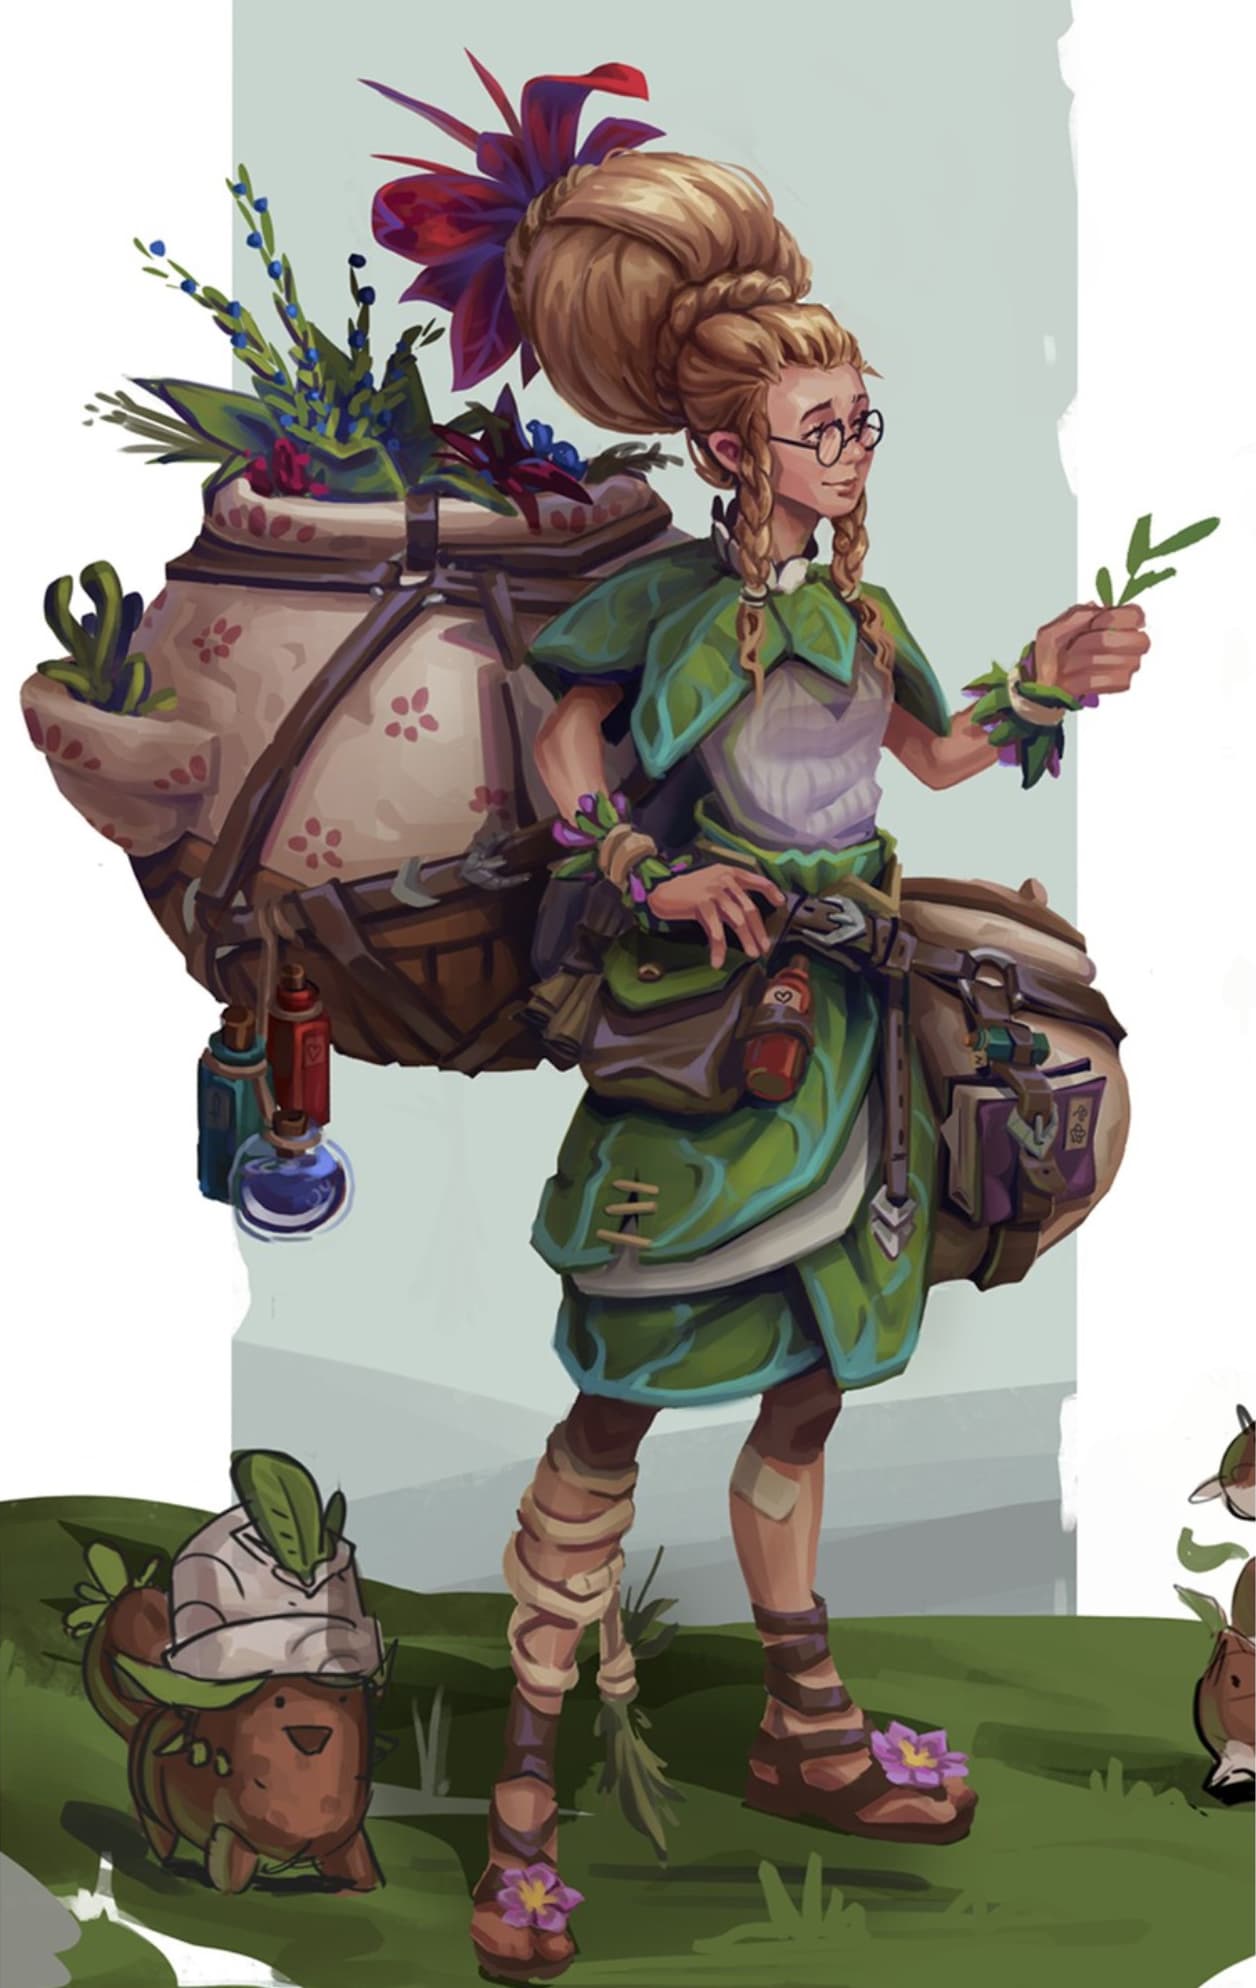
These will be the concepts that I will be attempting to modify with AI. These are the initial concepts that we (my wife and I) shortlisted from several others on Artstation. And I thought of combining them into a story driven narrative, just like my previous year’s attempt.
Here are the two primary references:
by
Nolan Bouana
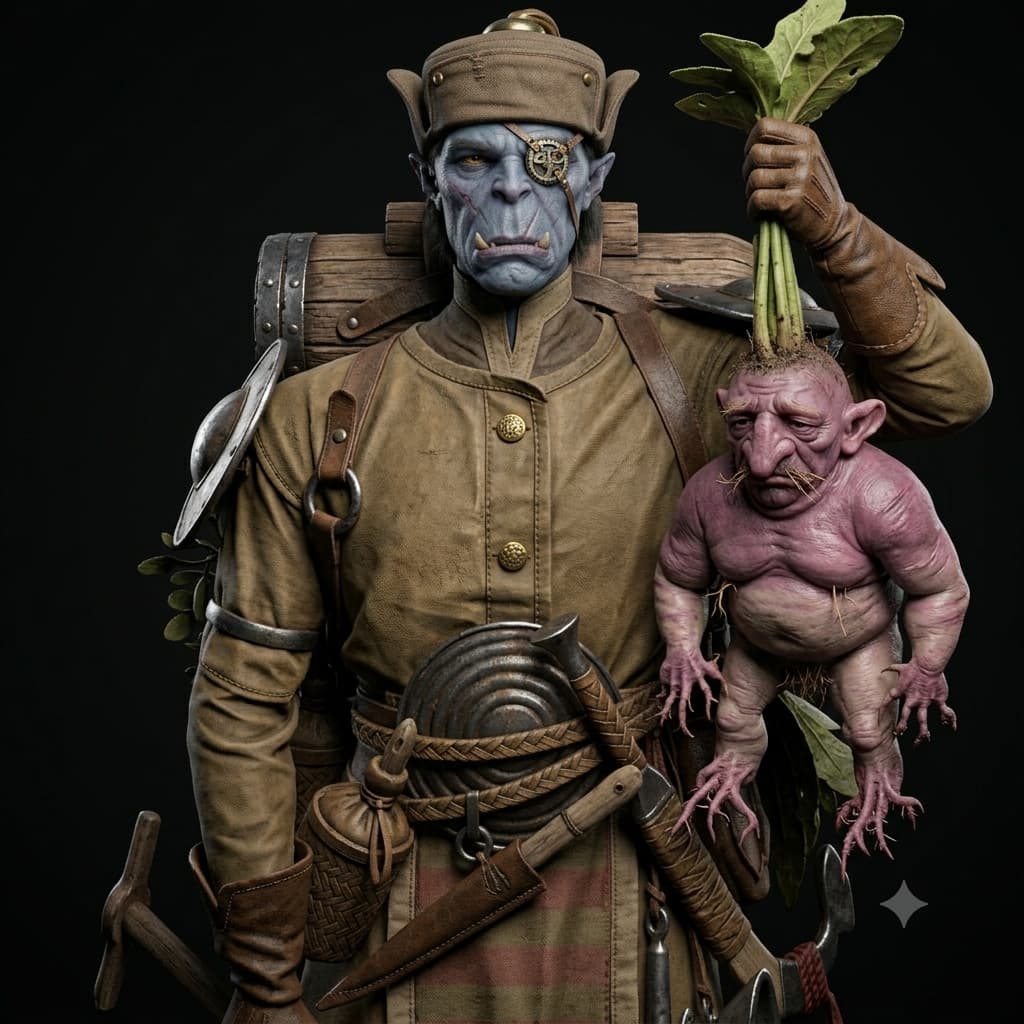
by
Pavel Hristov
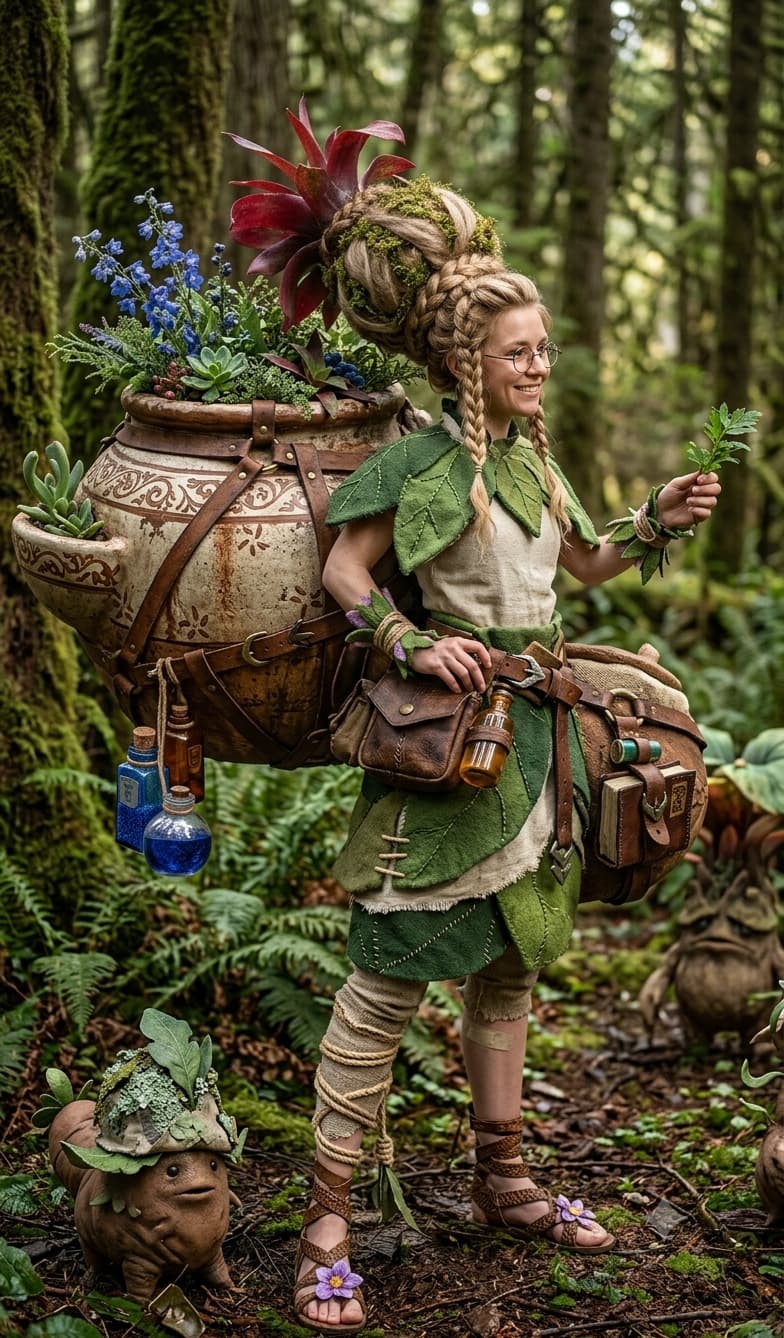
These are stylized concepts that I will be modifying to fit into a realistic realm. I did some initial tests with gemini with a basic prompt ‘create a realistic version of this image’
And I’ve got these results:
Let’s see where this takes me! Good luck to everyone and let’s have some fun!
5 Likes
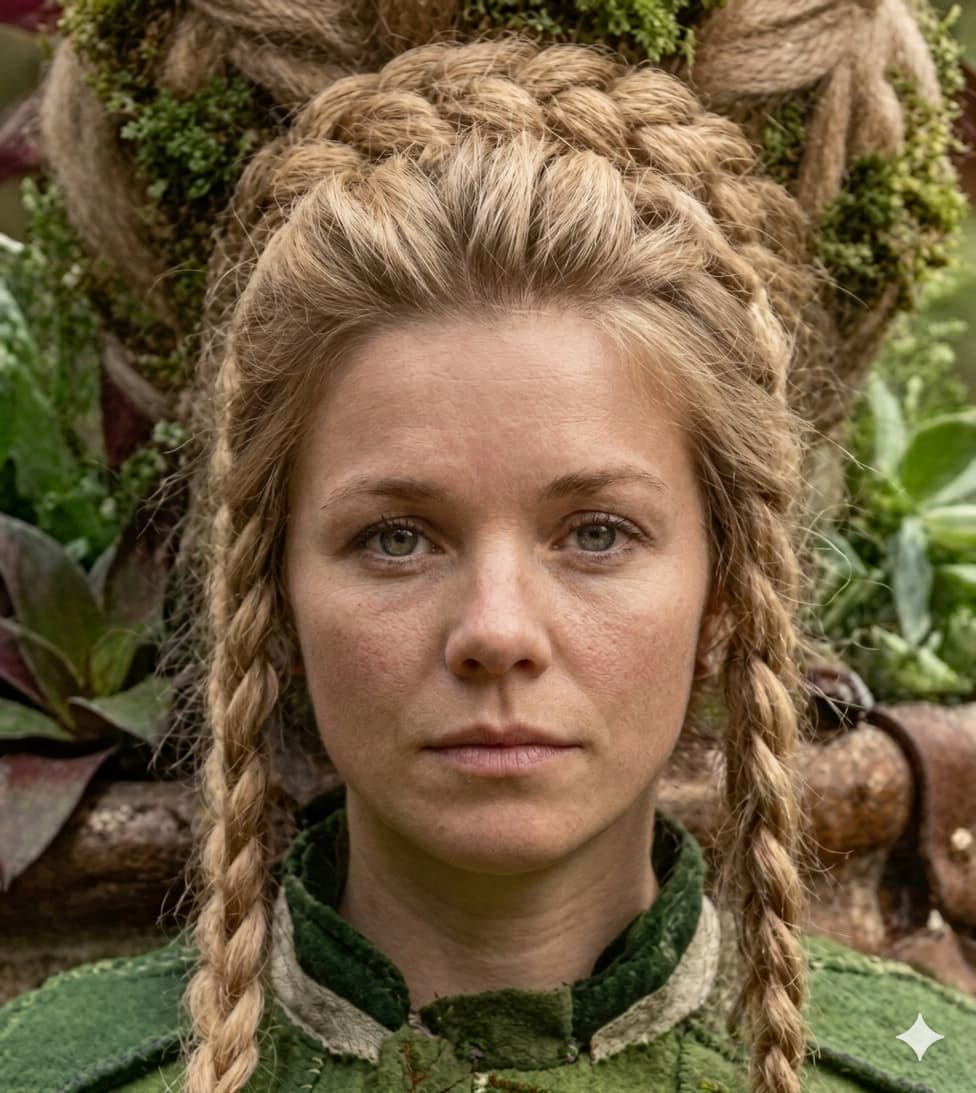
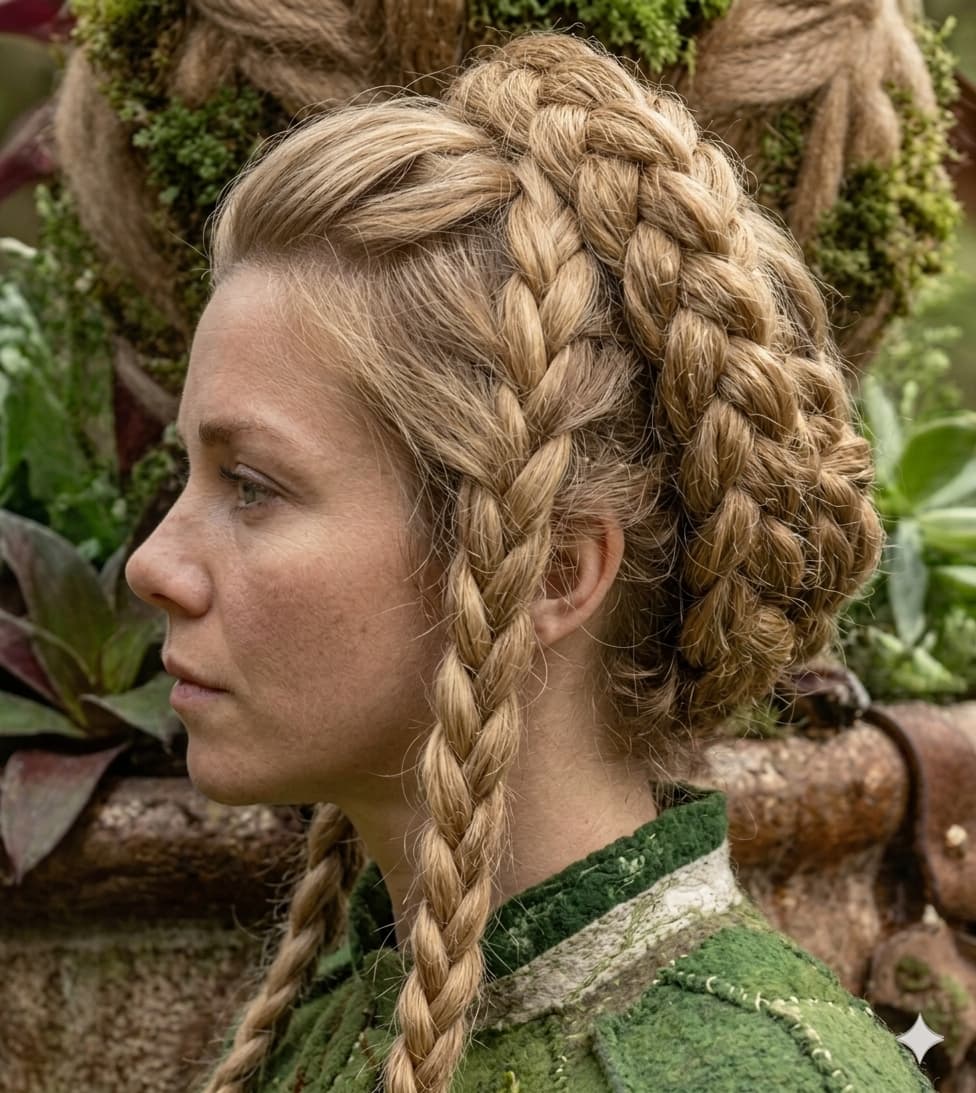
Generated a few neutral expression facial references from gemini. Again with some basic prompts like-
‘Remove the glasses and remove her smile completely’
Then after a few rounds of iterations using the one that I liked the most. I generated a reference for the side face.
‘Create a perfect side profile from this image’
Again choosing the one that I liked the most for my reference.
Next onto Headshot 3. Having used Headshot 2, I can confidently say in the newer version, the image mode seems to be much more accurate in getting the contours and landmarks of the face quite accurately.
Previously it used to get issues on the lip seam and eyelids, but with v3 it seems to have nailed them in first go. I will be playing next with the morph sliders to get the face looking right in areas that don’t match.
2 Likes
Went through the tutorials for Headshot refinement with curve tools and sculpt morphs.
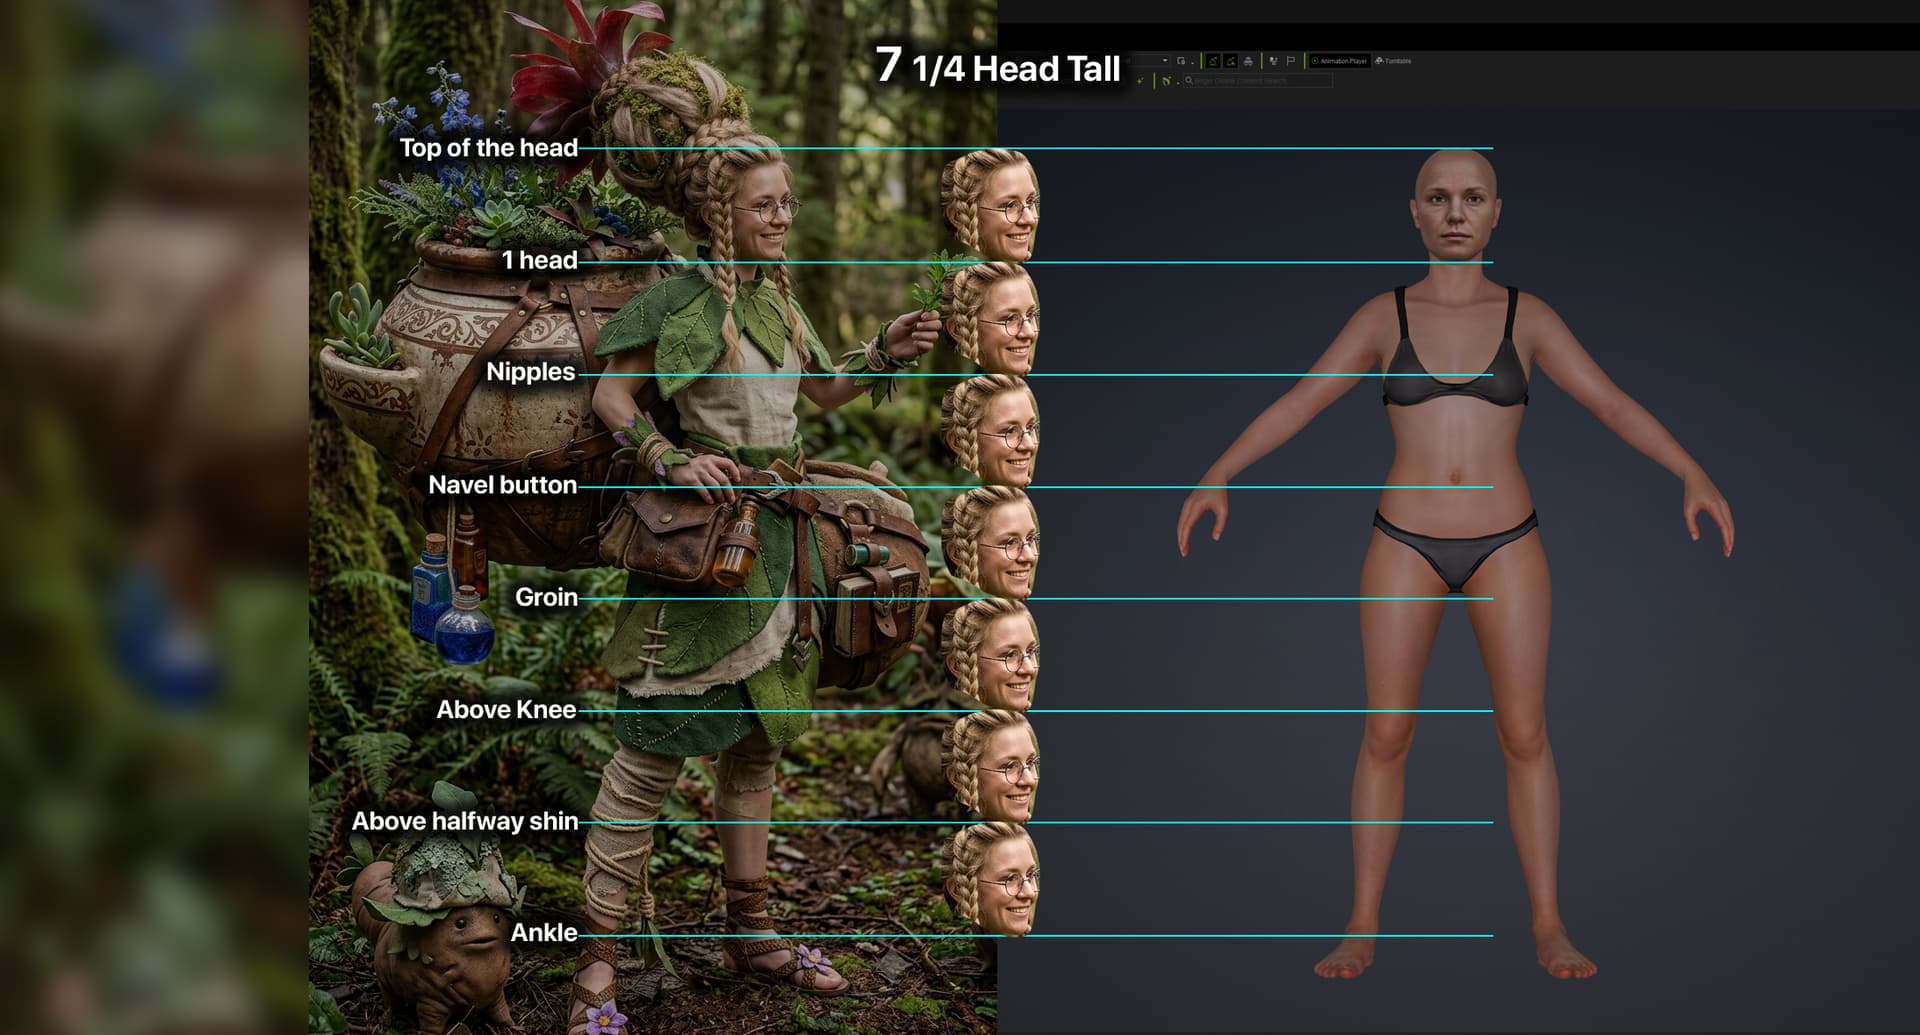
Calculating body proportions the traditional way and modified her whole body using the body morph sliders.
2 Likes
Looking good - Yeah never thought to use headshot - that certainly will optimize the workflow
1 Like
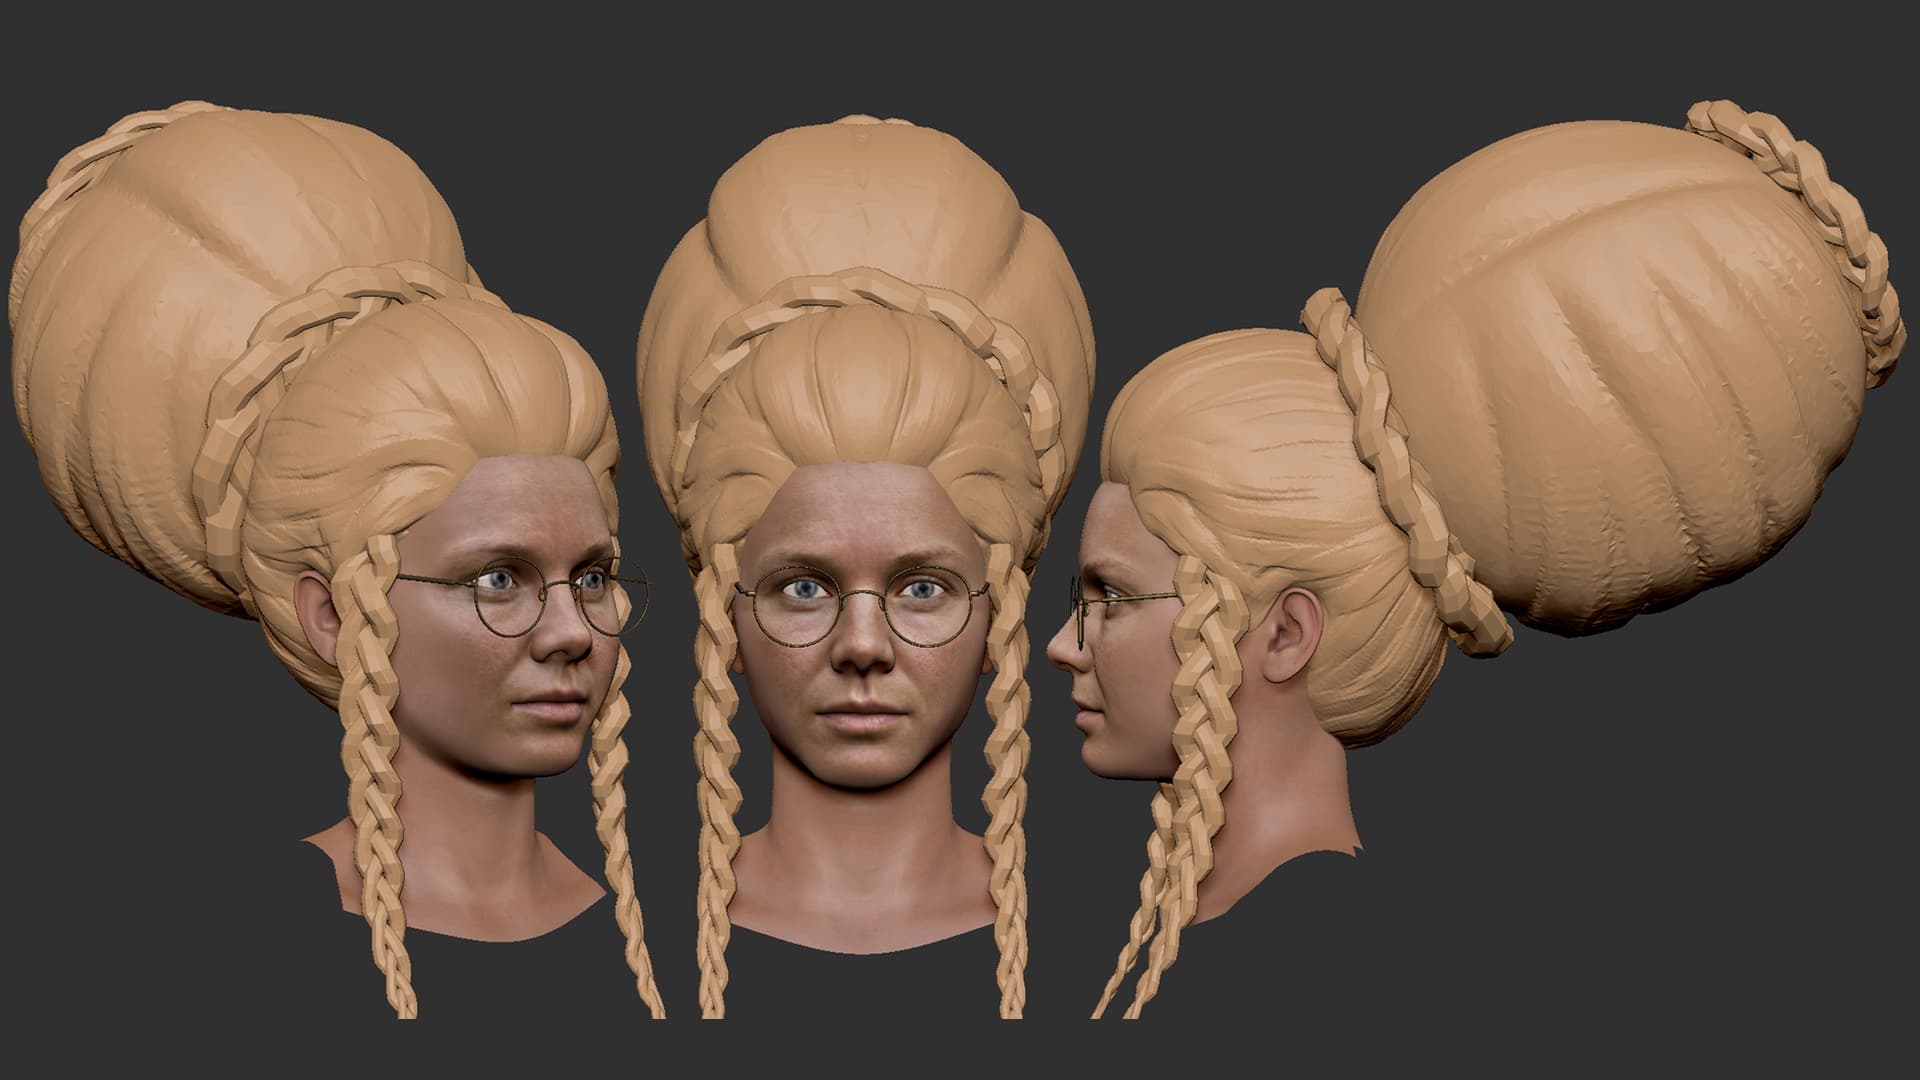
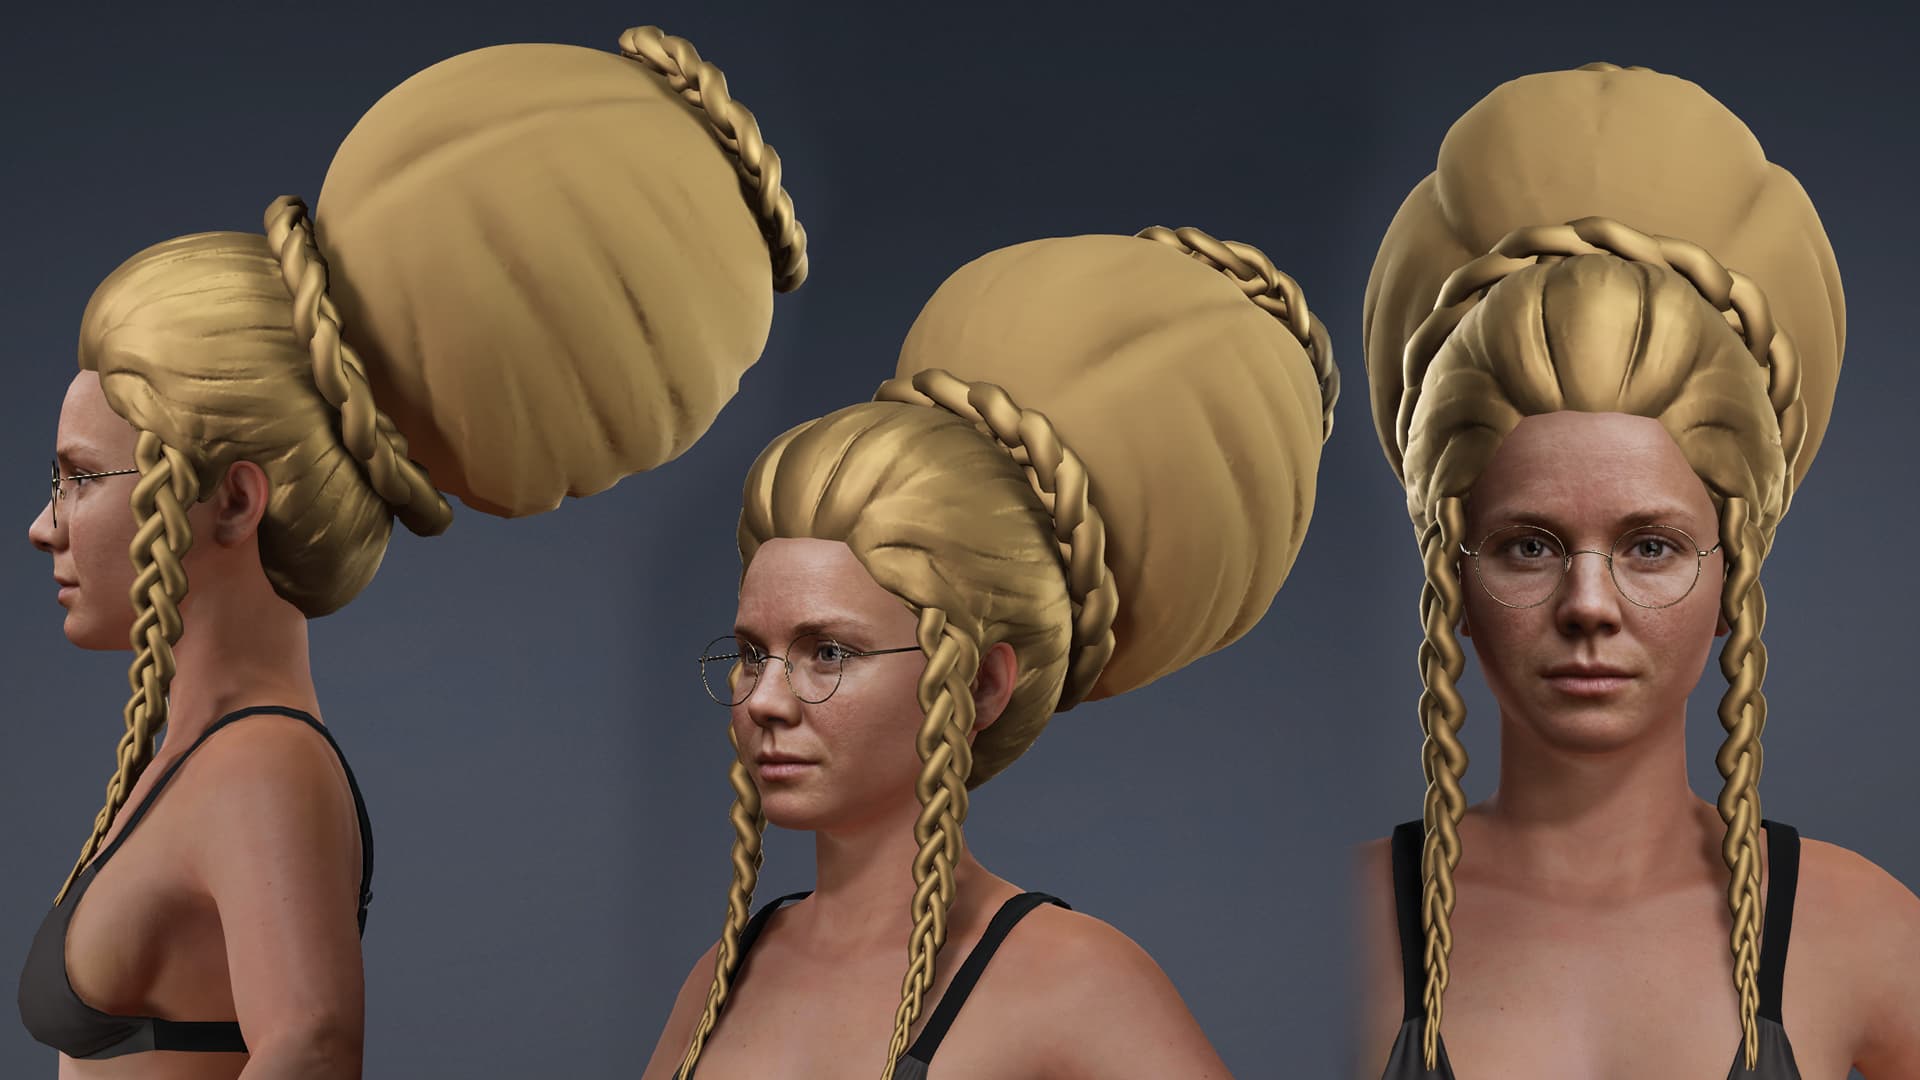
Made some progress with the head shape inside zbrush matching the head with spotlight and getting the primary forms down. Had to add the quick glasses and hair blockout to get an idea of the overall facial proportions.
It’s always nice to see the meshes back in CC5 even though they’re just blockouts.
4 Likes
Couldn’t work much last week but here’s some progress with the bottom layer of the clothing. Will be ripping off the bottoms later on after it has been retopologized.
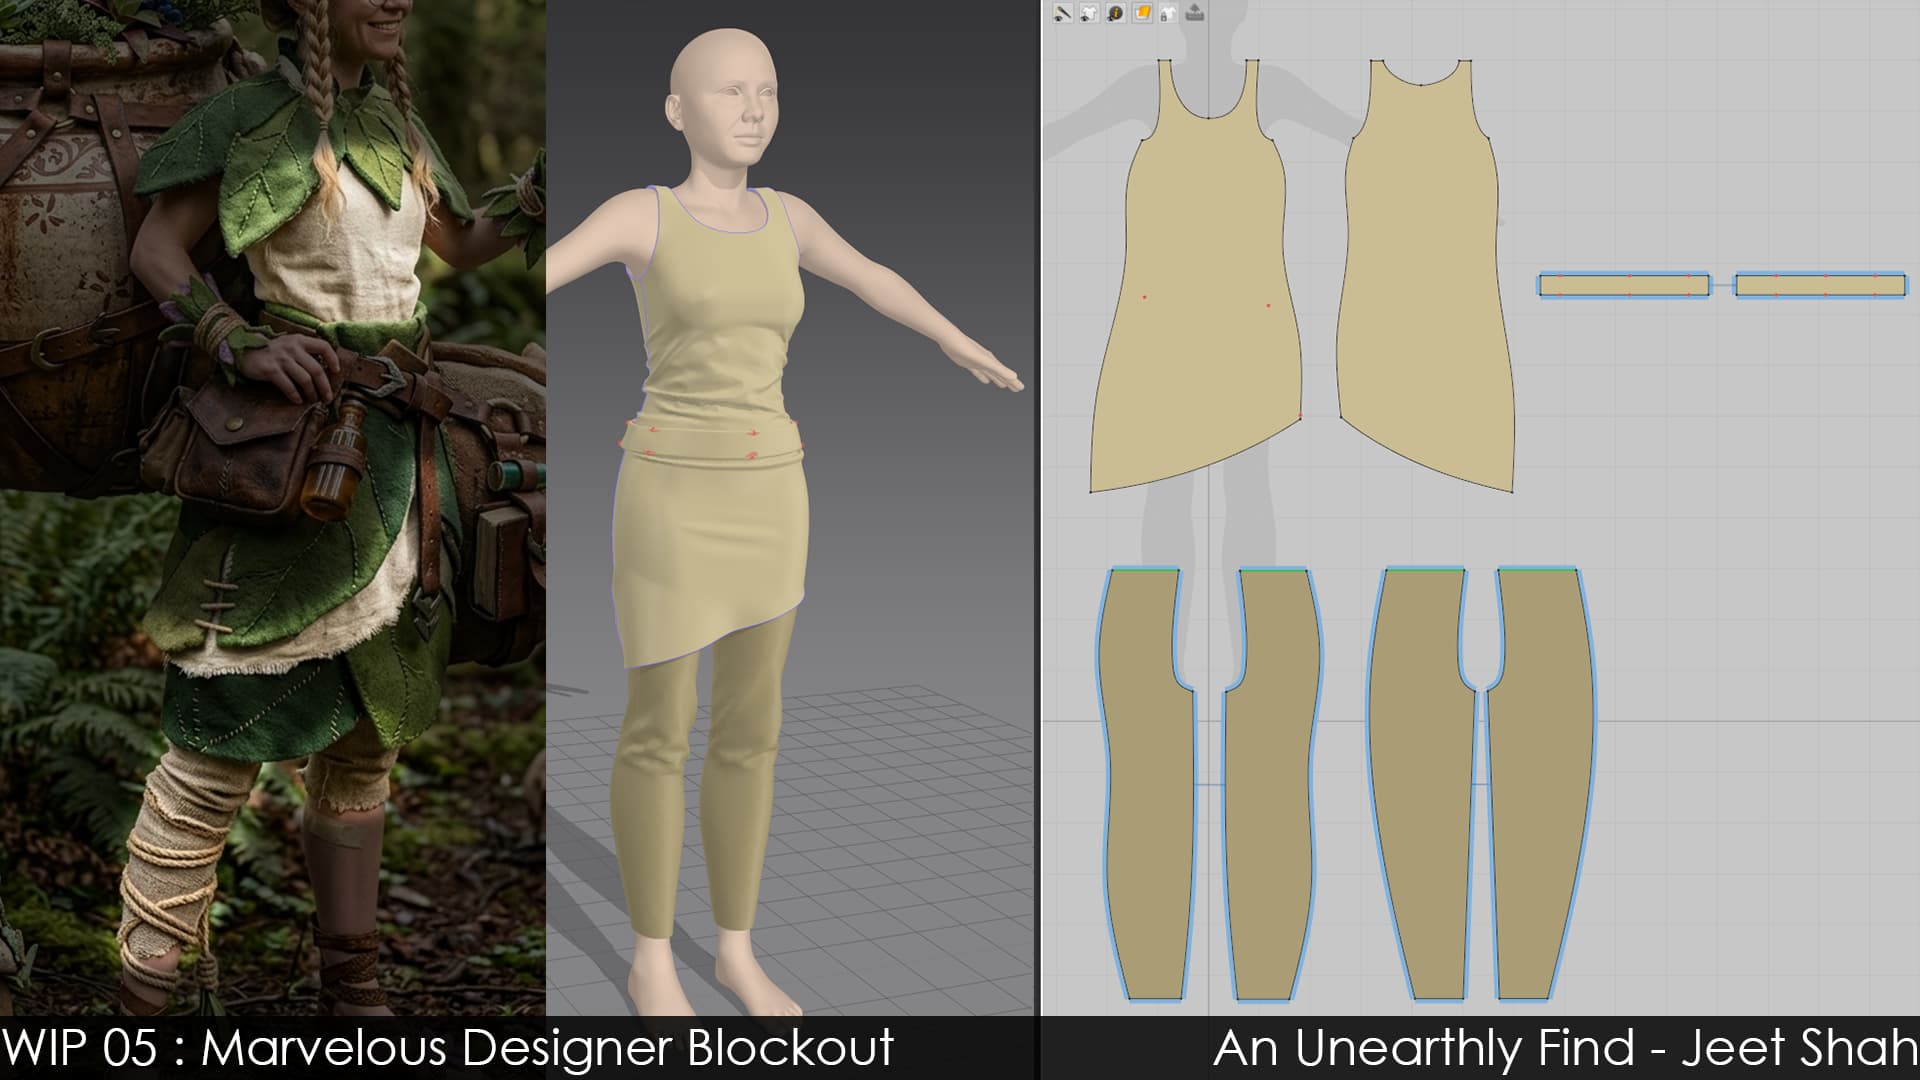
Some initial clothing blockouts from Marvelous Designer. Think that’ll be it in terms of what I’ll be using MD for as the thicker felt like leaves don’t really need any wrinkles and I can handle that with manual sculpts.
3 Likes
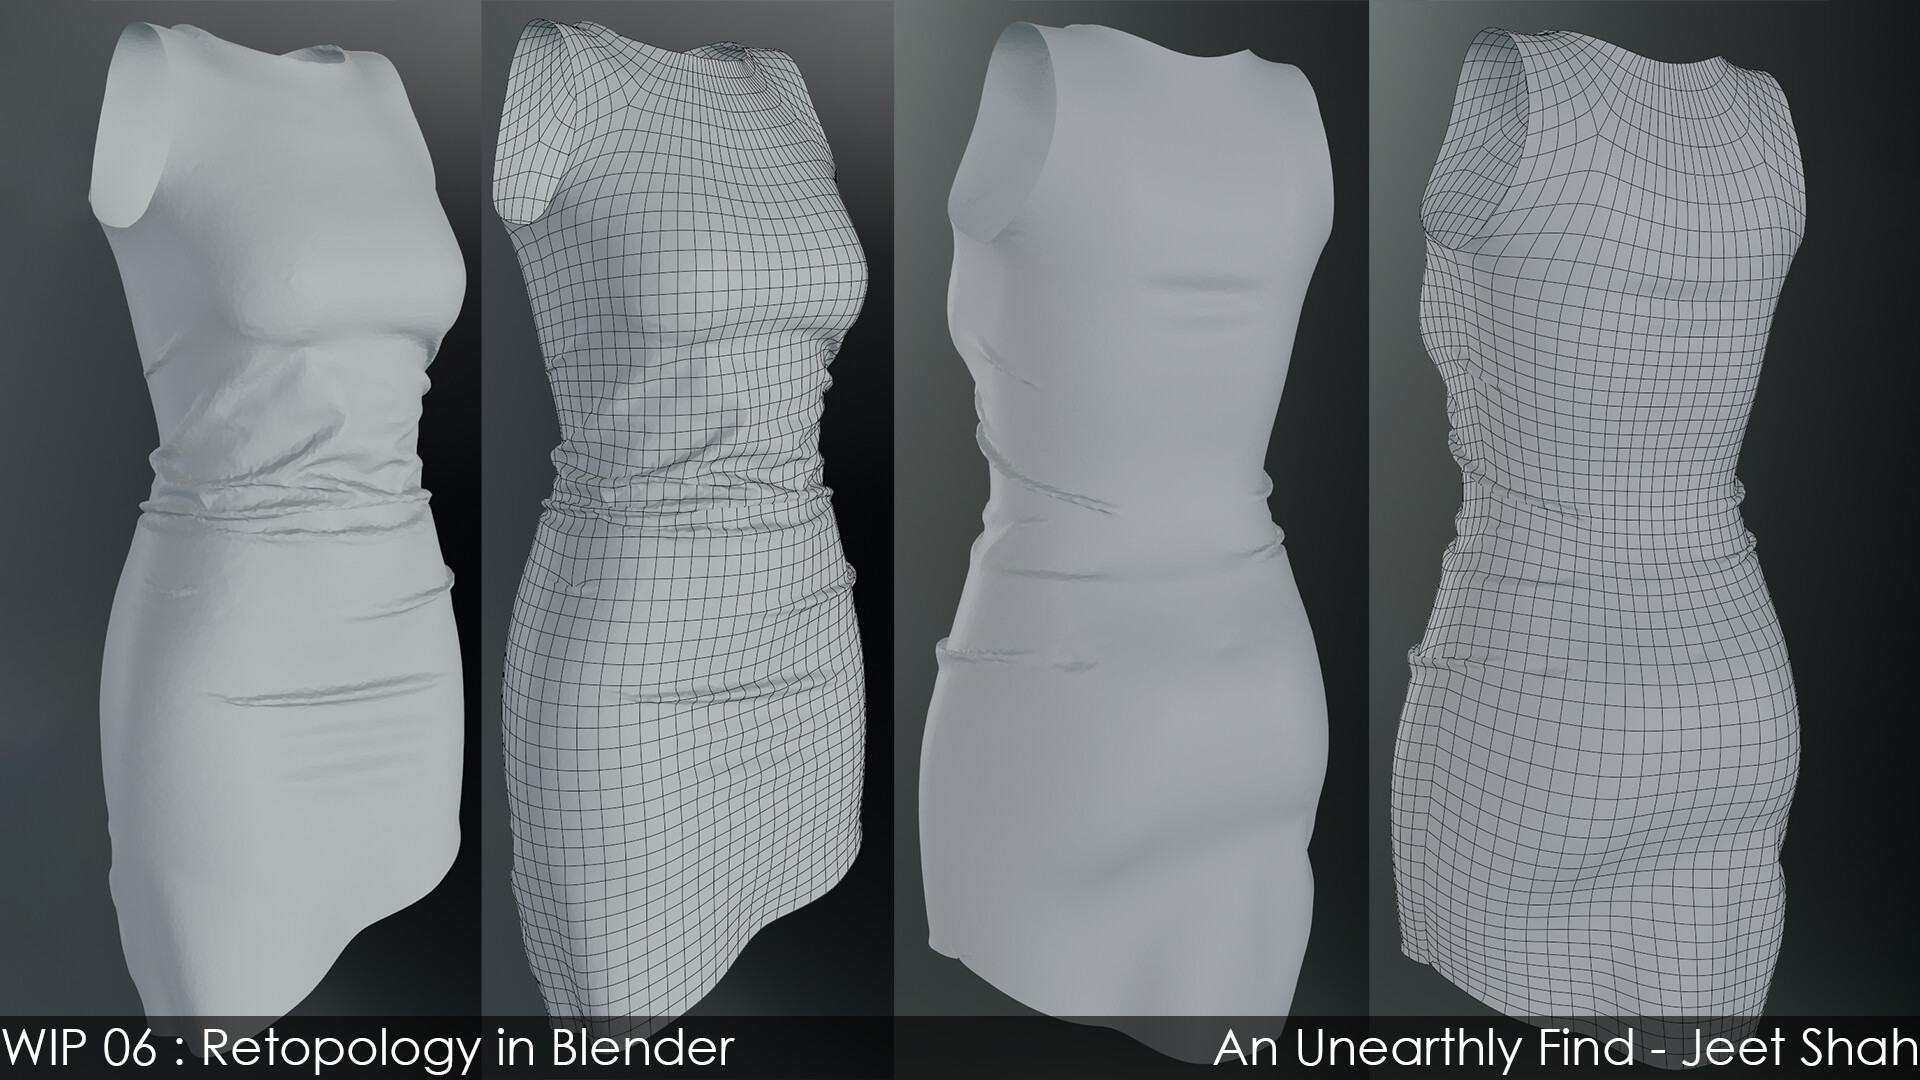
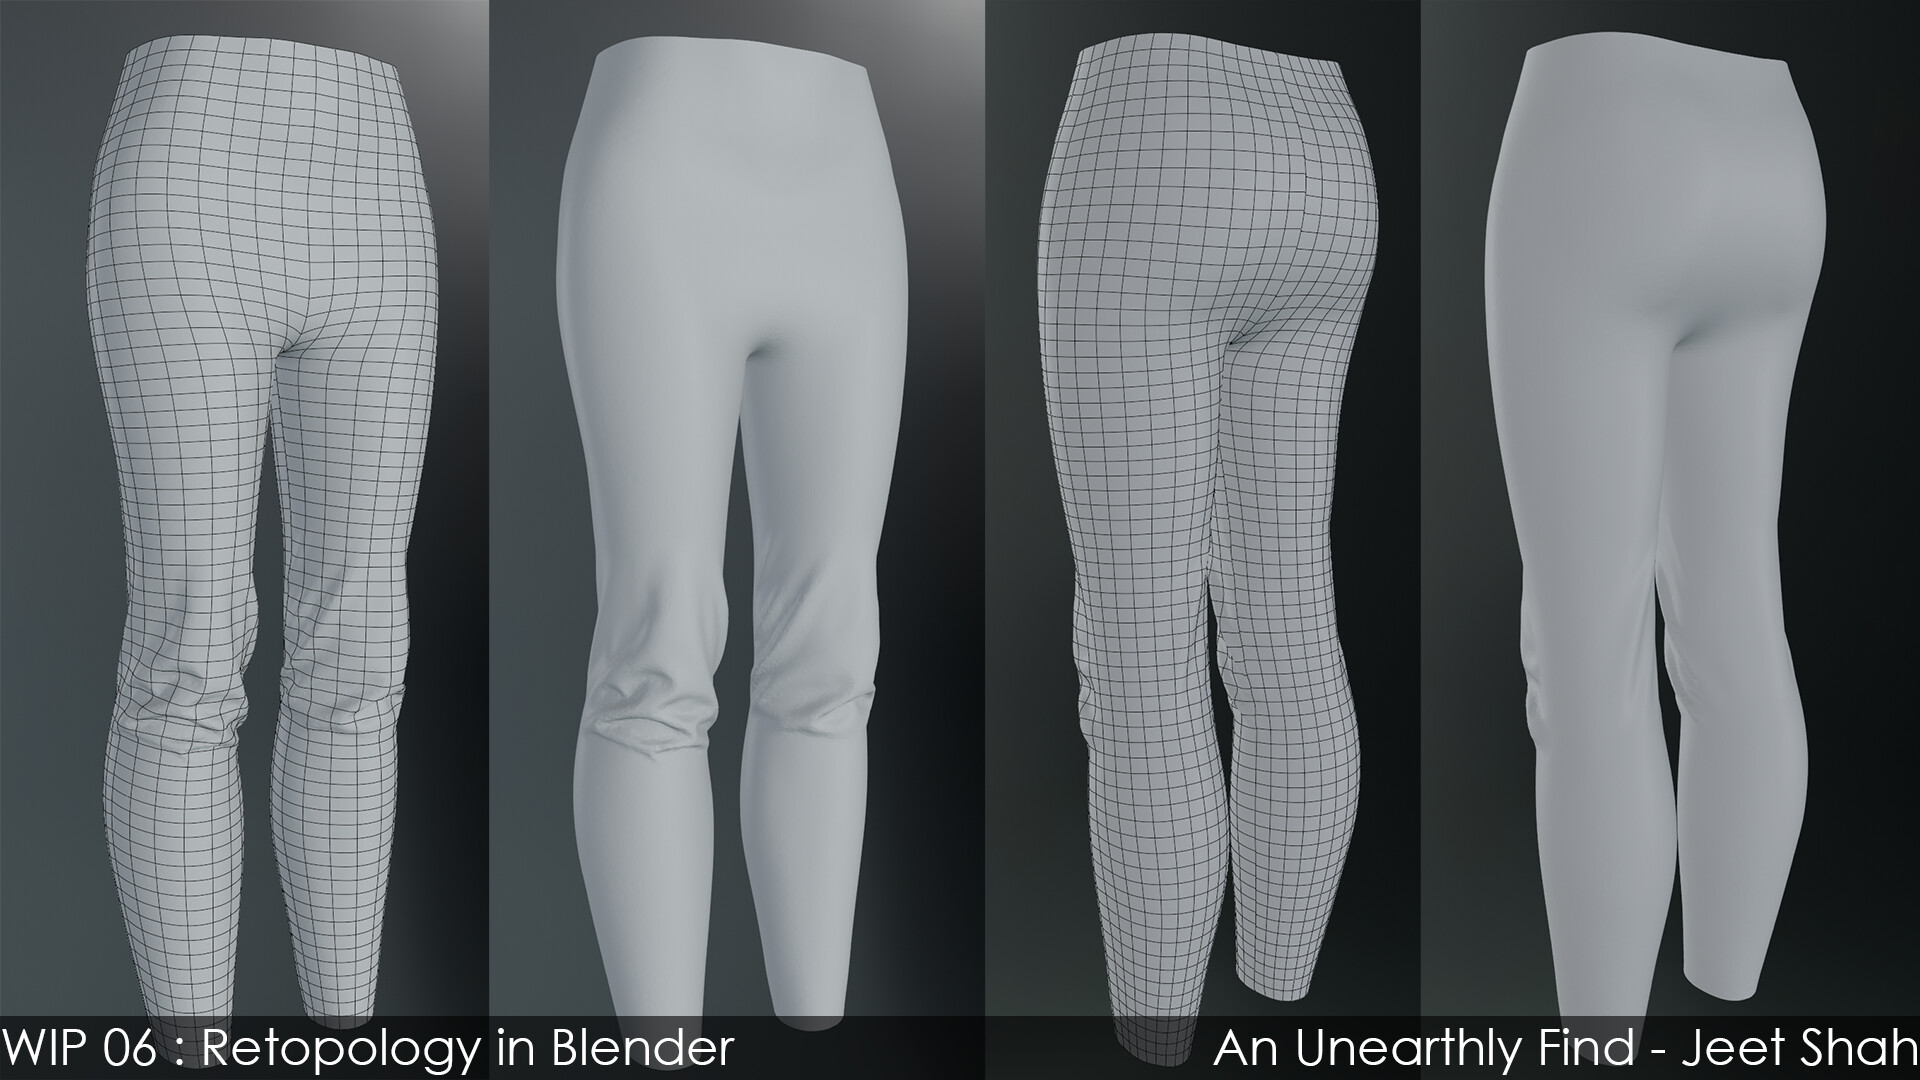
Did the Retopo for MD meshes with Retopo Planes
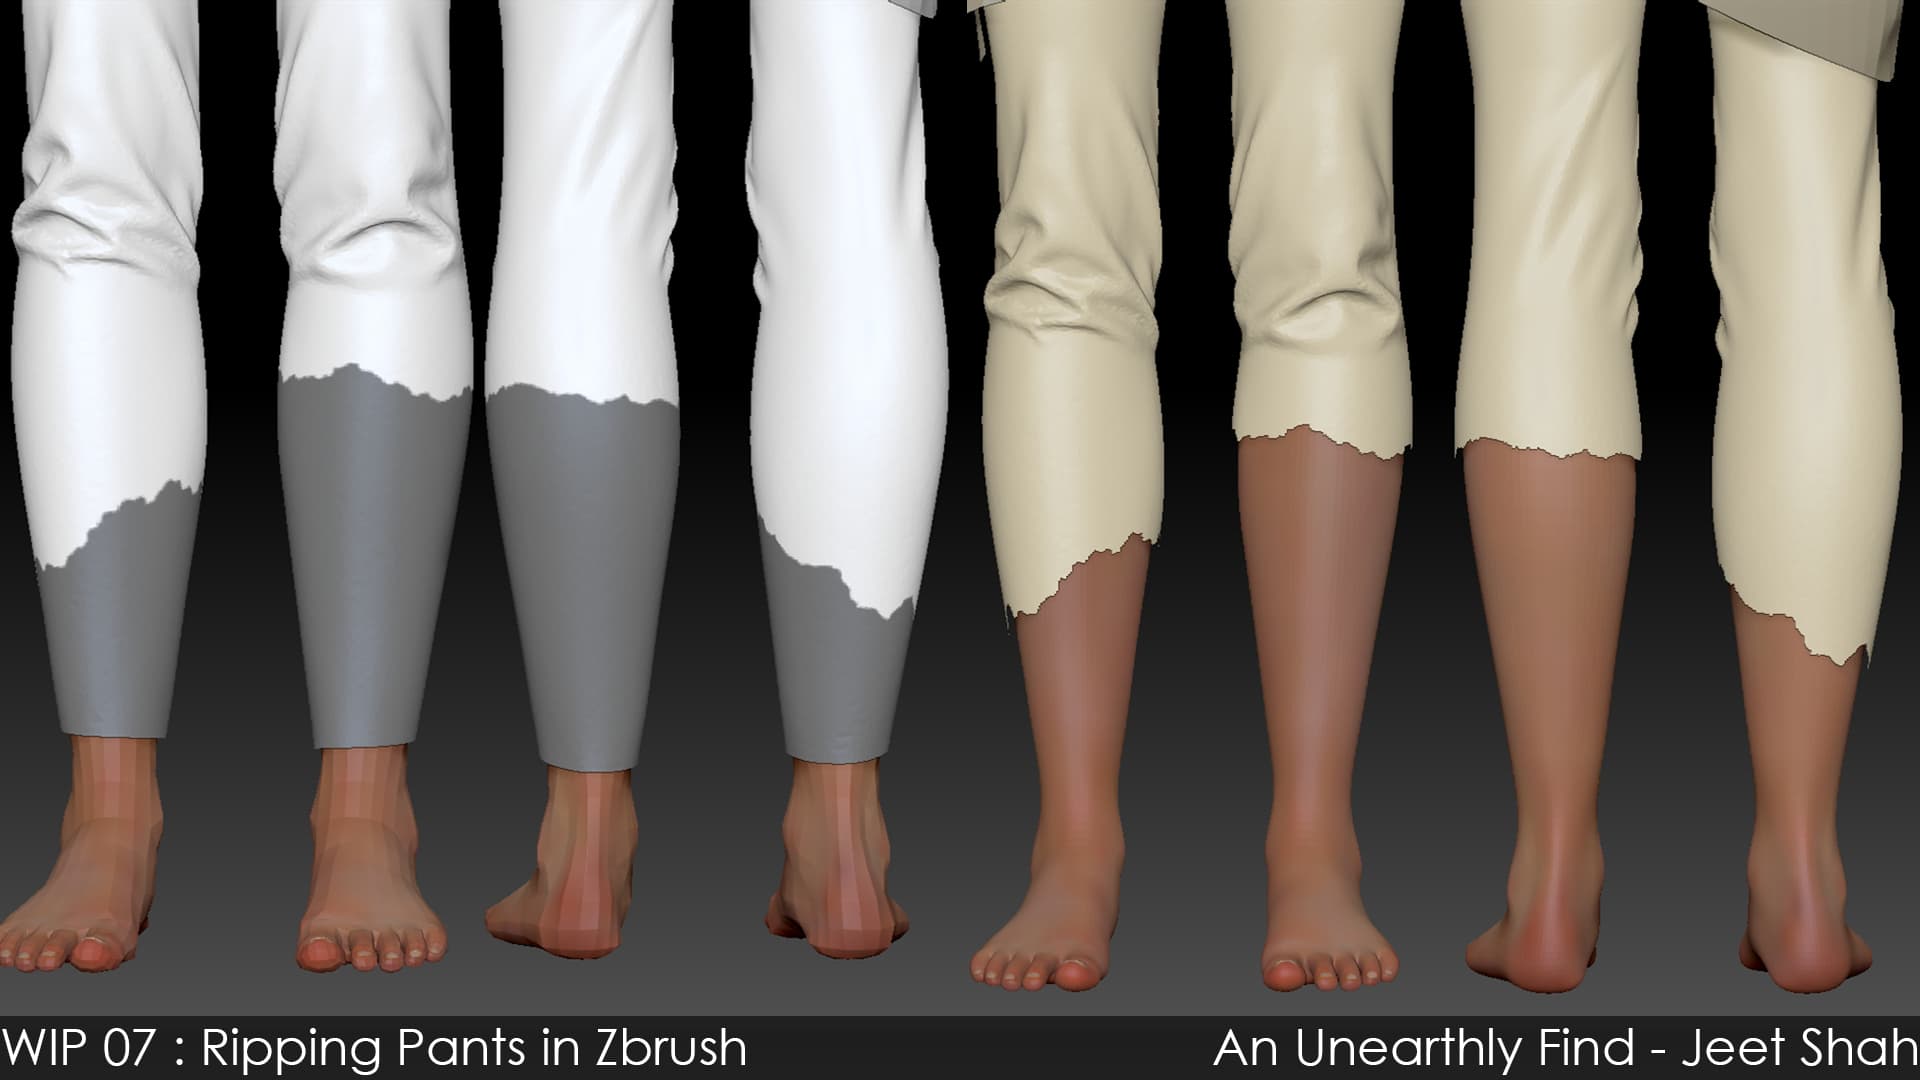
Ripped off the pants like the concept below the knee in Zbrush by masking the high poly mesh and deleting it. Will be retopoing the ripped areas again but the upper portion will be kept intact.
4 Likes
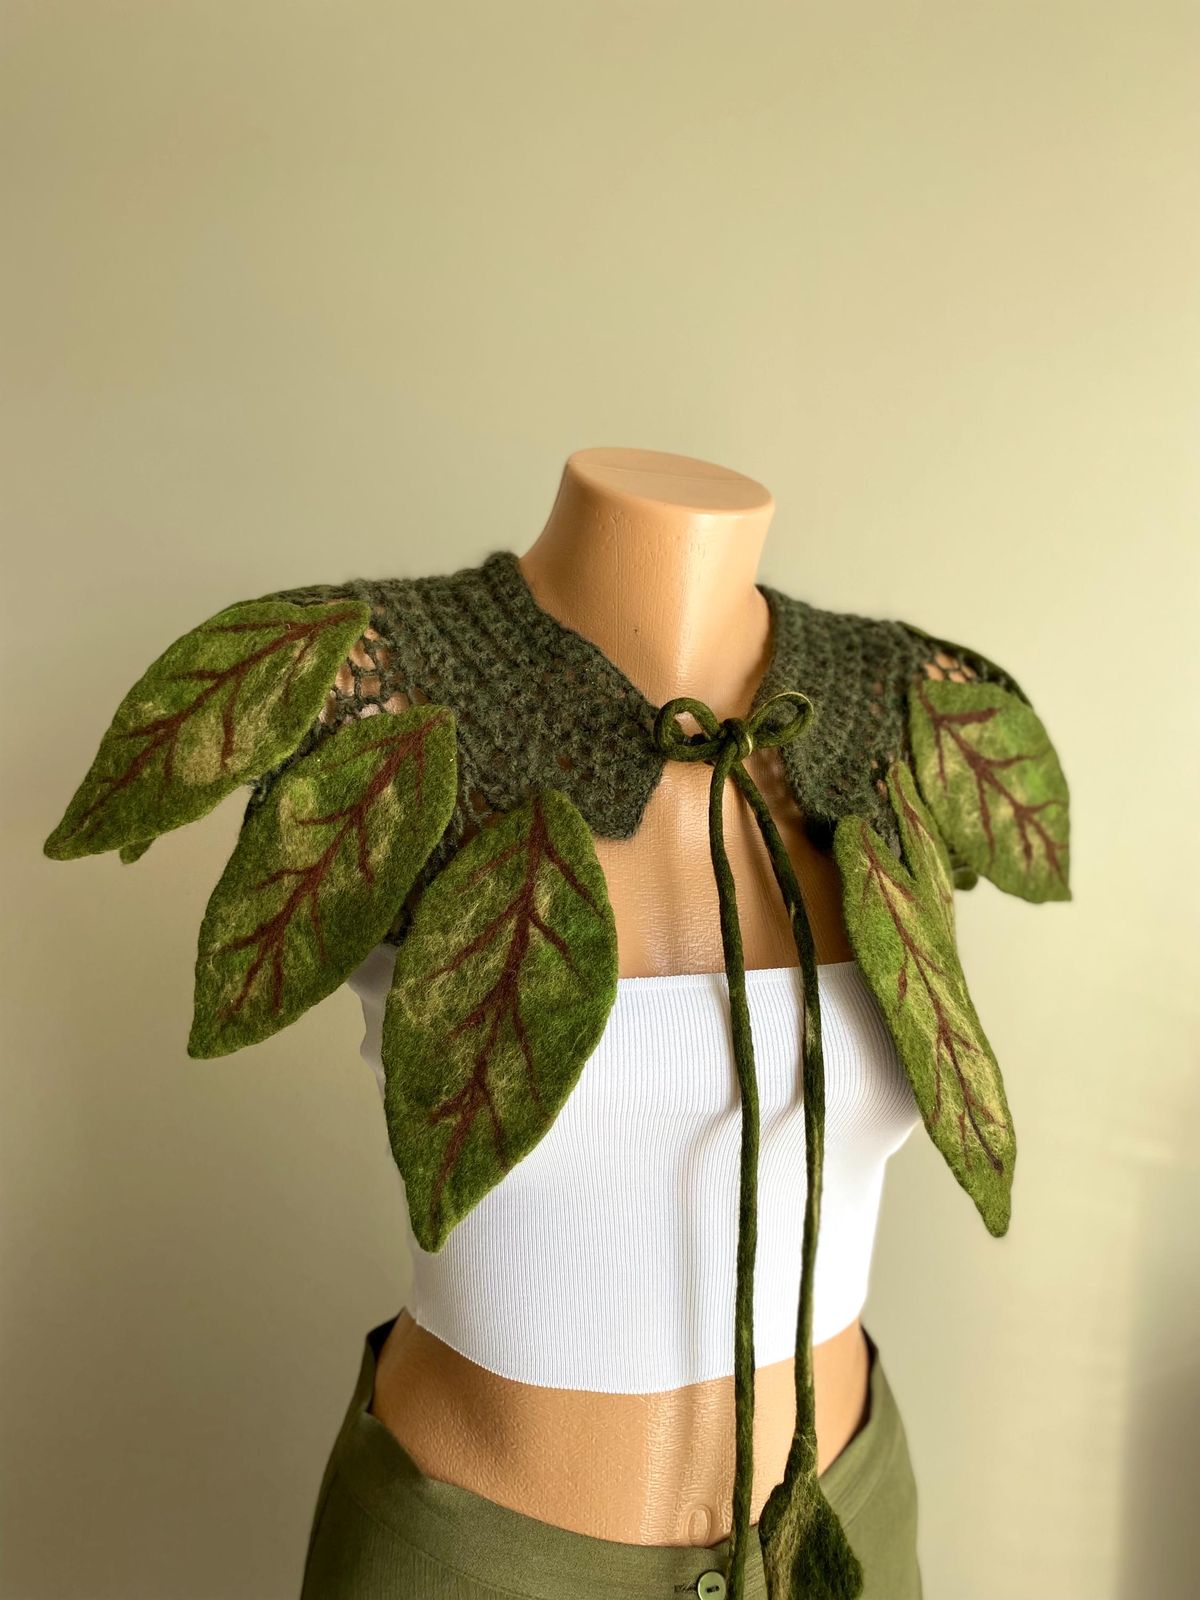
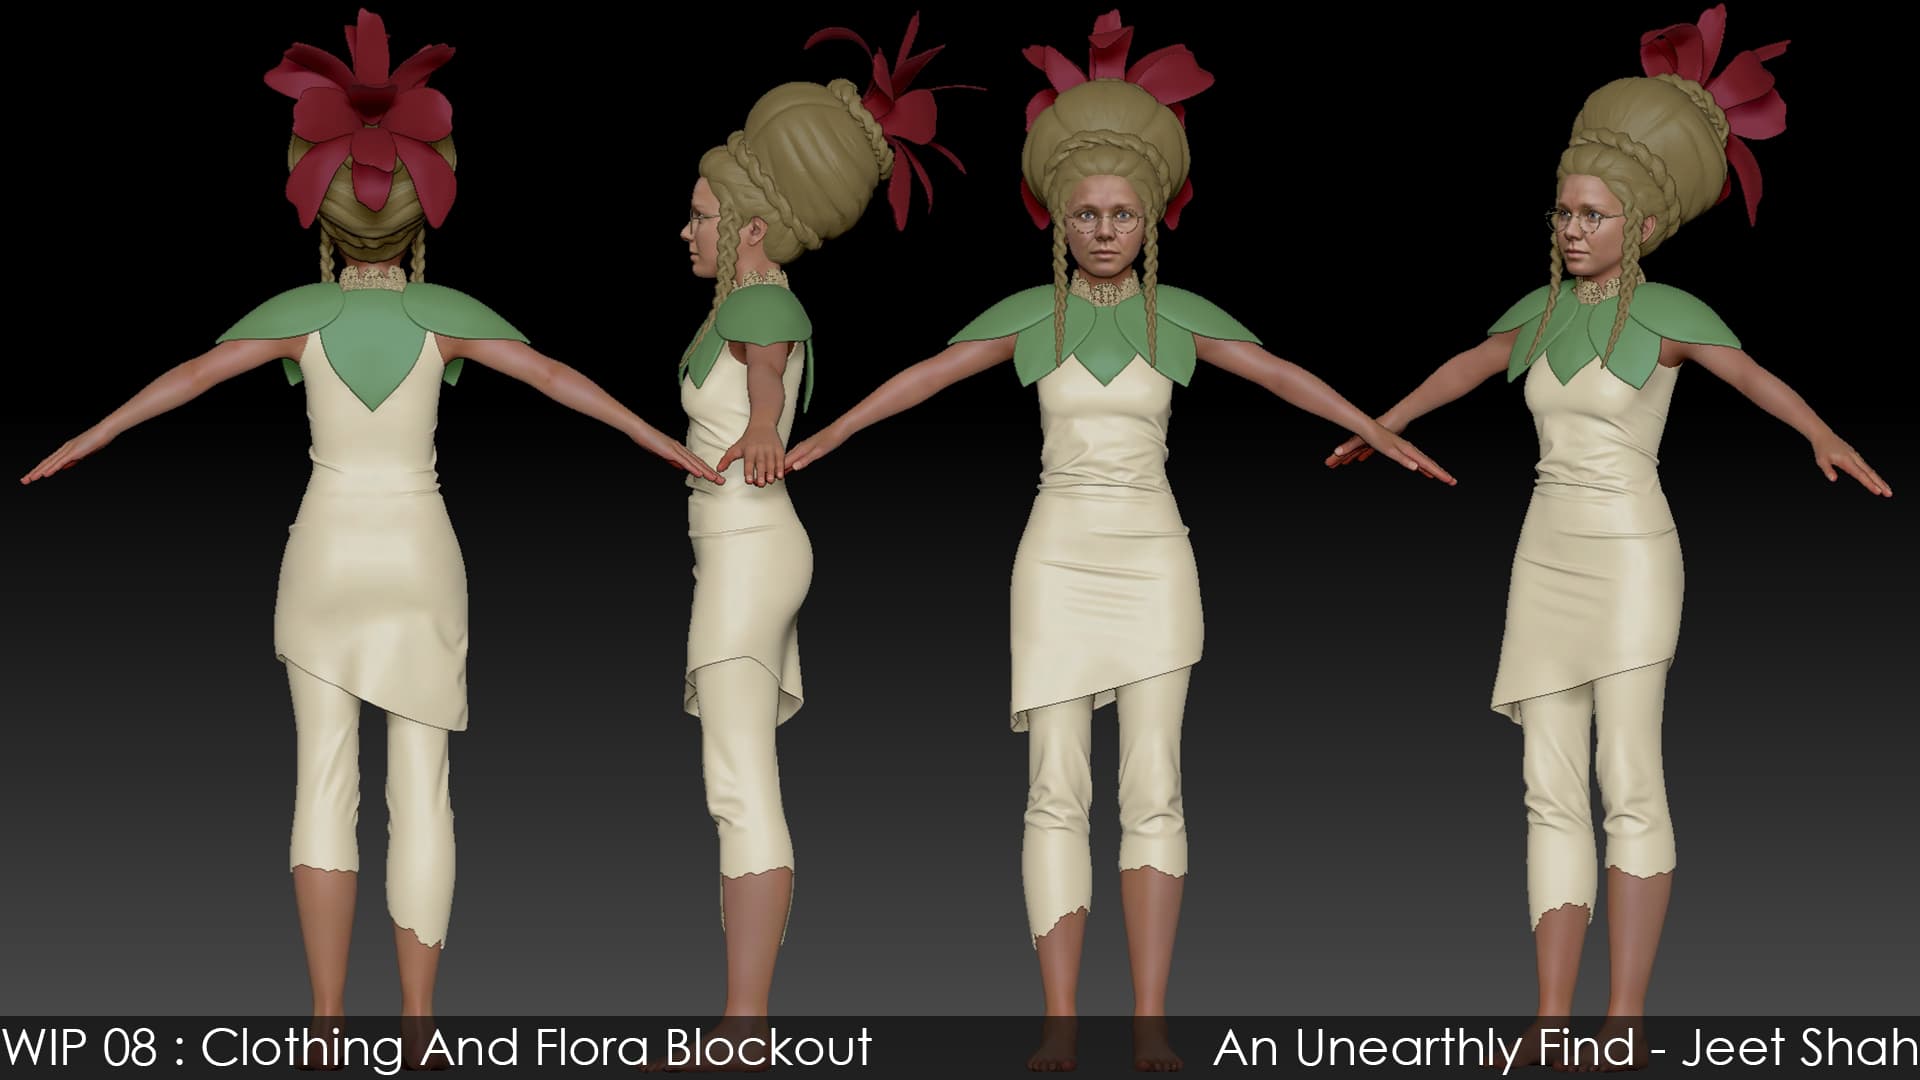
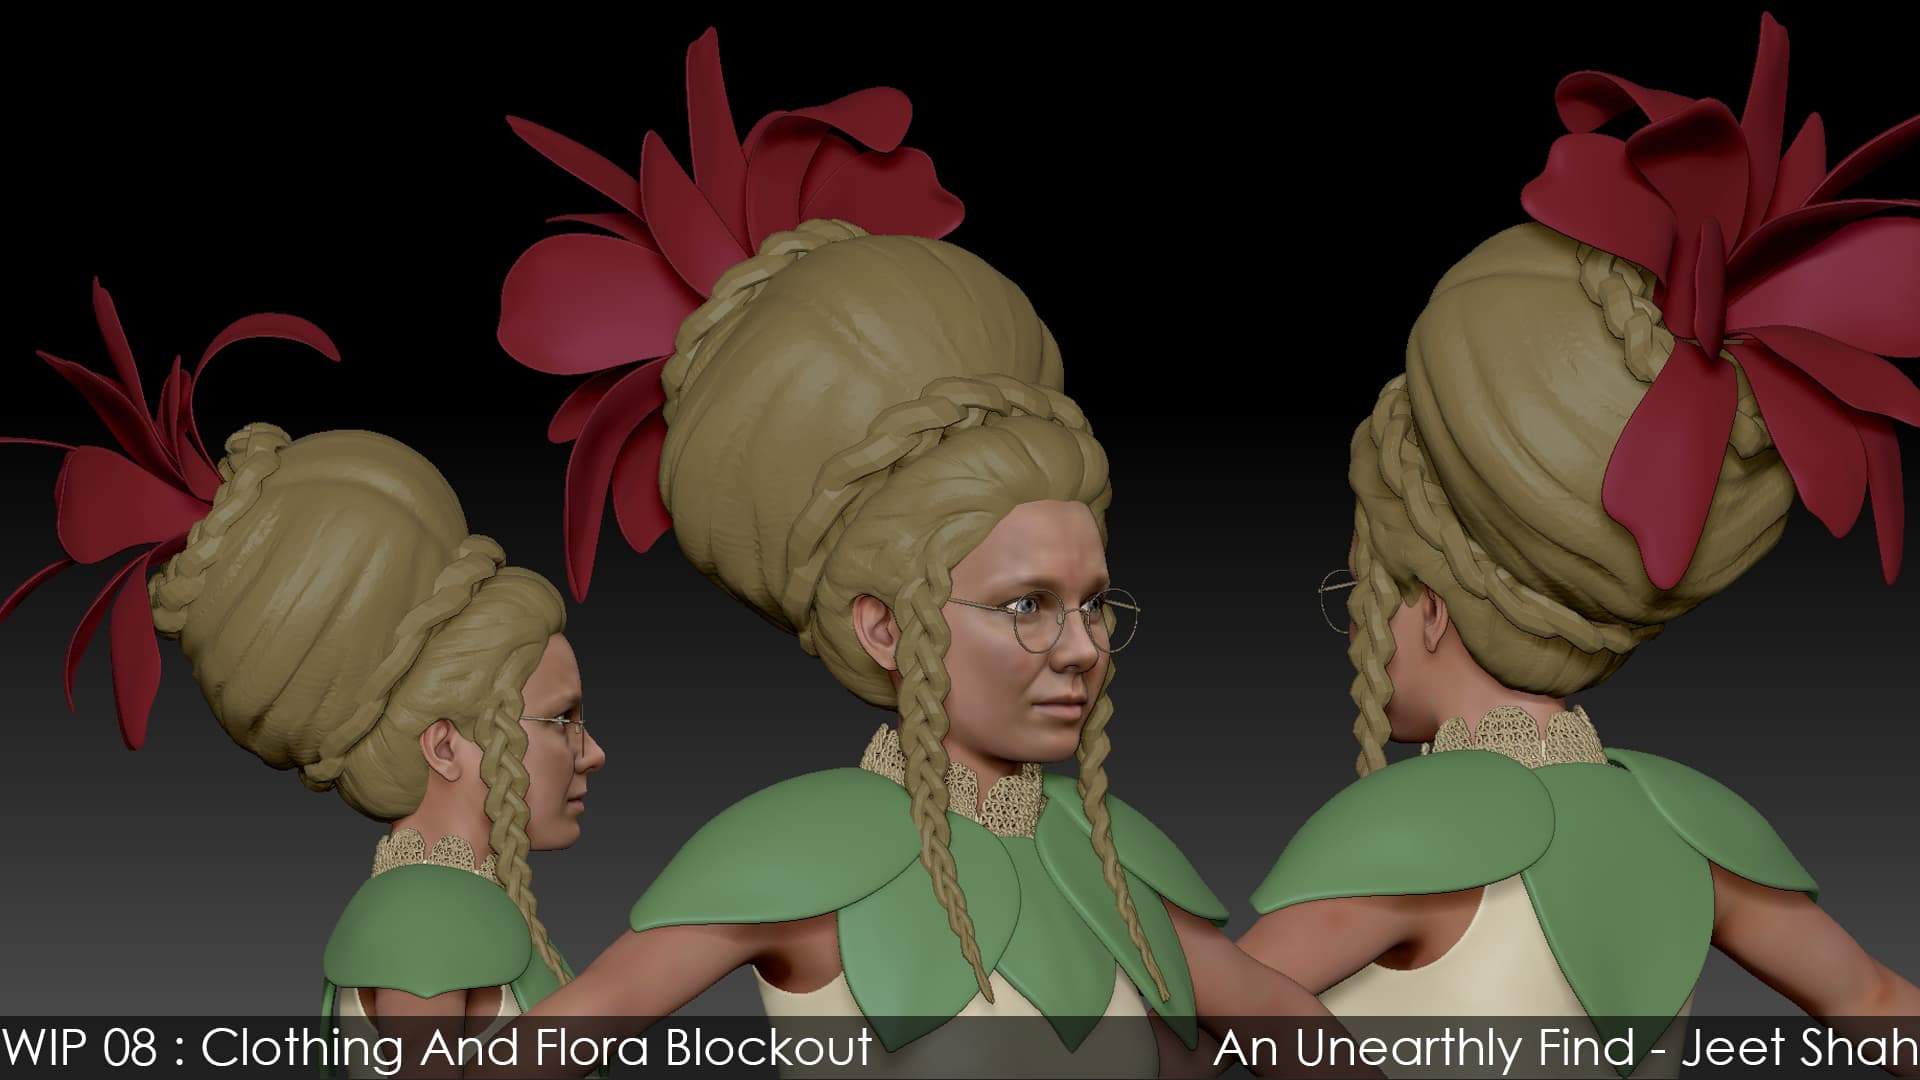
Here’s some blockout progress on clothing and flora elements. Going for a crochet collar/cape with leaf shaped felt fabrics on her shoulders.
5 Likes
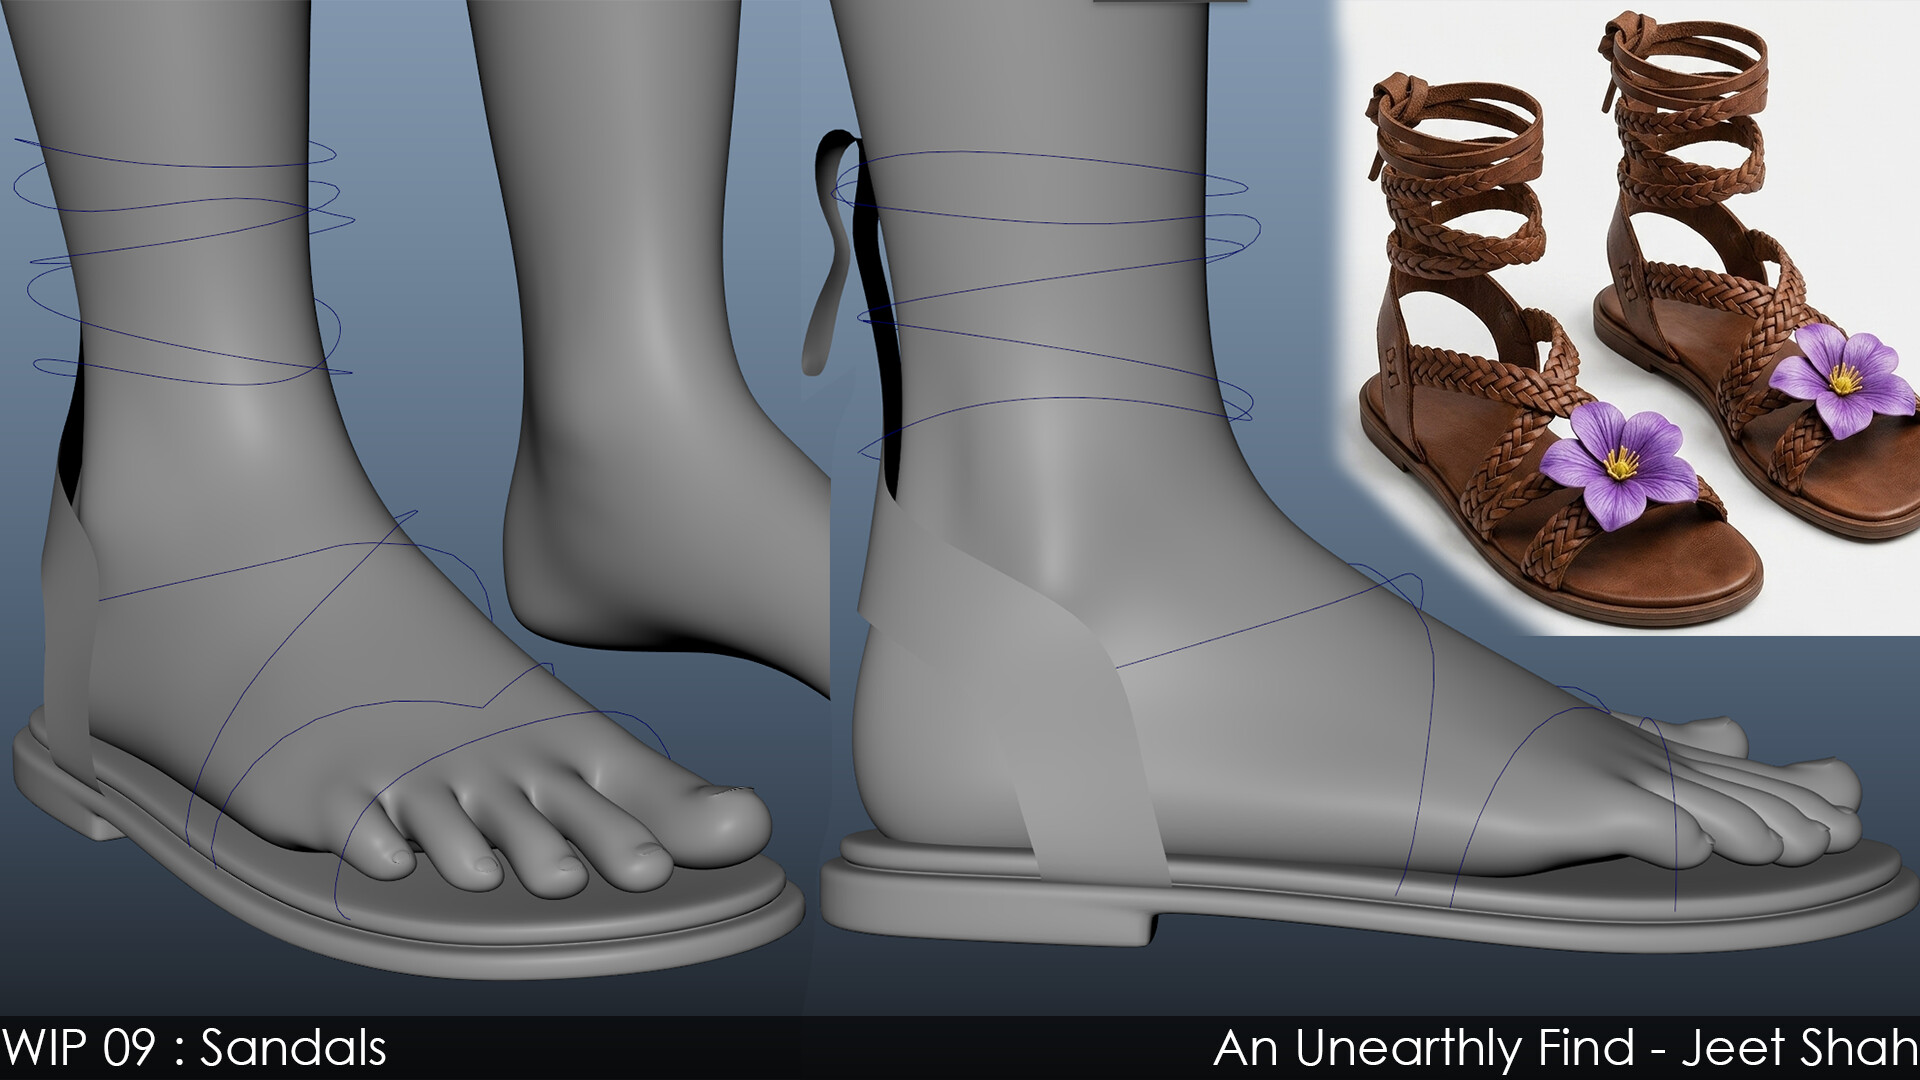
Progress on her Sandals:
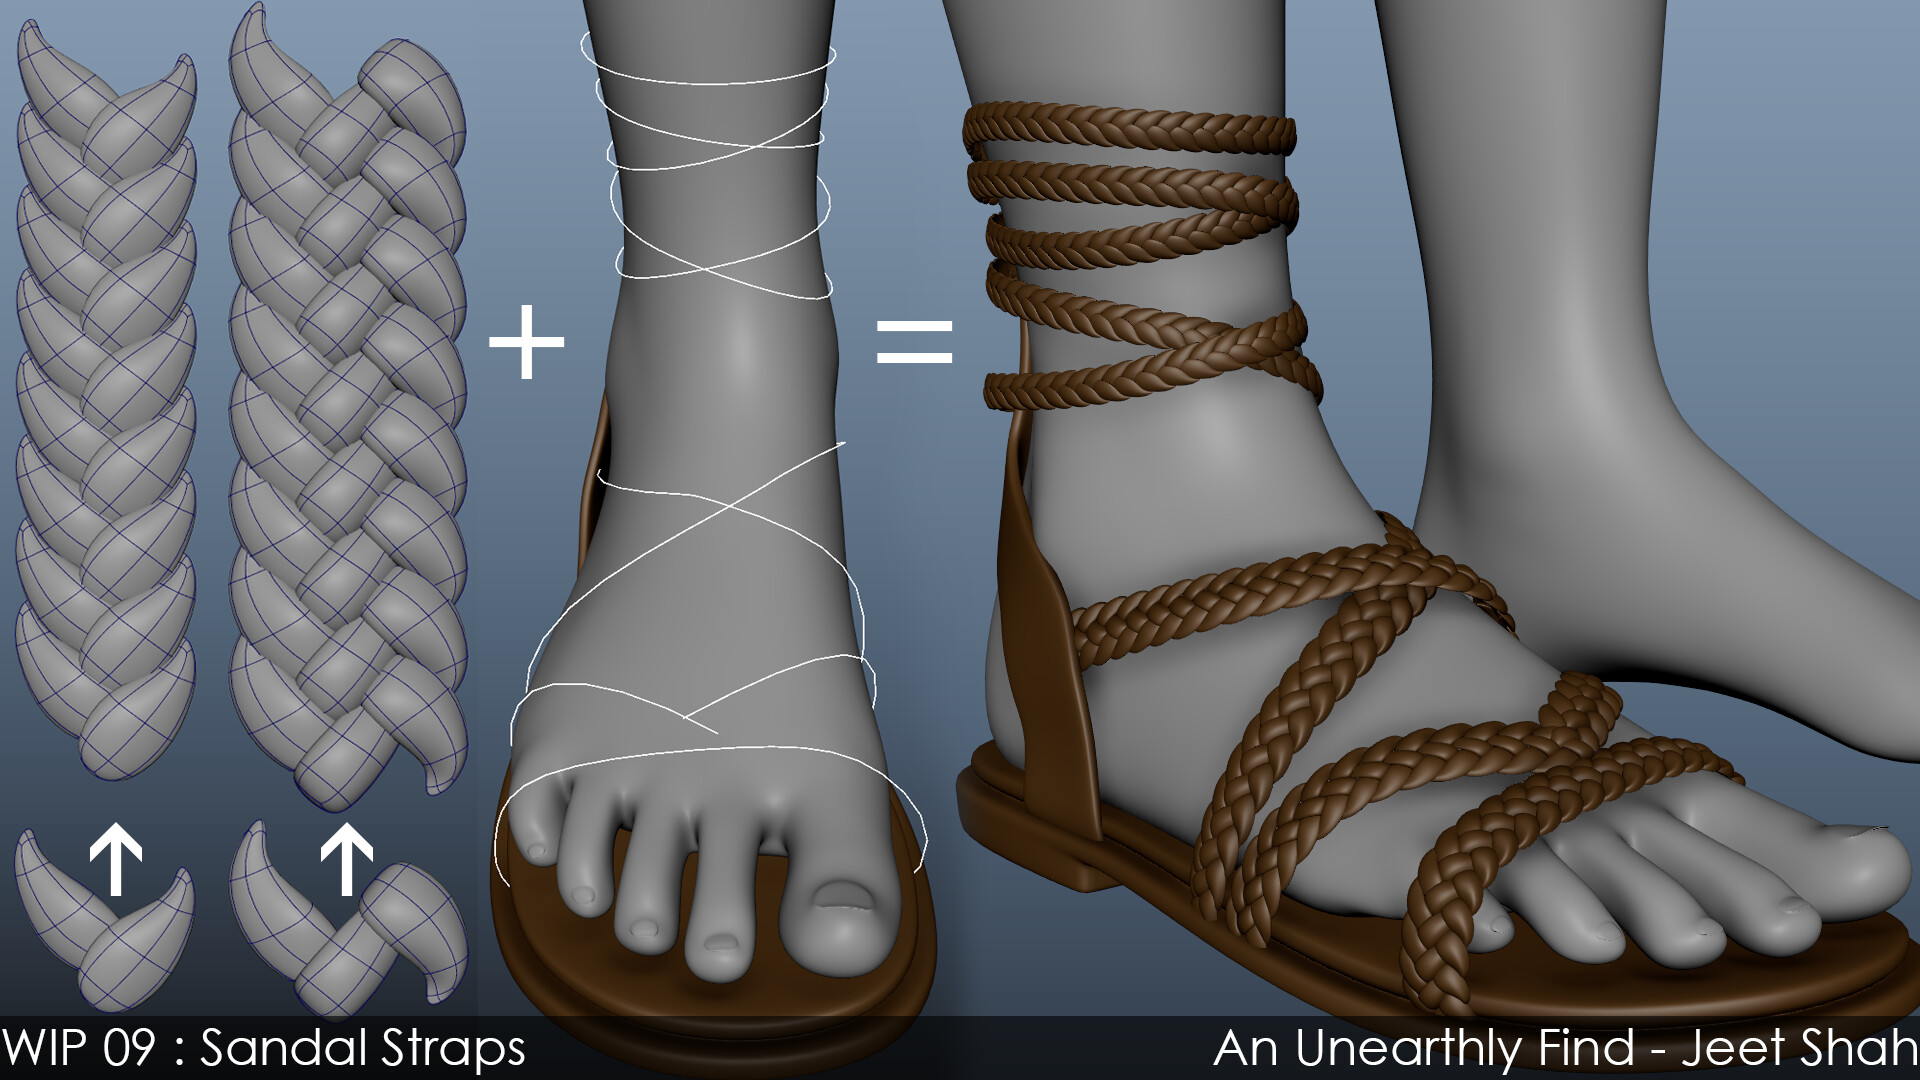
Asked Gemini to isolate the sandals from the main reference. Then using this and some other sandal refs from pinterest designed the straps and belts.
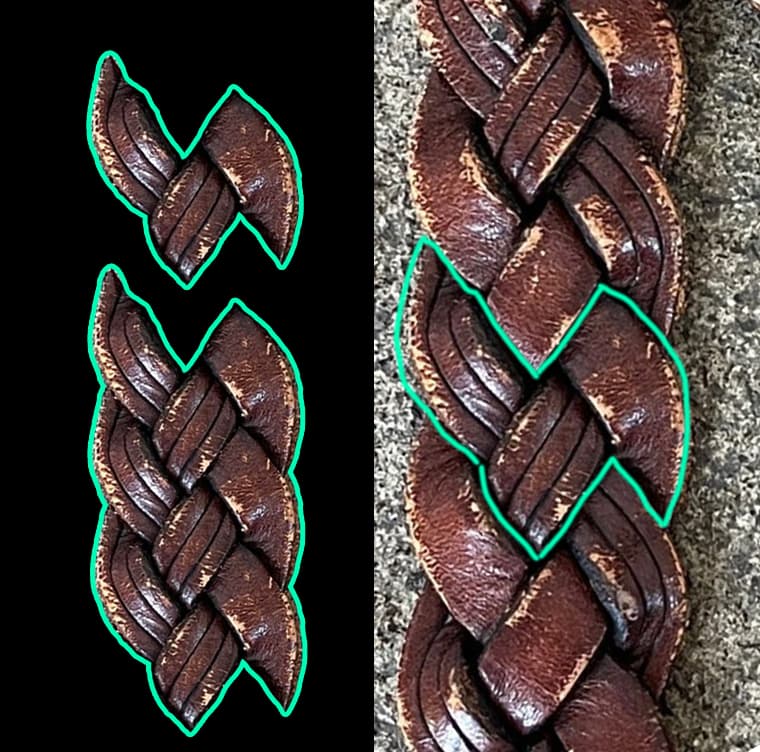
Identified the repeating unit from actual interwoven leather and modeled it.
Then using curve warp in Maya aligned the straps in place with correct orientation.
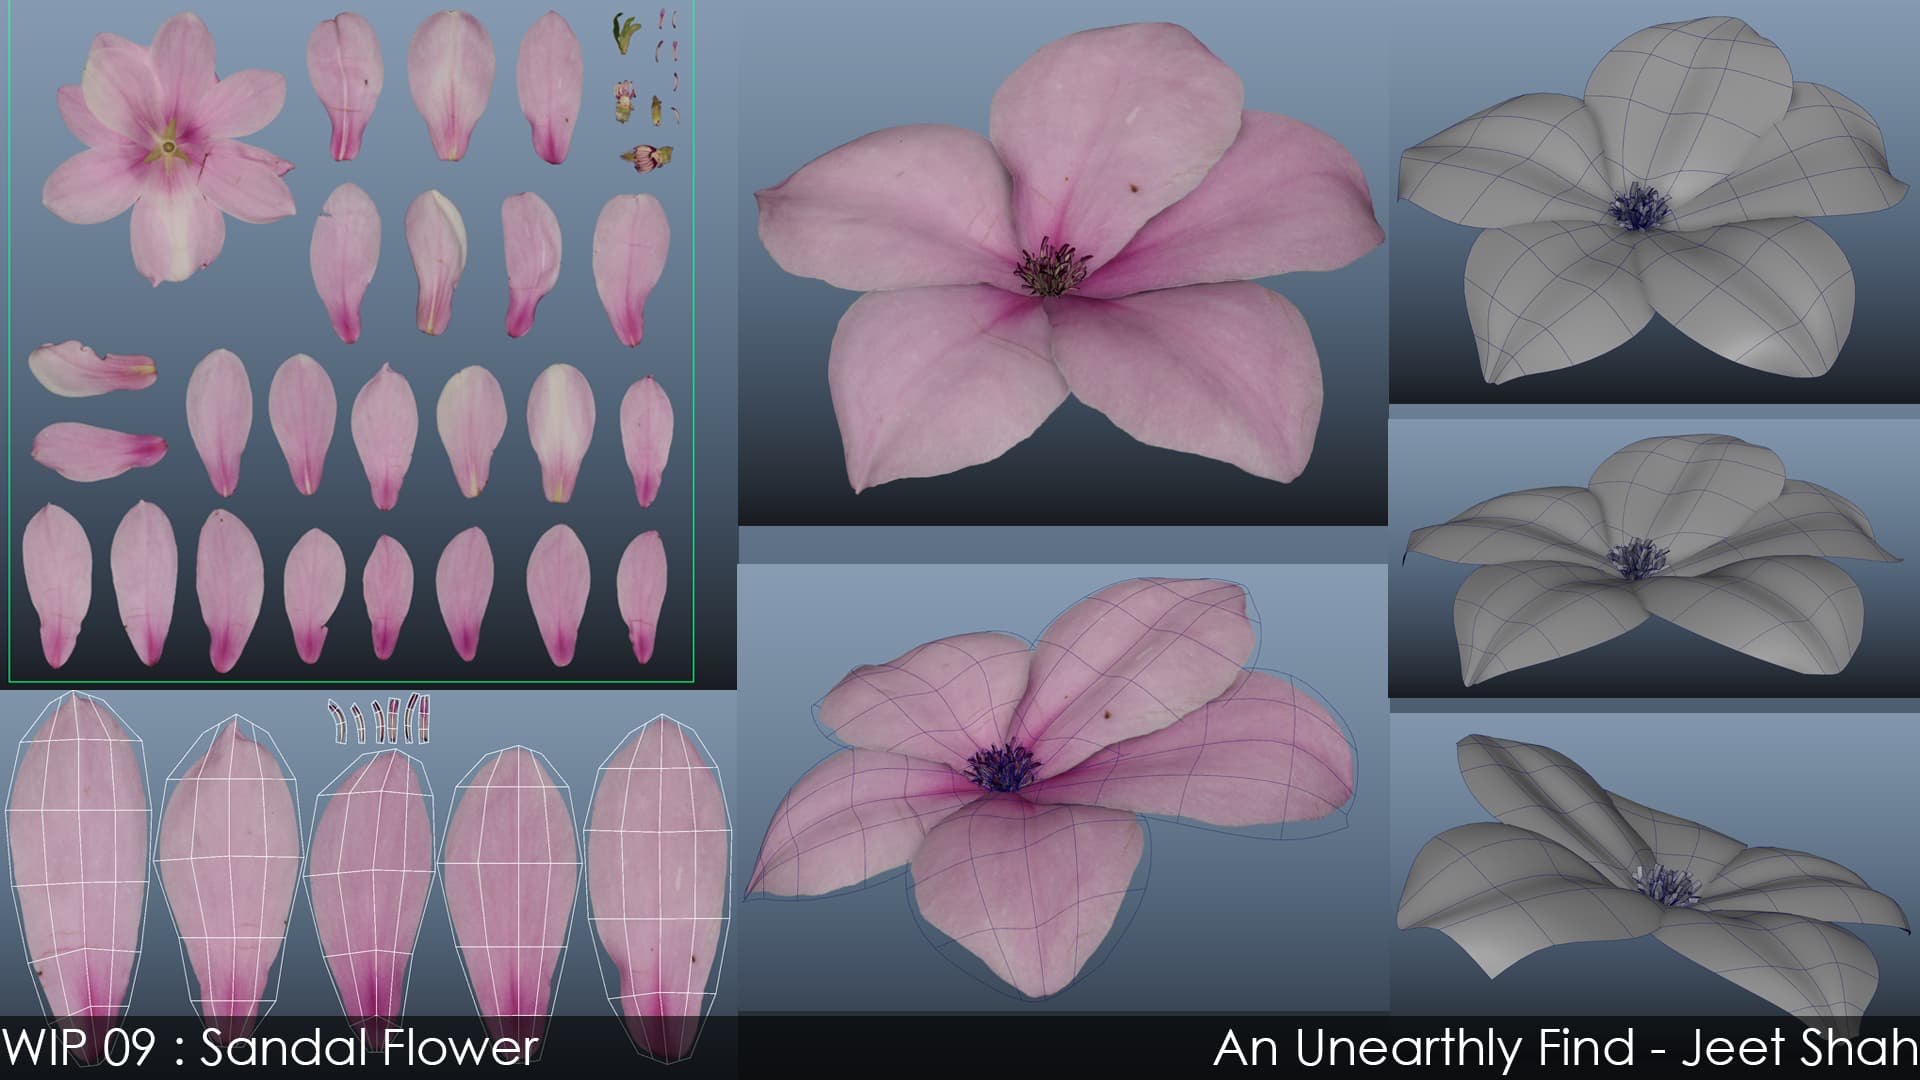
Found this free flower texture from textures.com, and made it into a flower. This was probably my first try at making foliage from textures. Addressed it the same way I address making hair cards.
Now putting it all together I think I am done with modeling the sandals.
6 Likes
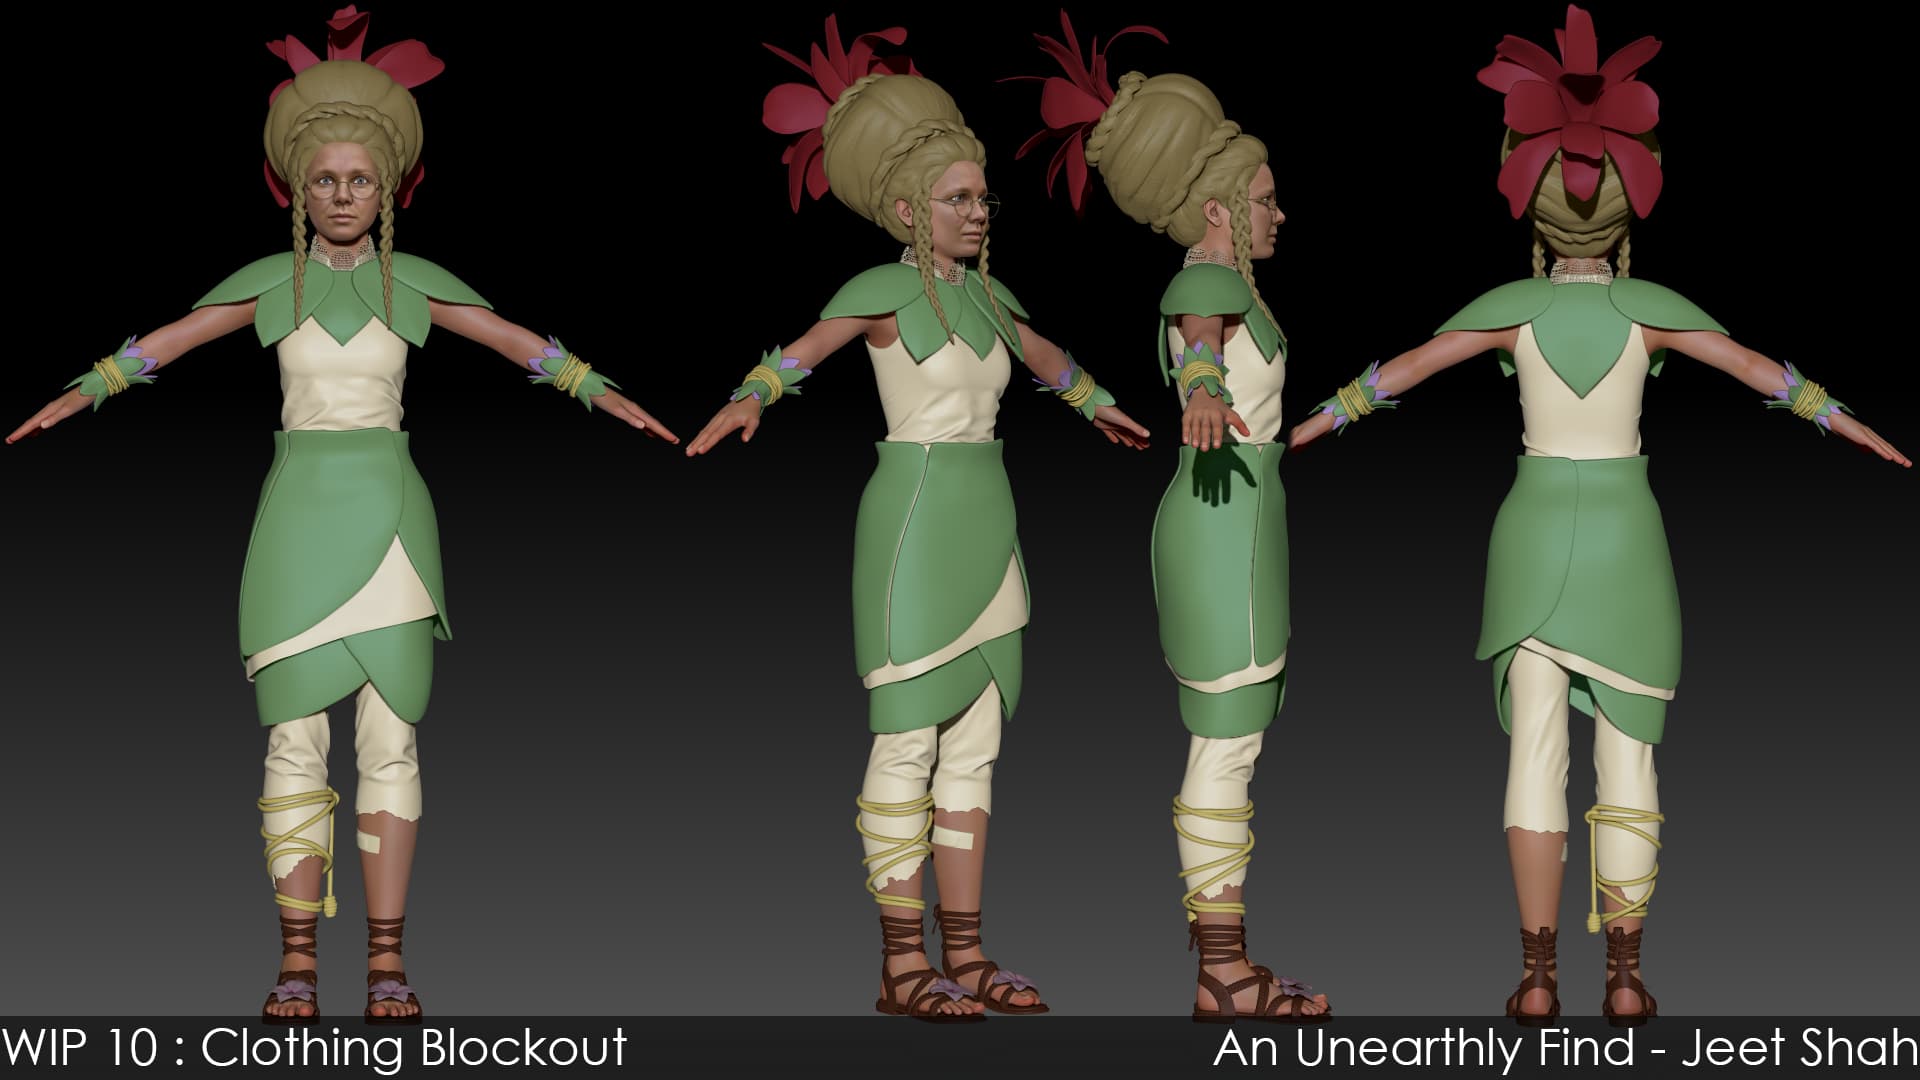
Some blockouts on the layers of clothing that she’ll be wearing. It’s all single sided with Zbrush’s handy dynamic thickness coming to the rescue.
Will be sculpting more on them keeping the dynamic thickness turned on and will bake it down at the very end when I’m happy with the folds.
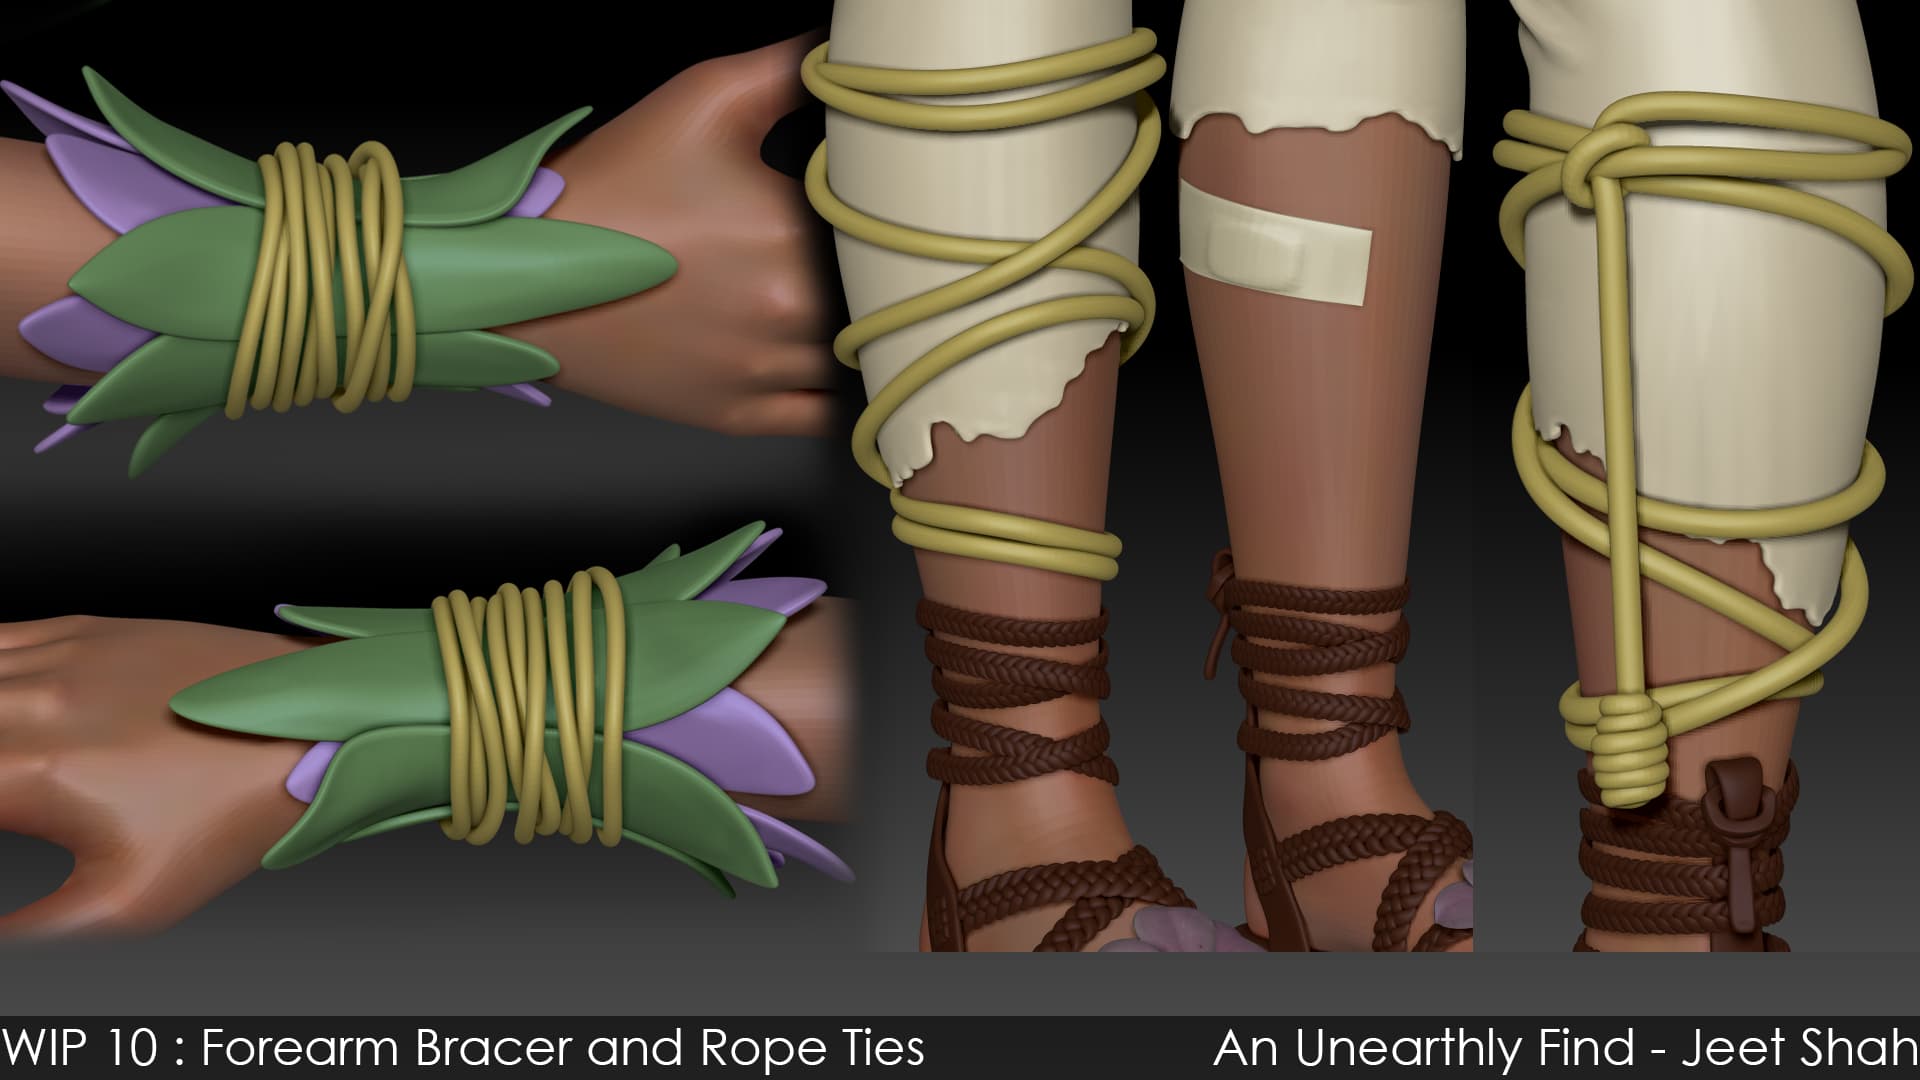
Added some ropes to the bracers and the pants.
Planning on sculpting everything together when all the required meshes are ready in Zbrush. Will be aiming to add all the blockouts for the tons of props next. And belts at the end to connect everything together.
4 Likes
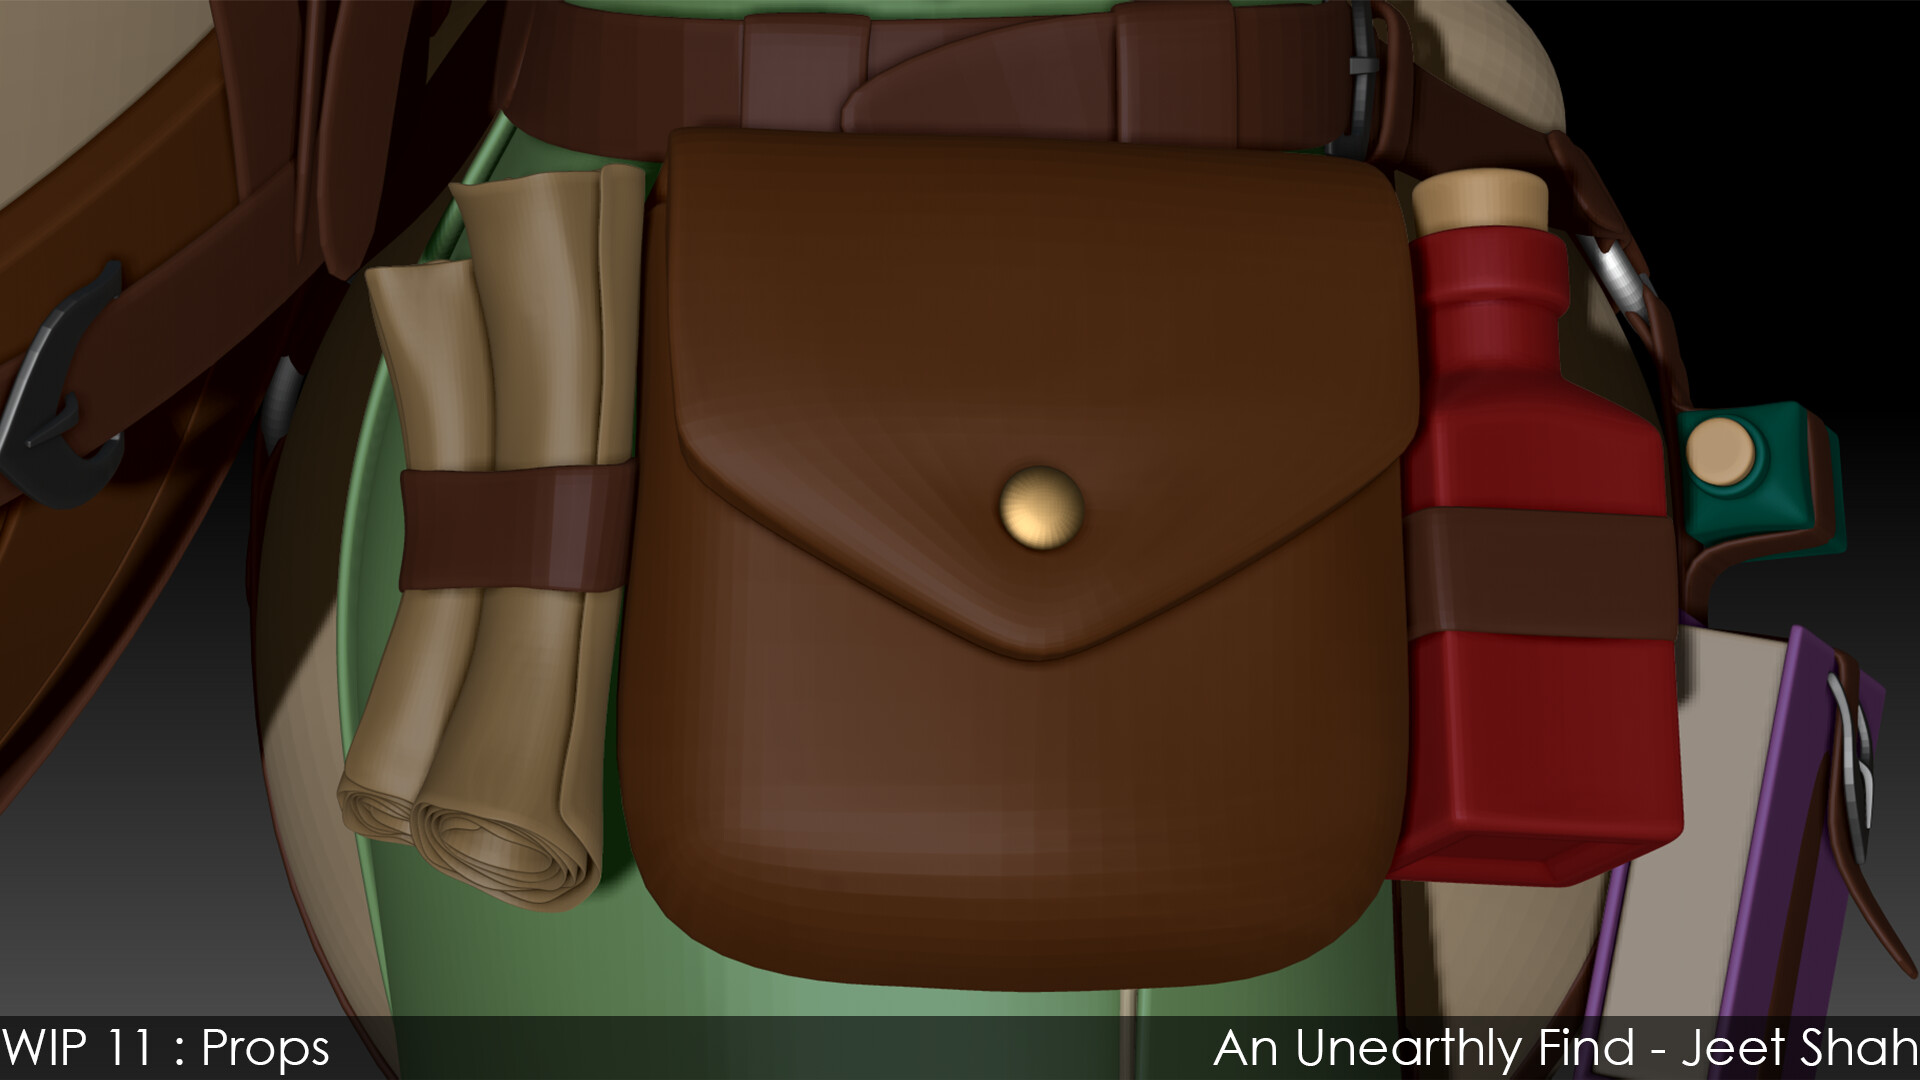
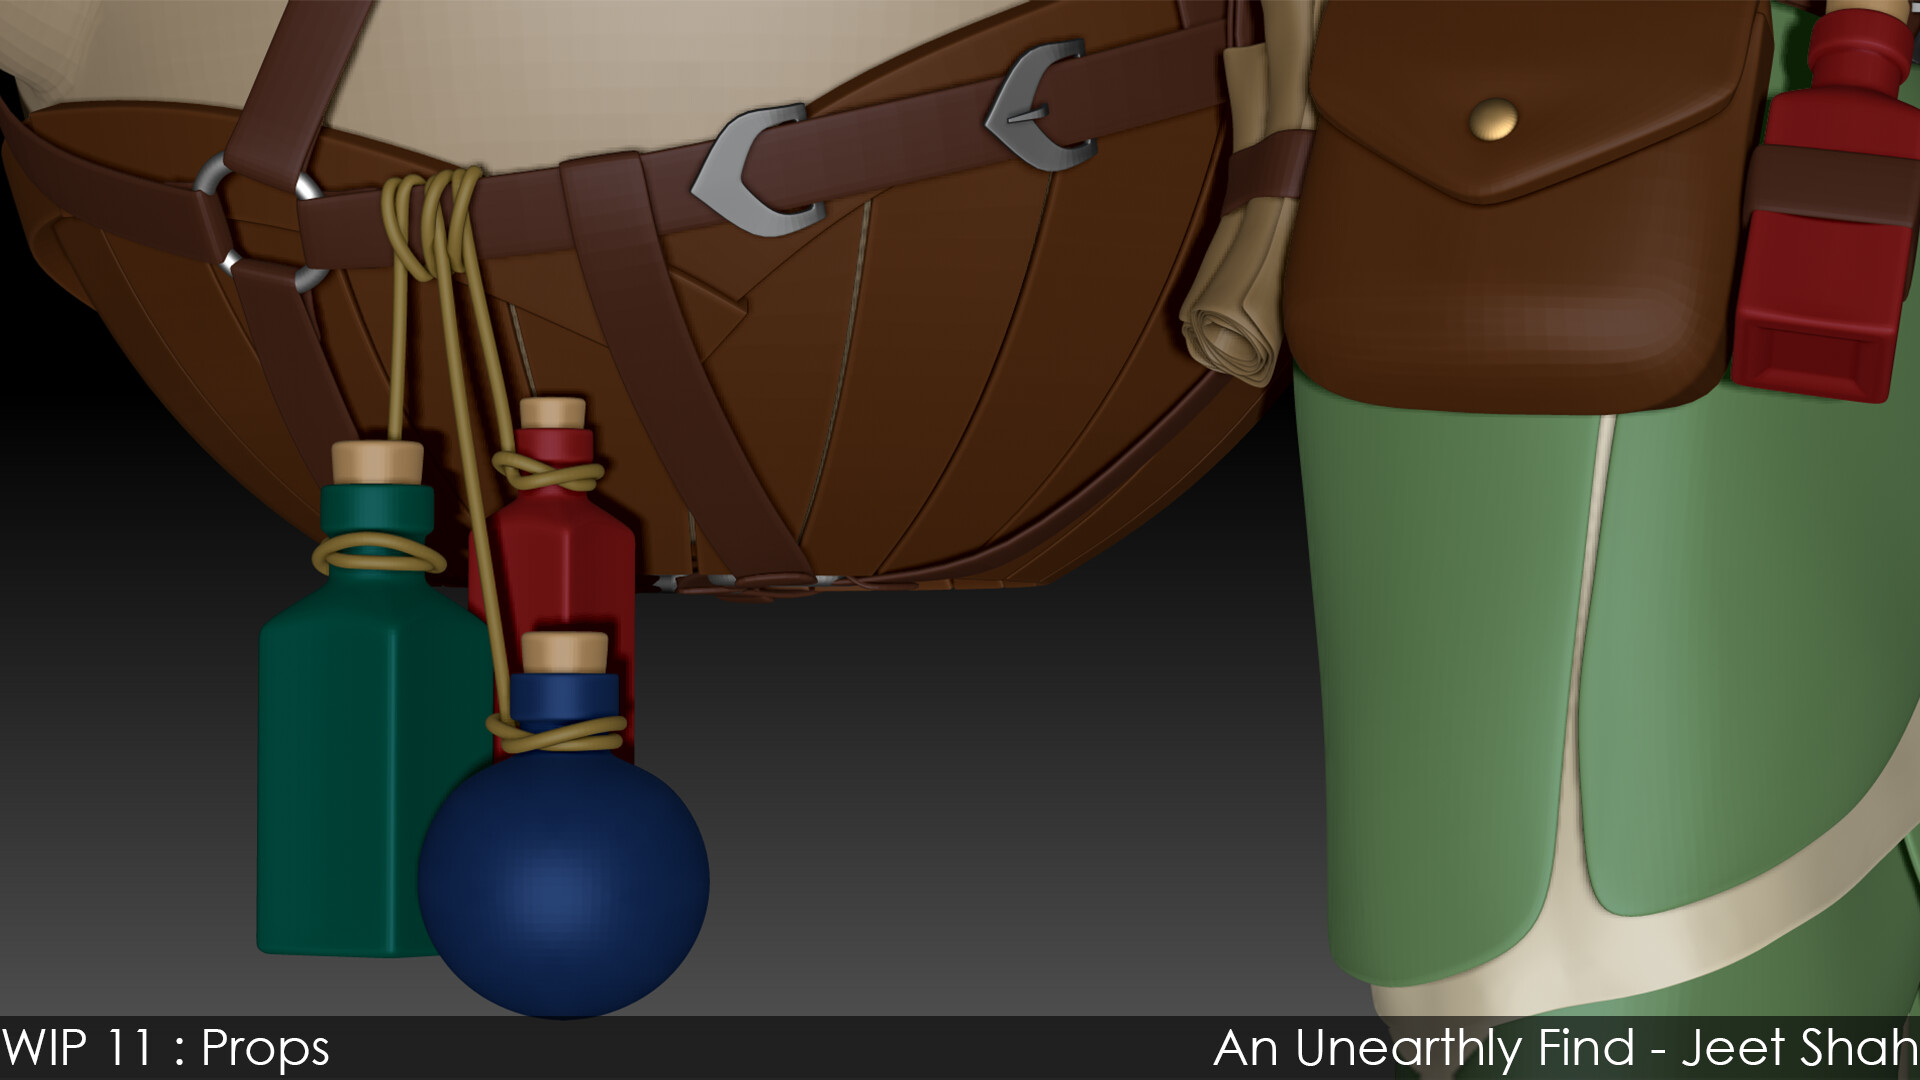
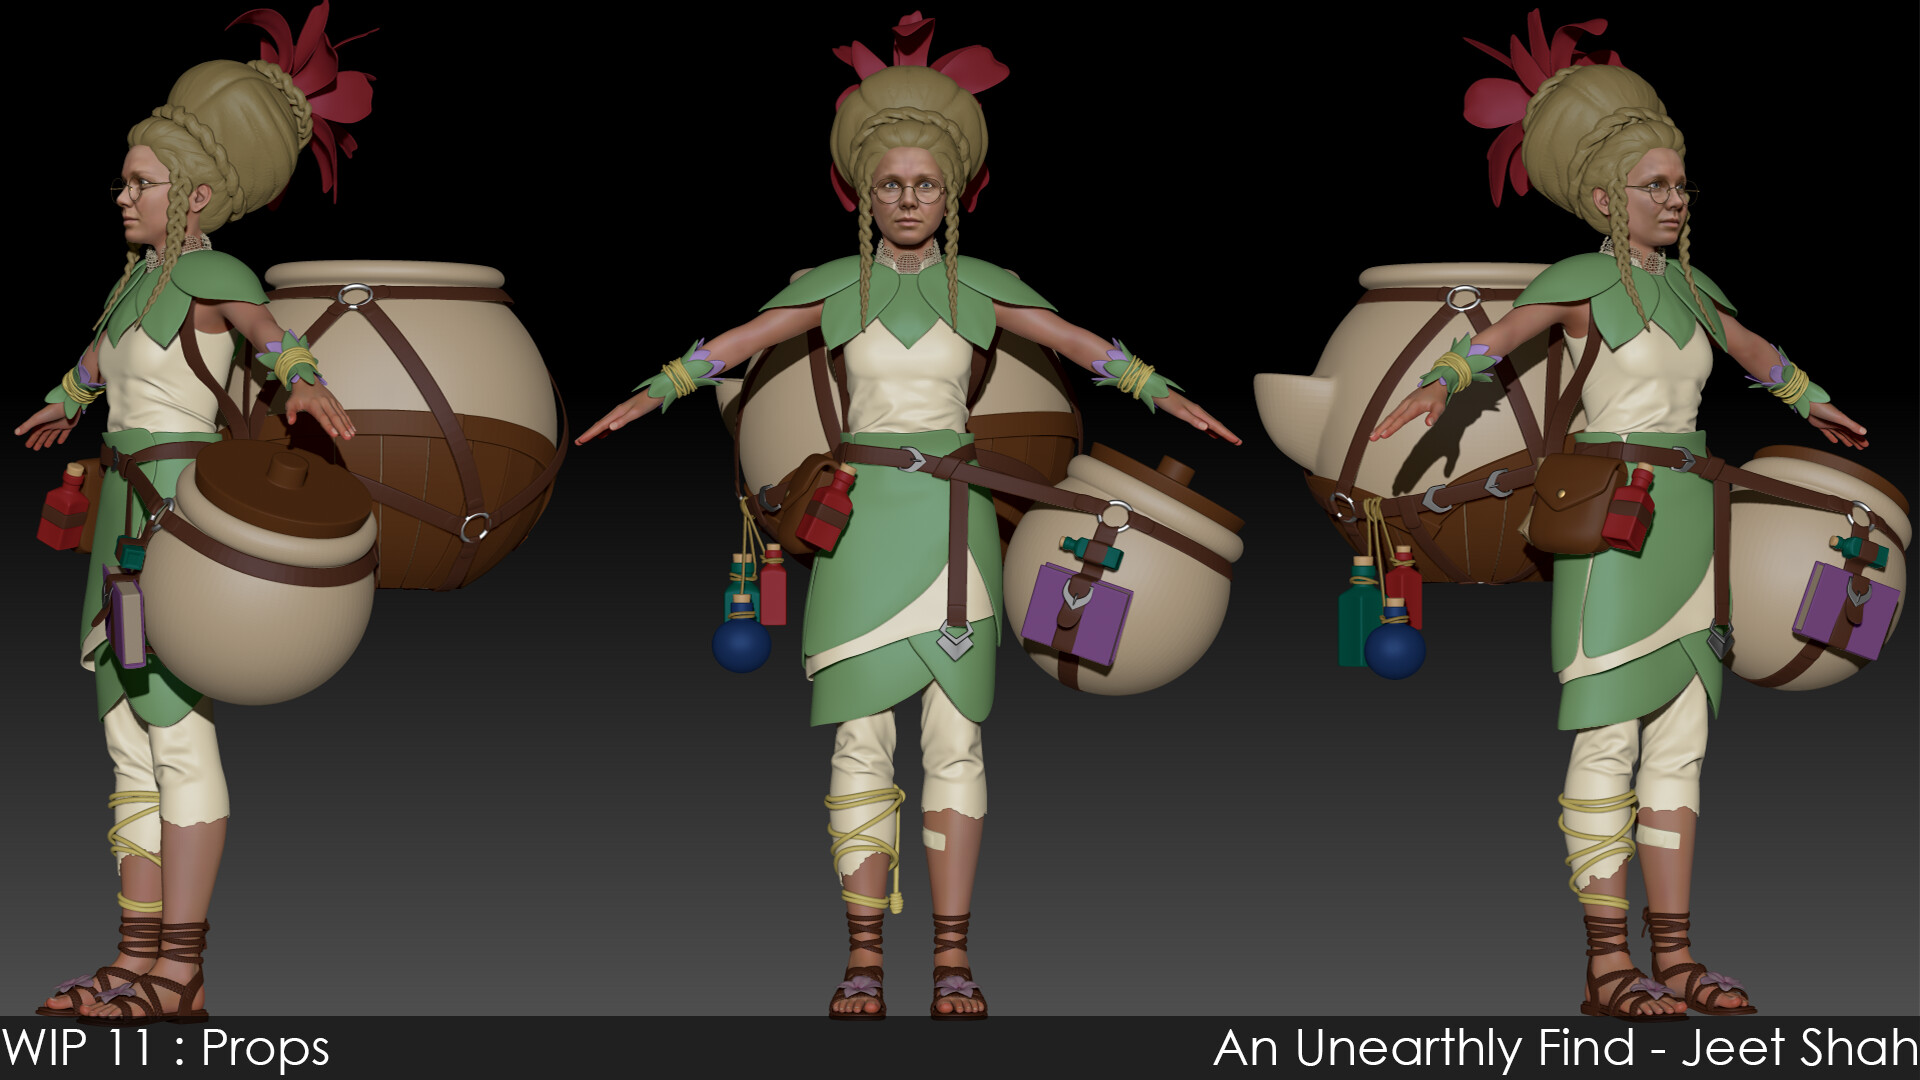
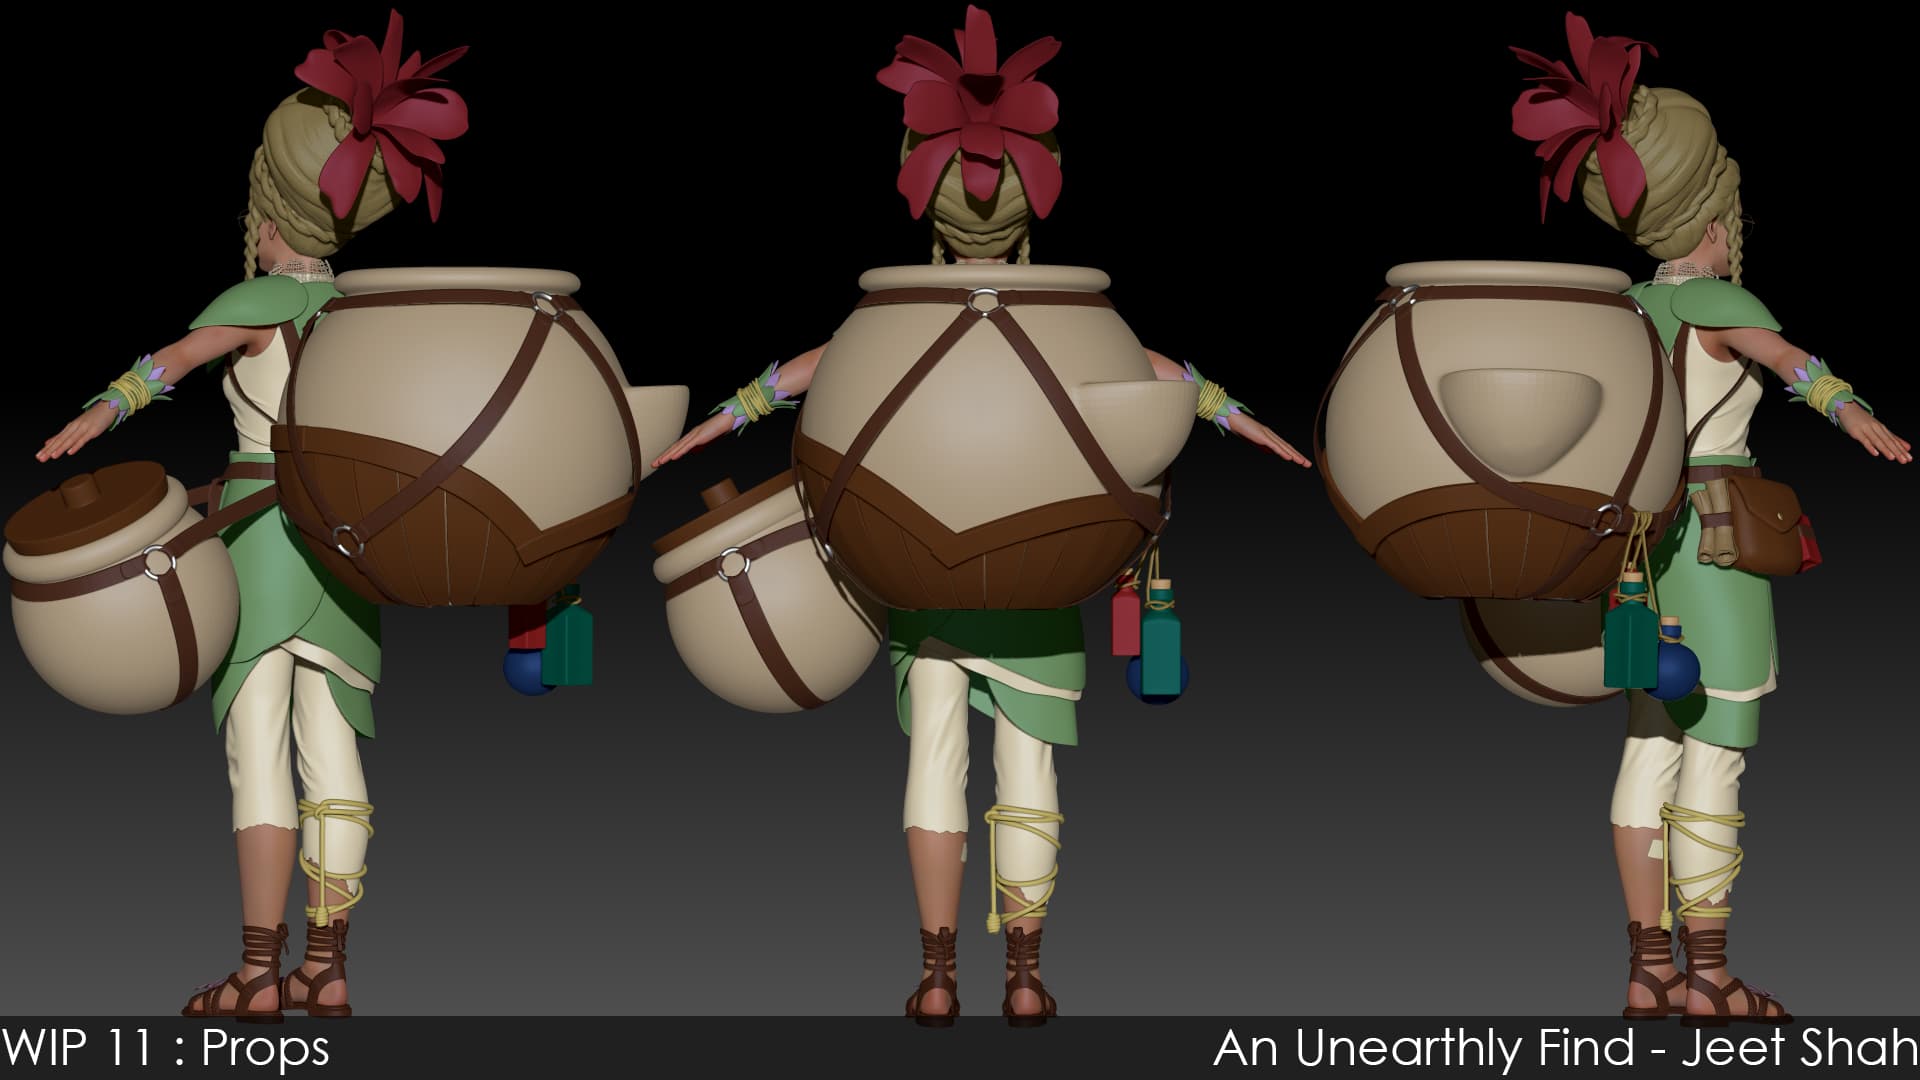
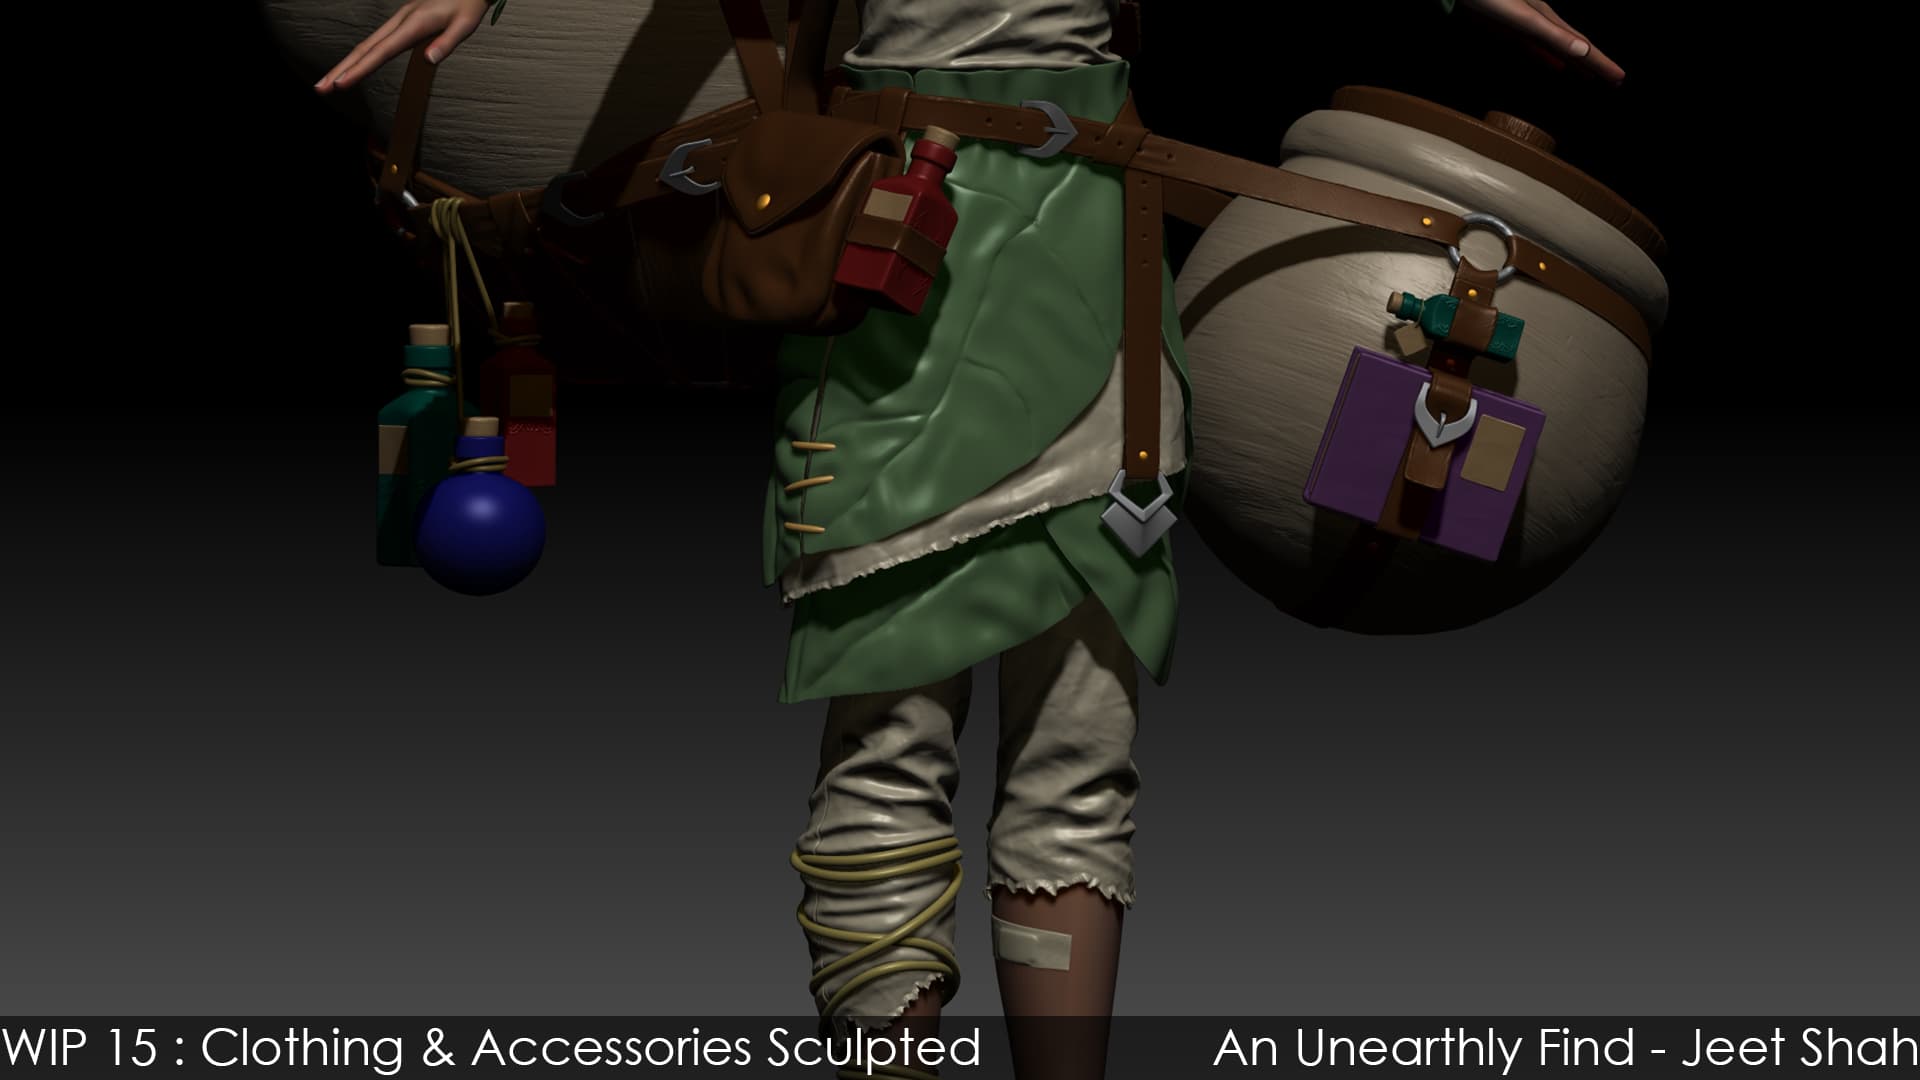
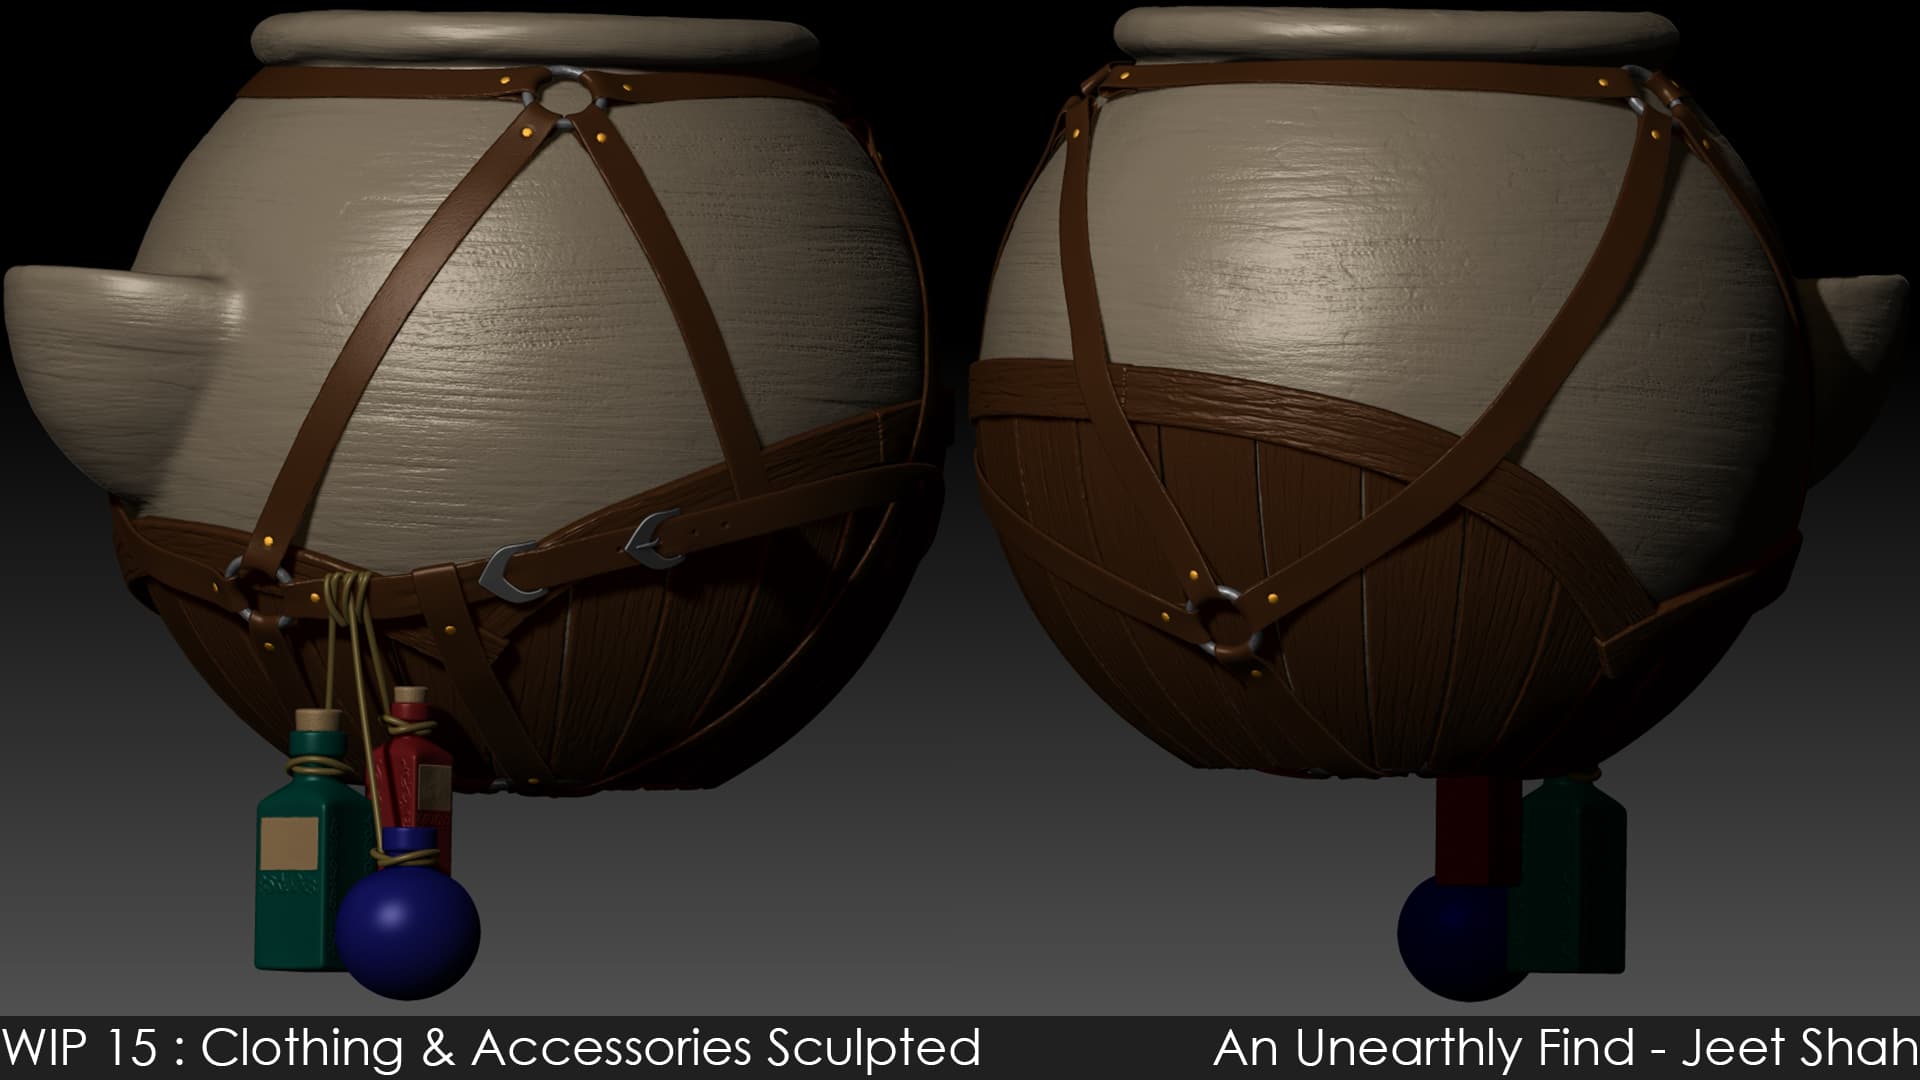
Mostly done with all the props on her. A few little buttons and misc props remain.
Here’s the progress so far. Almost all of it was poly modeled in Maya the traditional way.
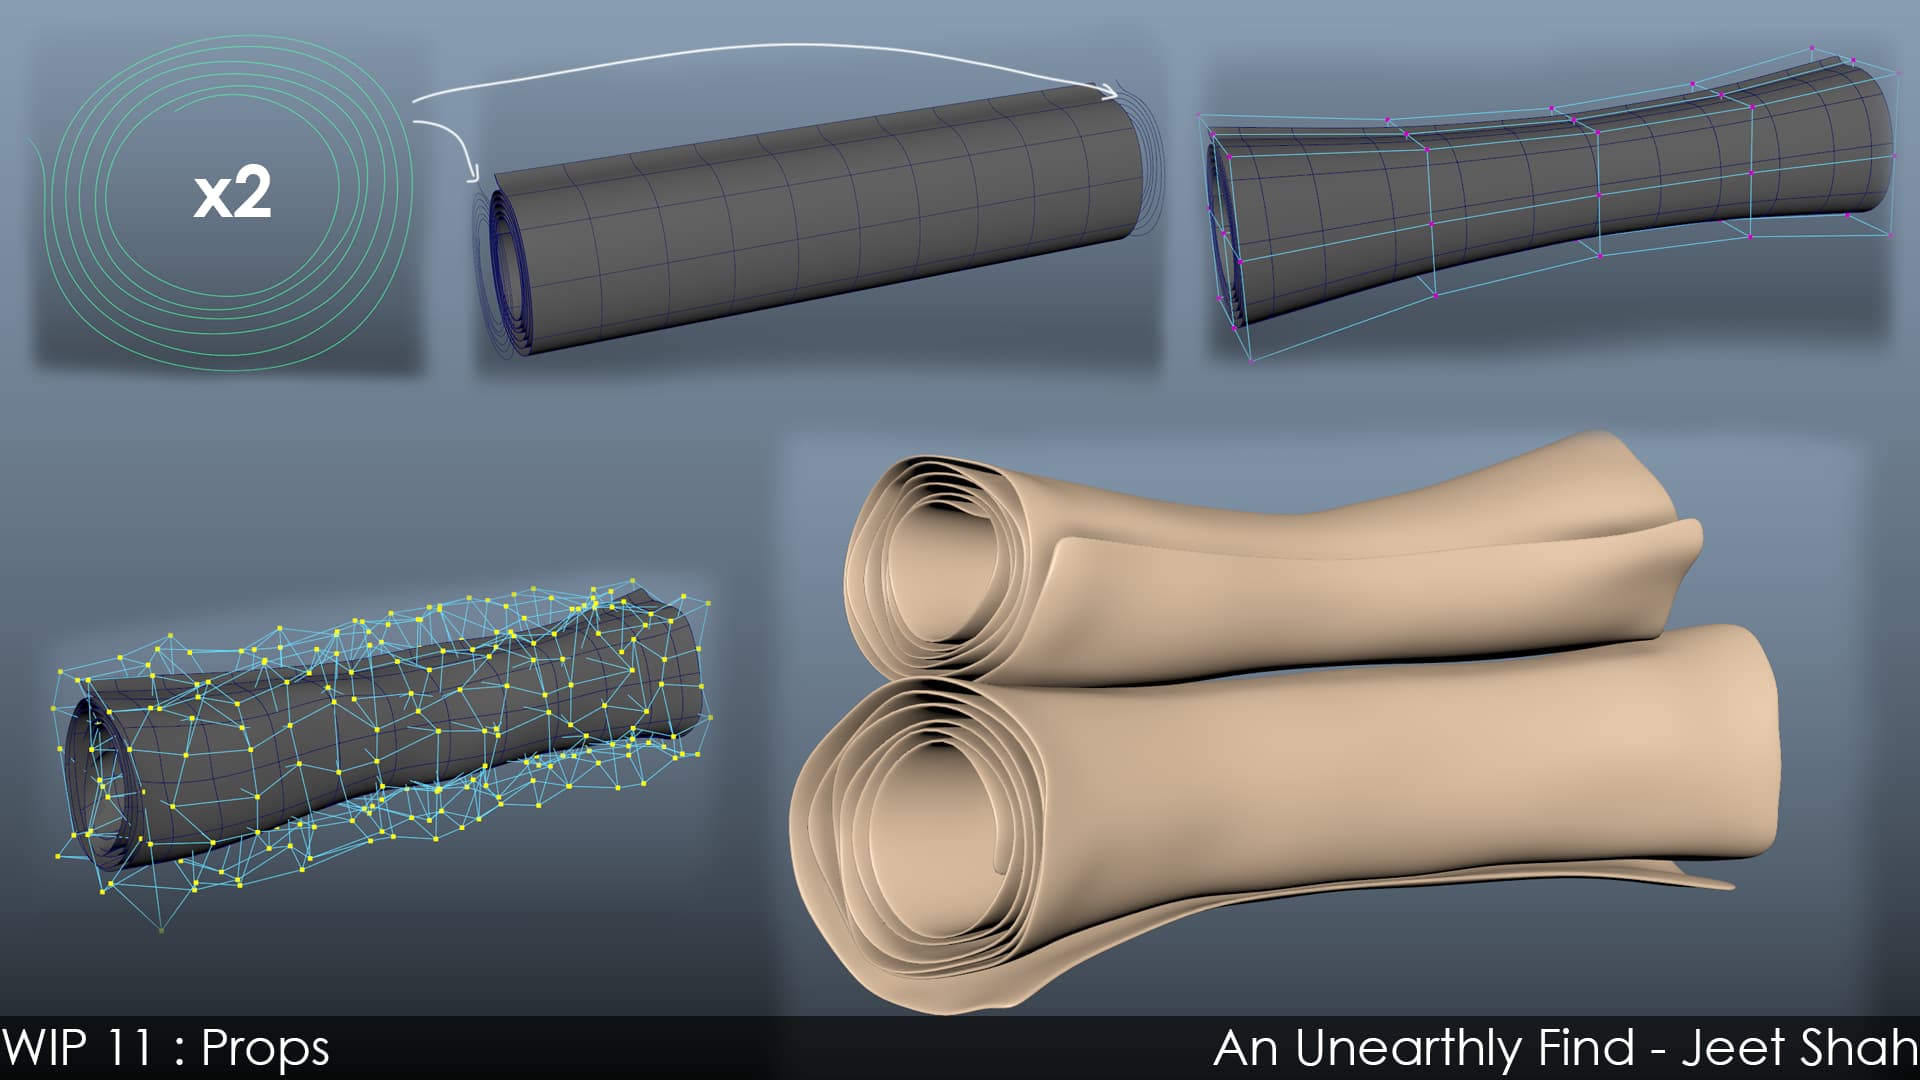
Here’s how I made the scrolls base mesh. Drew a spiral curve, duplicated it twice to the length of the scroll. Lofted them together into a roll of paper. Did some adjustments with a lattice deformer to get the main proportions. Then another lattice to add some lumps and bumps on it. Then with a push and pull on the edges to get it uneven looking.
Here’s a little timelapse of how I tackled the various different belts. Using the PaintFX tool laid down some strokes to convert them to Curve. Simplified the curves with GSCurveTools to make the shaping easier. Then using the SweepMesh tool to extrude a belt along the curve.
The belts took a lot of time as I tried a few ways to tie them up together to be physically plausible. The layout in the concept and the AI references didn’t make much sense. But I’m happy with how they came out now.
Now onto the little guy to justify the title.
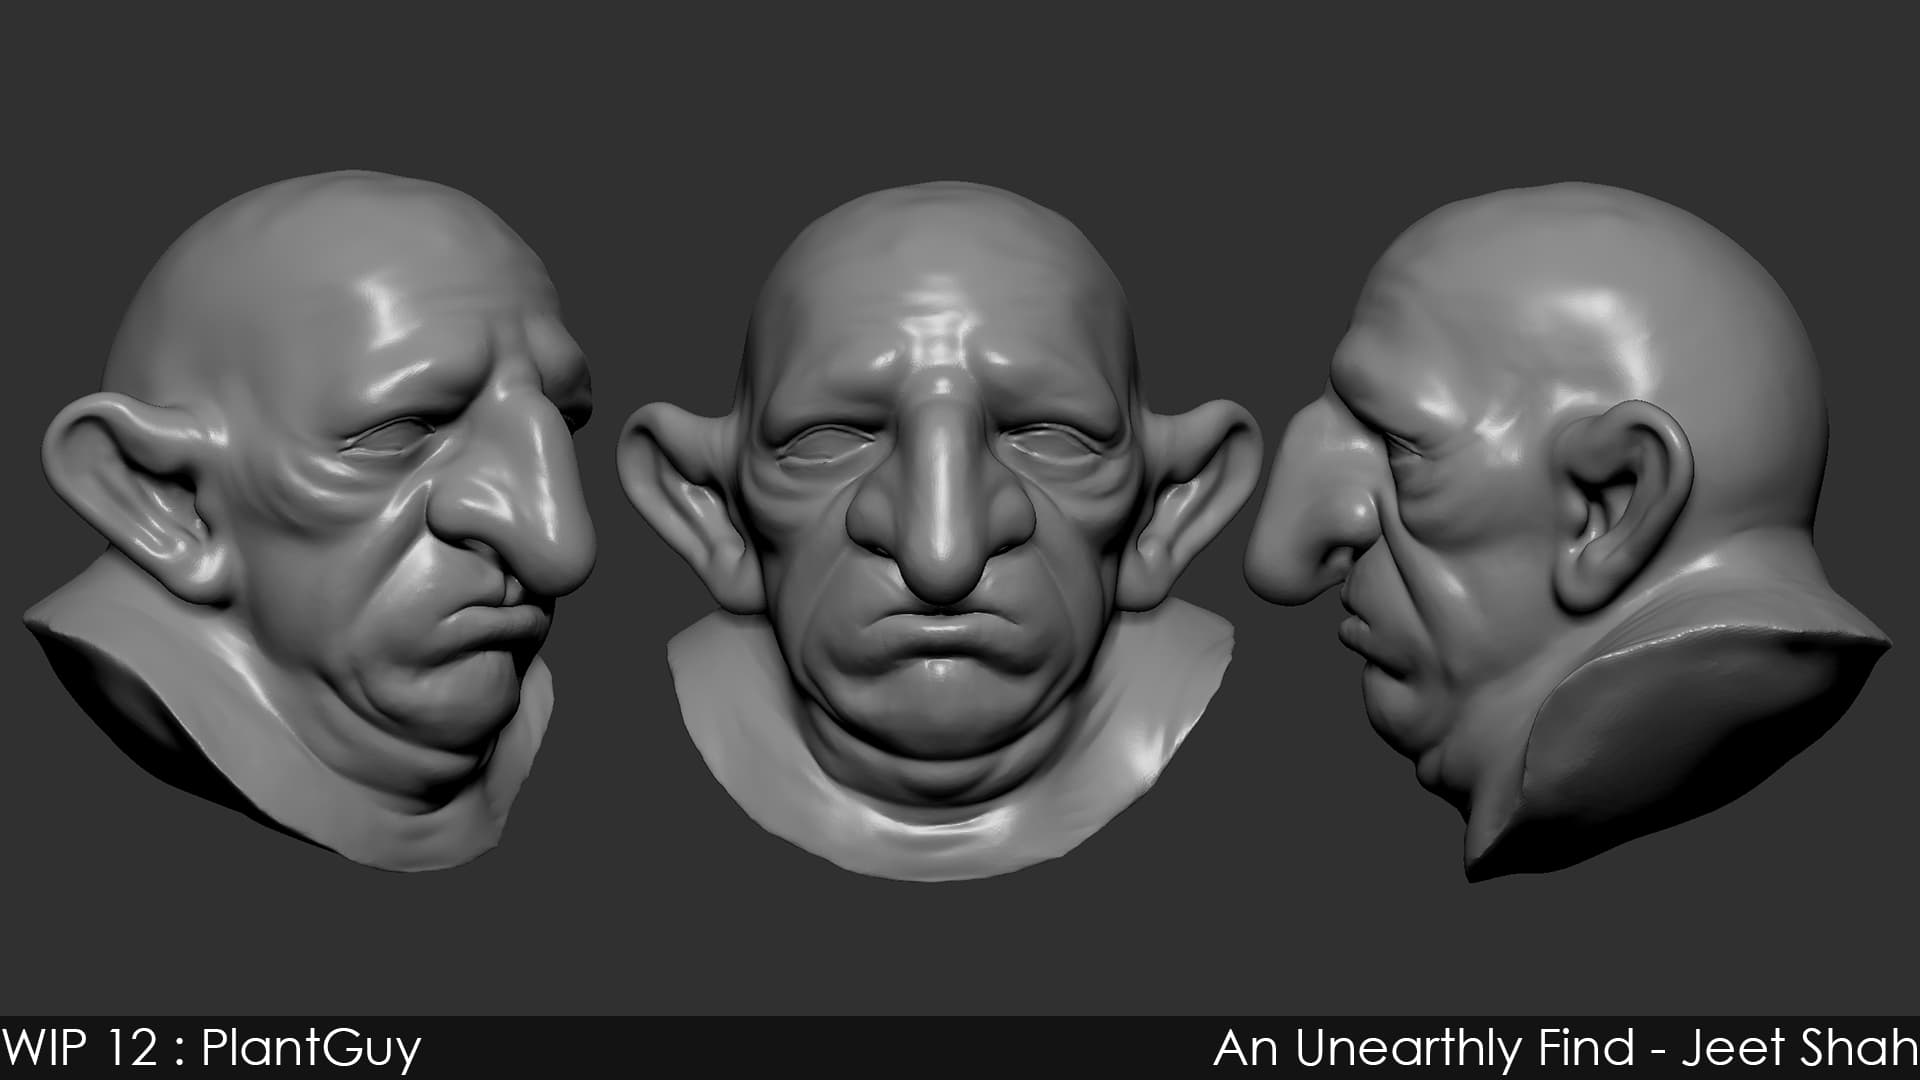
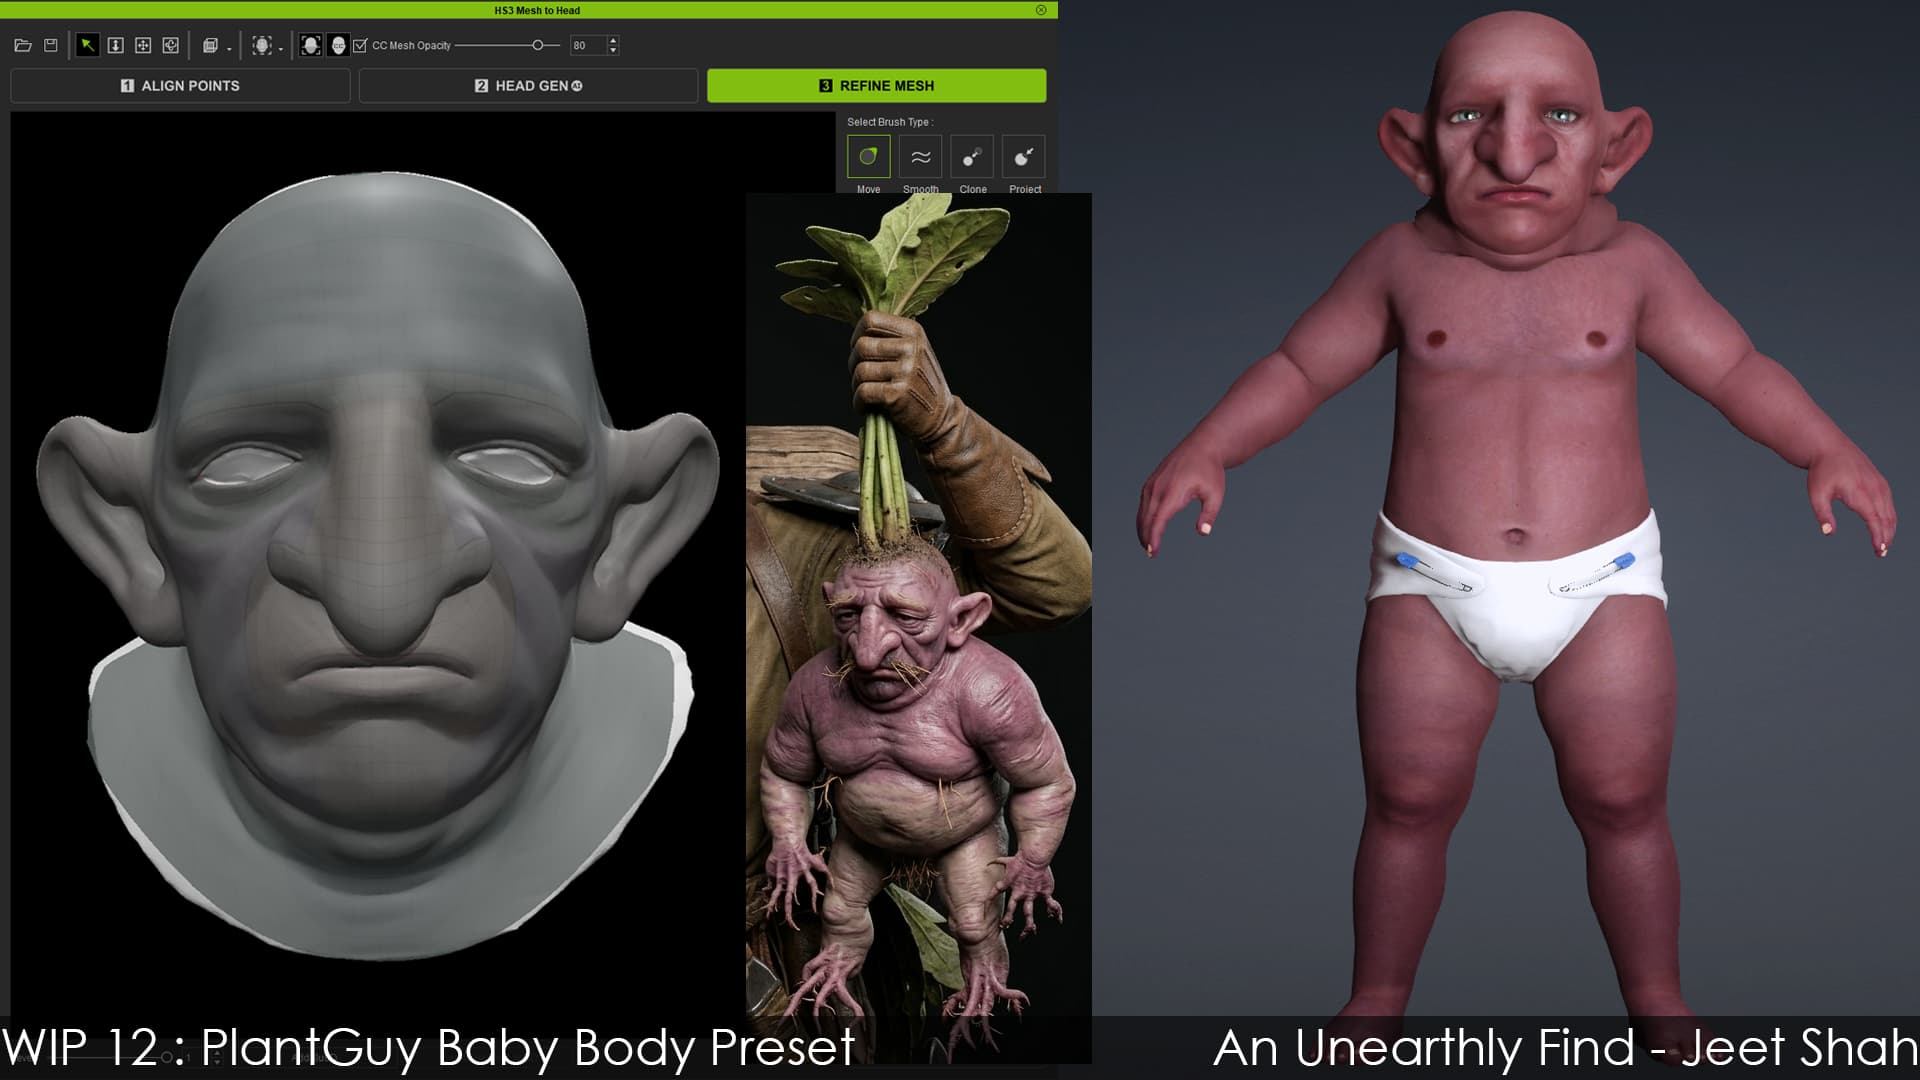
Started with a crude head sculpt of the plant guy in ZBrush.
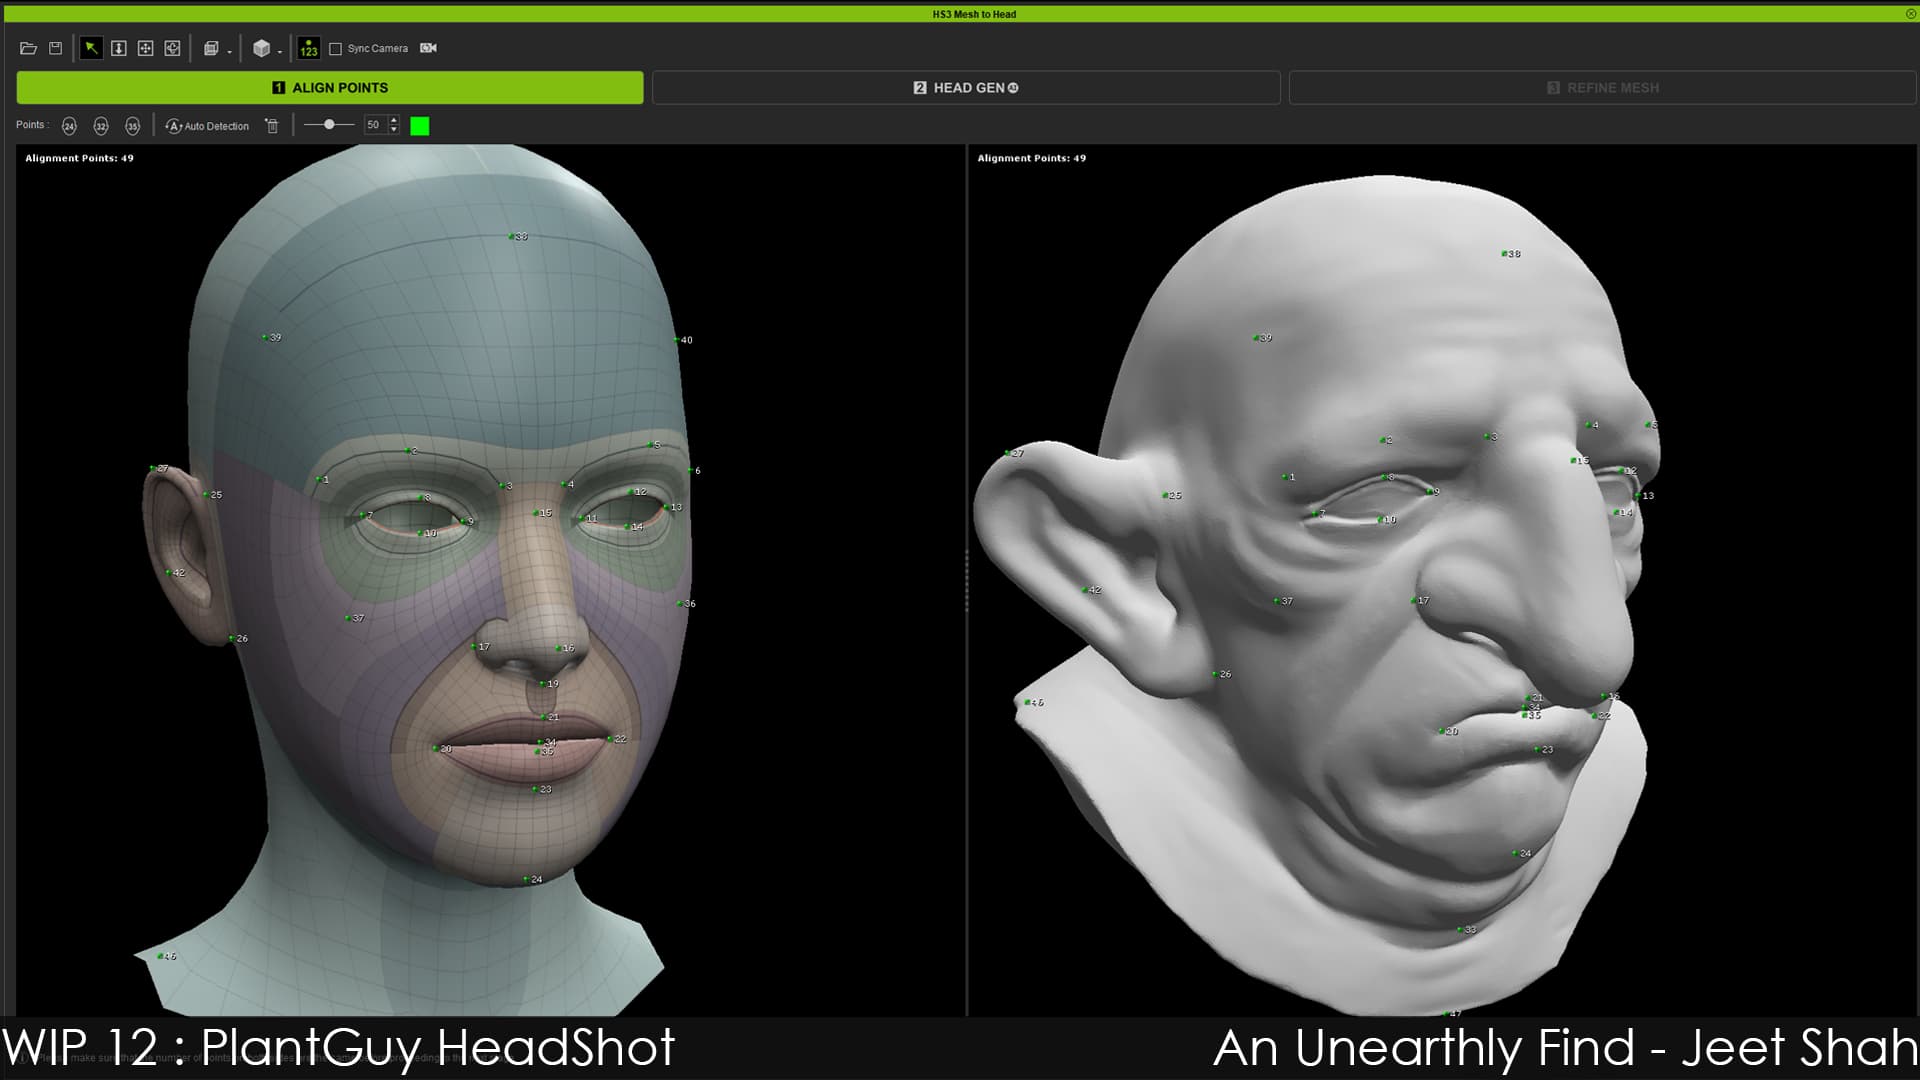
Brought the decimated version of the head to Headshot in CC5
Did some quick refinement to conform to the forms of the sculpt. Instead of giving him a full male body, thought it would fit a baby’s preset better. Although proportionally he’s close to what I want him to be. But oh boy he looks weird in a baby’s body and diaper 
1 Like
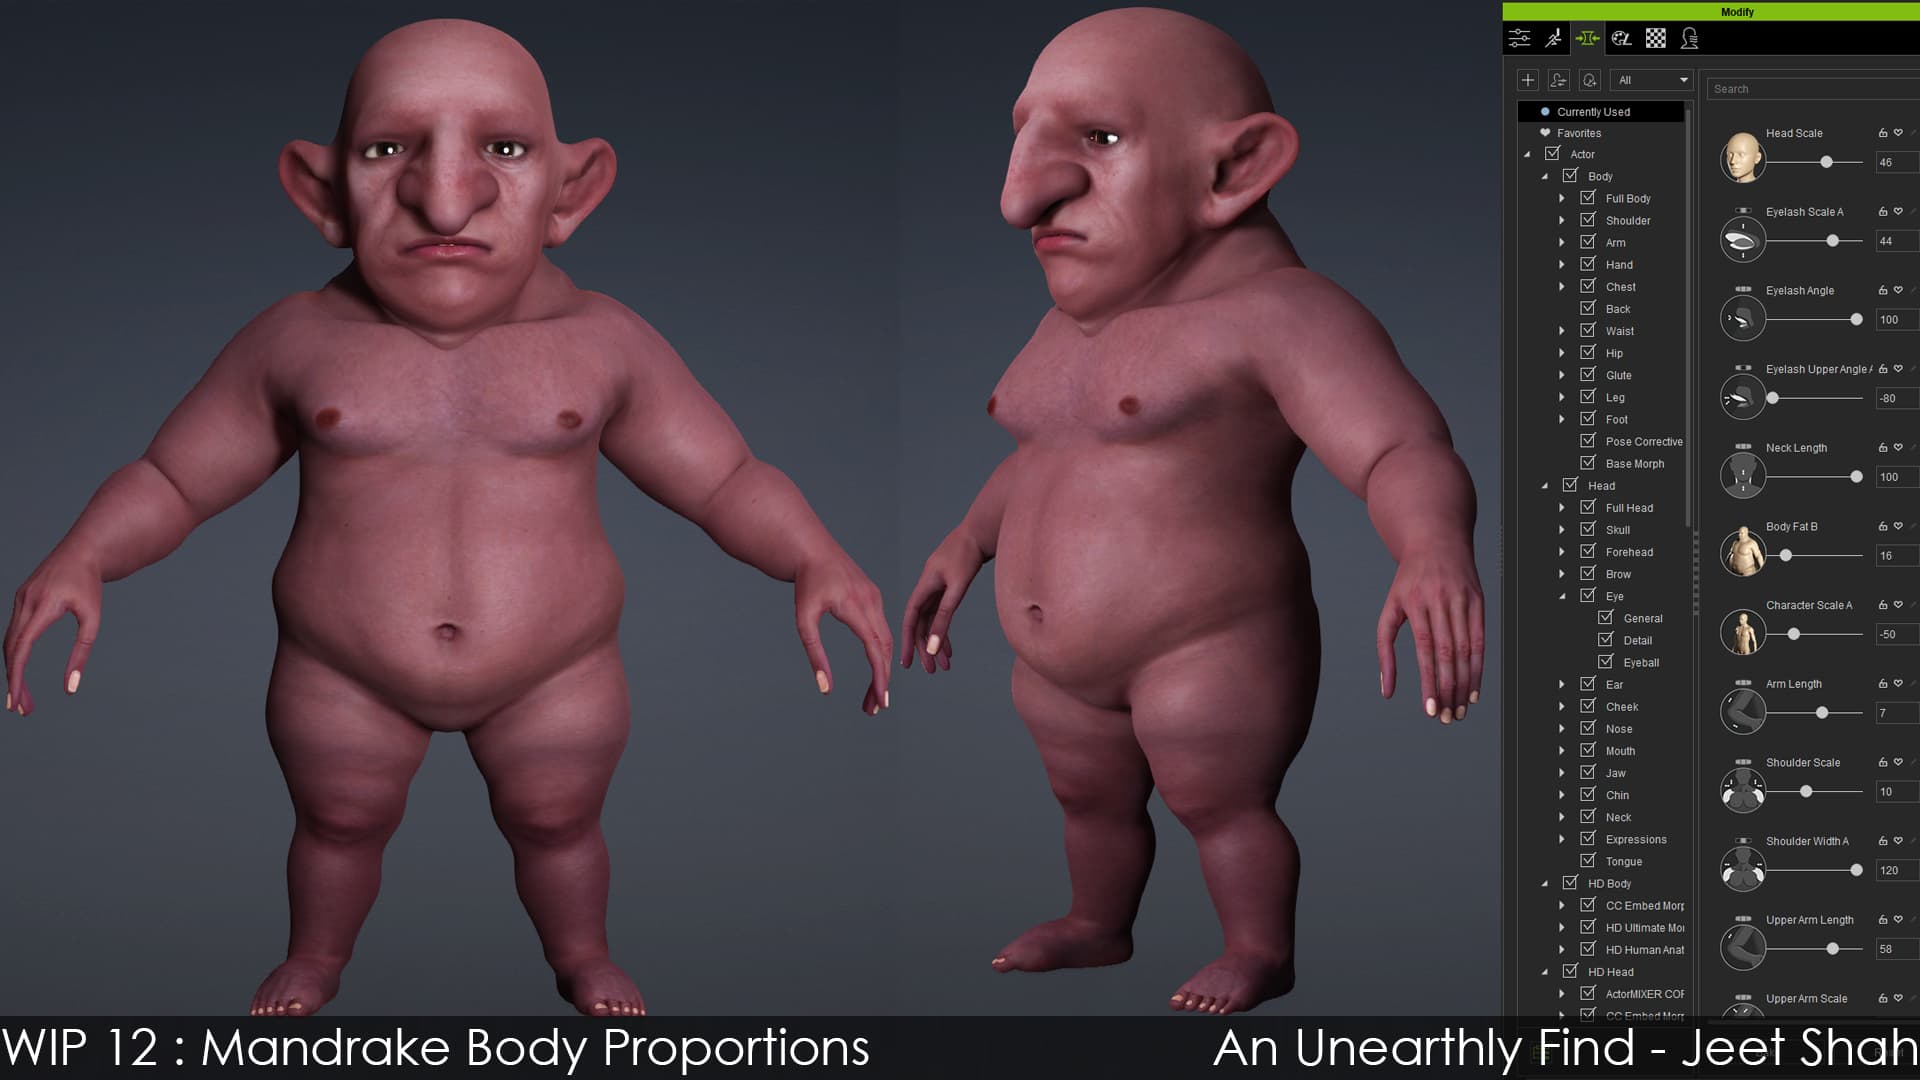
Quick update on the body proportions with CC morphs. Looking less weird now. And just realized these creatures are called Mandrakes, so PlantGuy is now a Mandrake.
Now getting him into Zbrush for further refinement and details.
1 Like
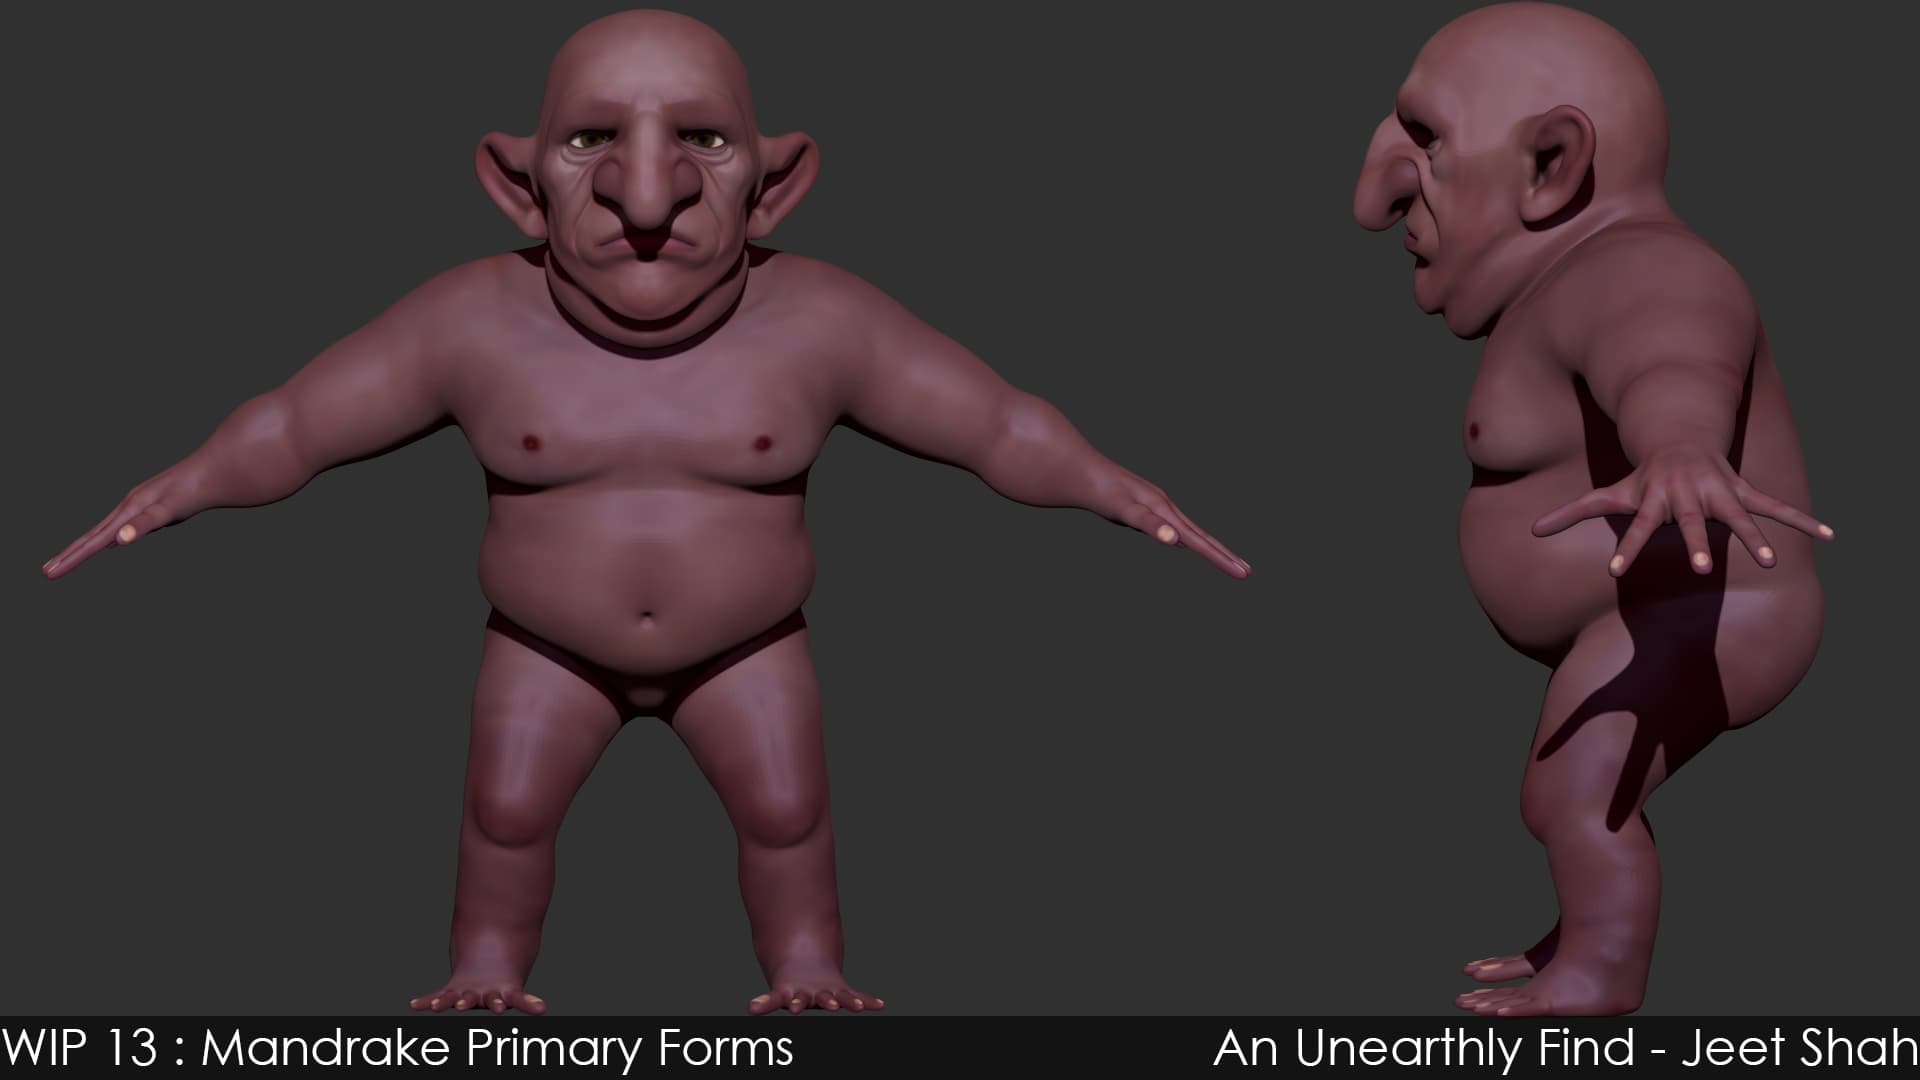
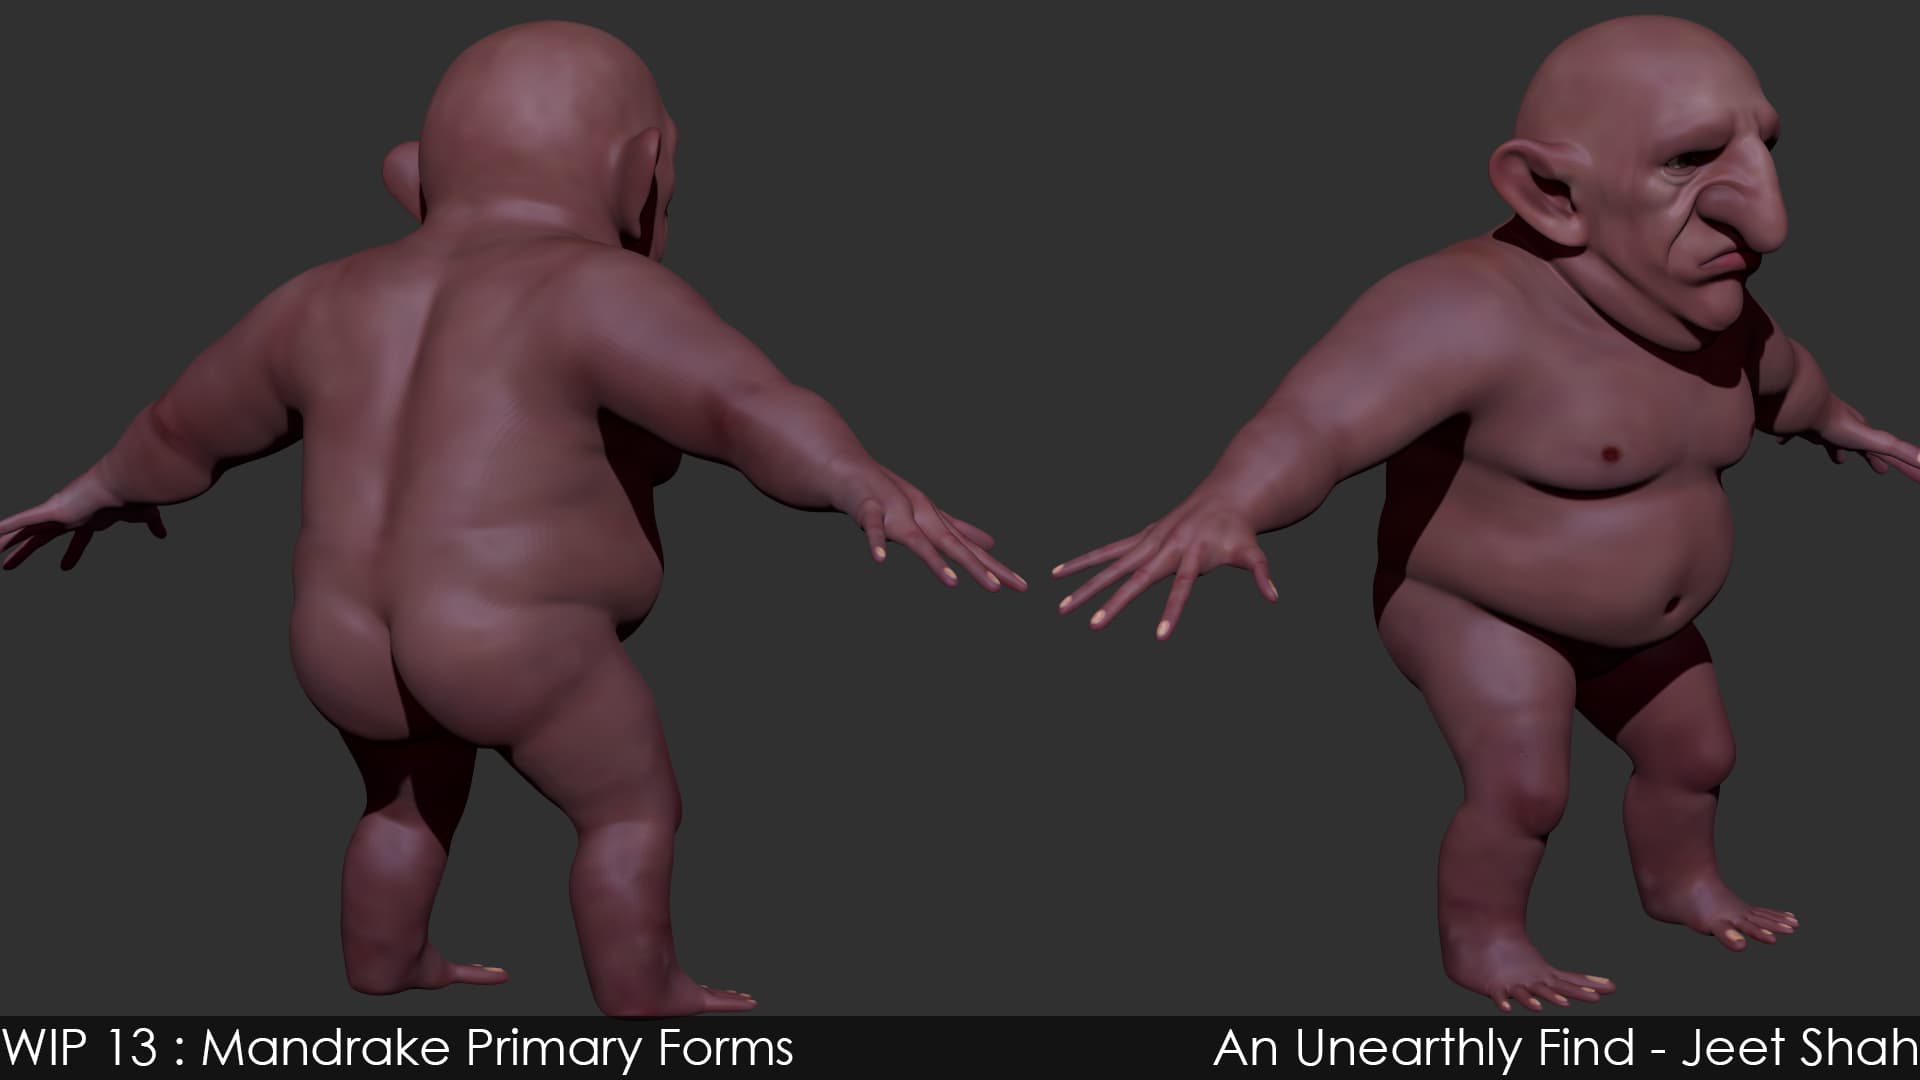
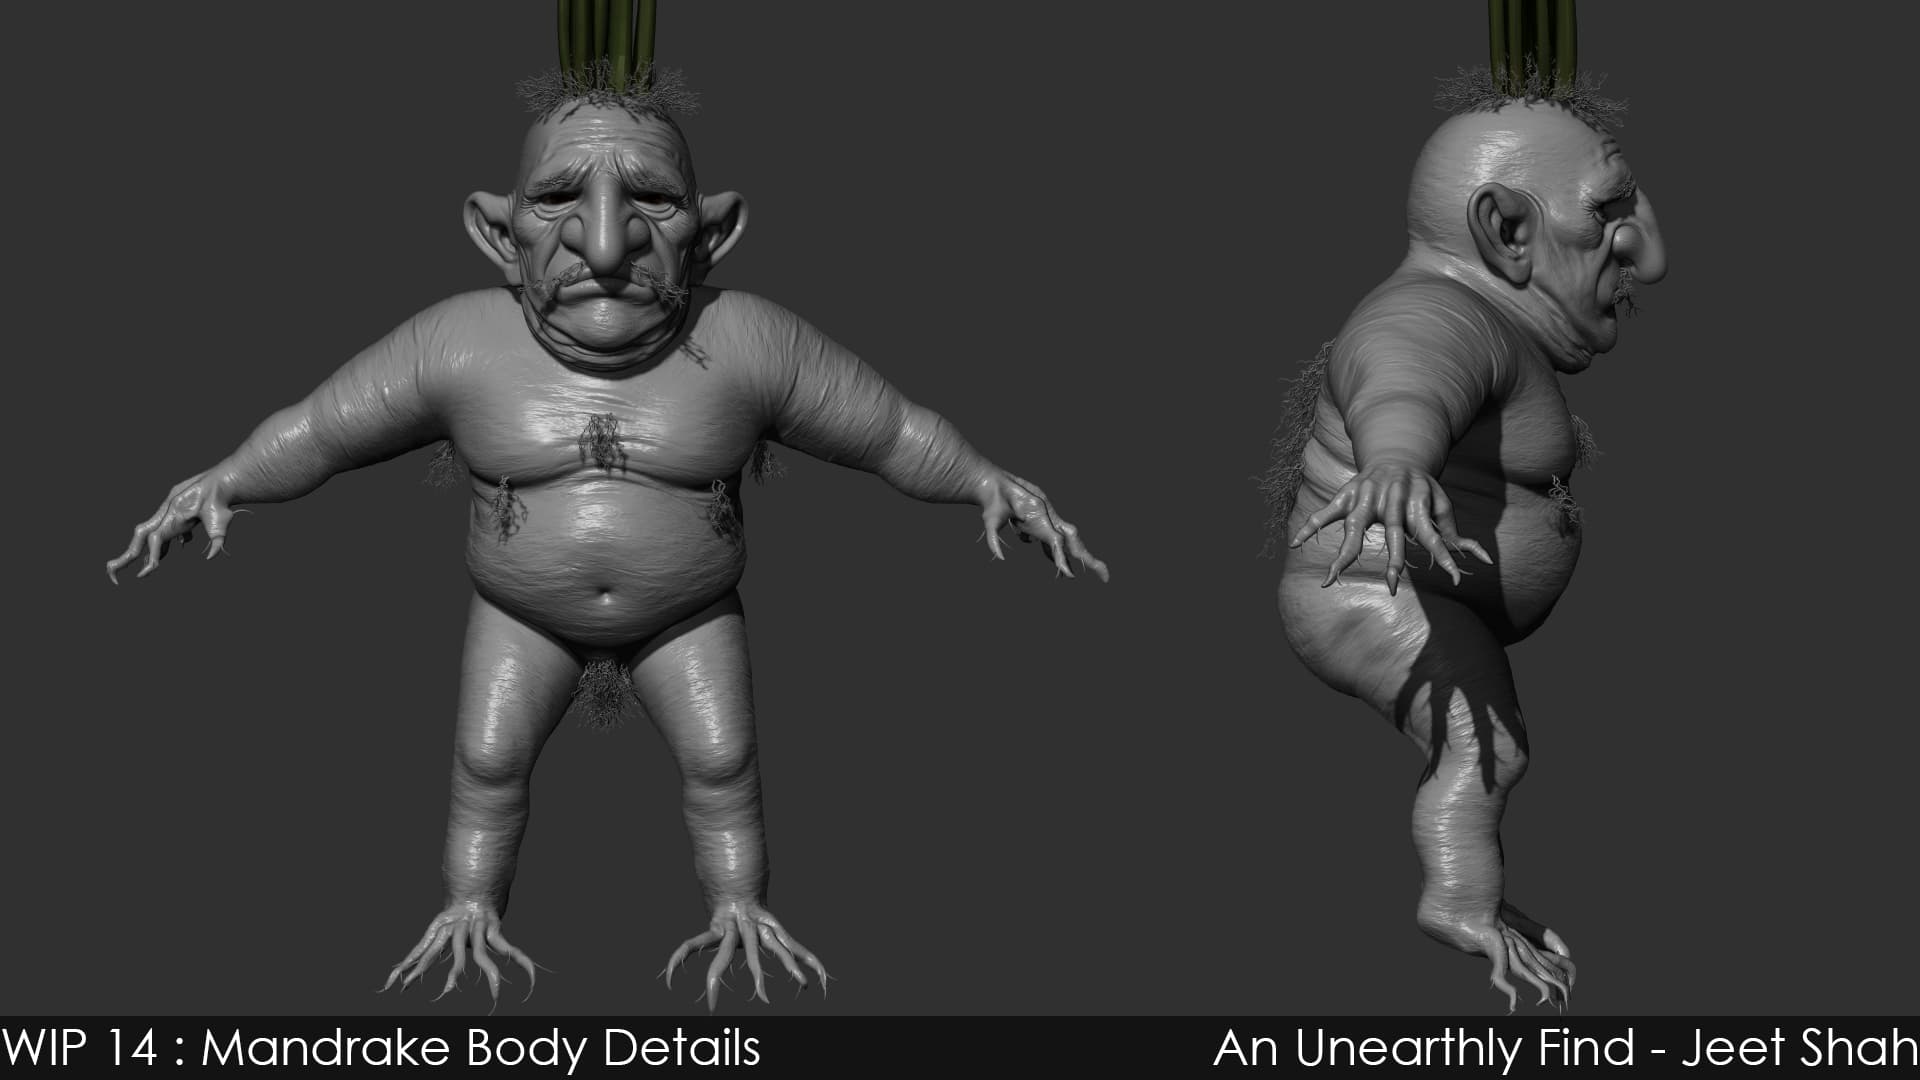
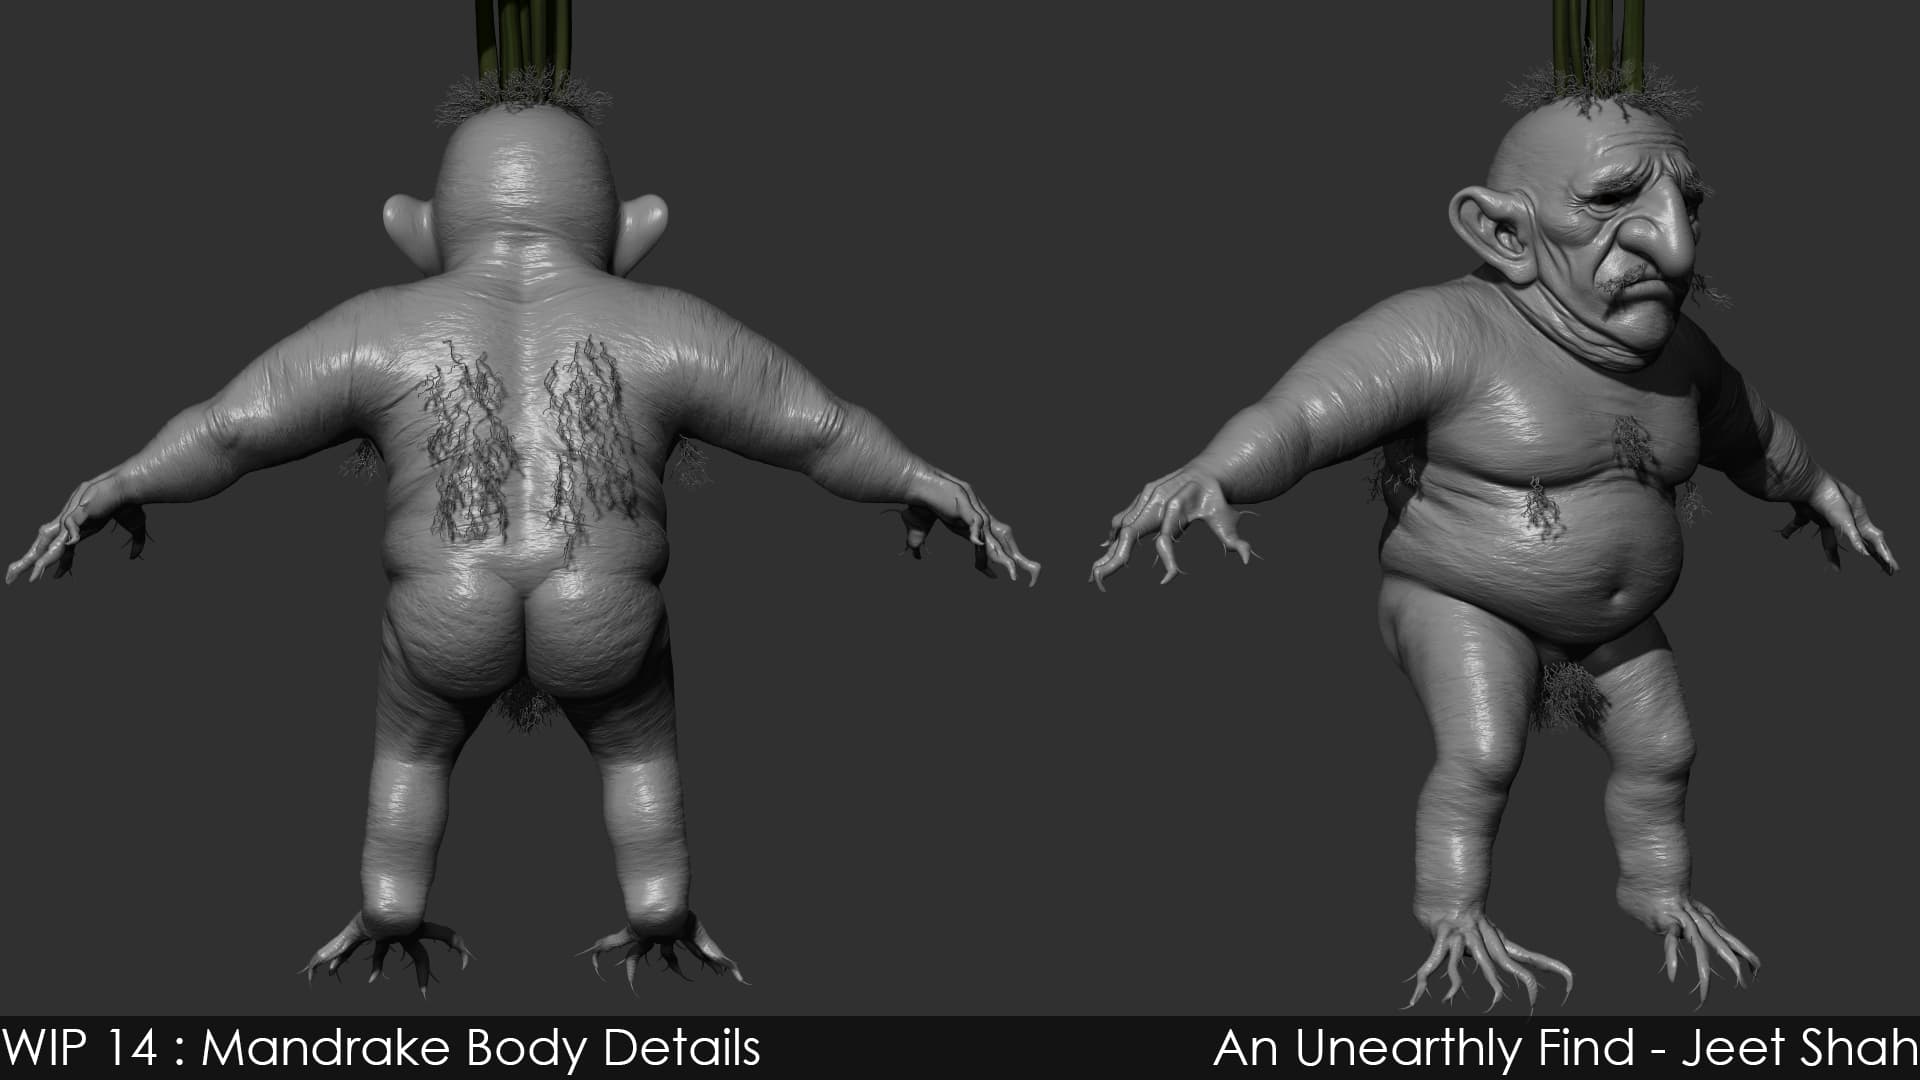
Some progress on the mandrake’s proportions in Zbrush. Fixing the stuff that was off.
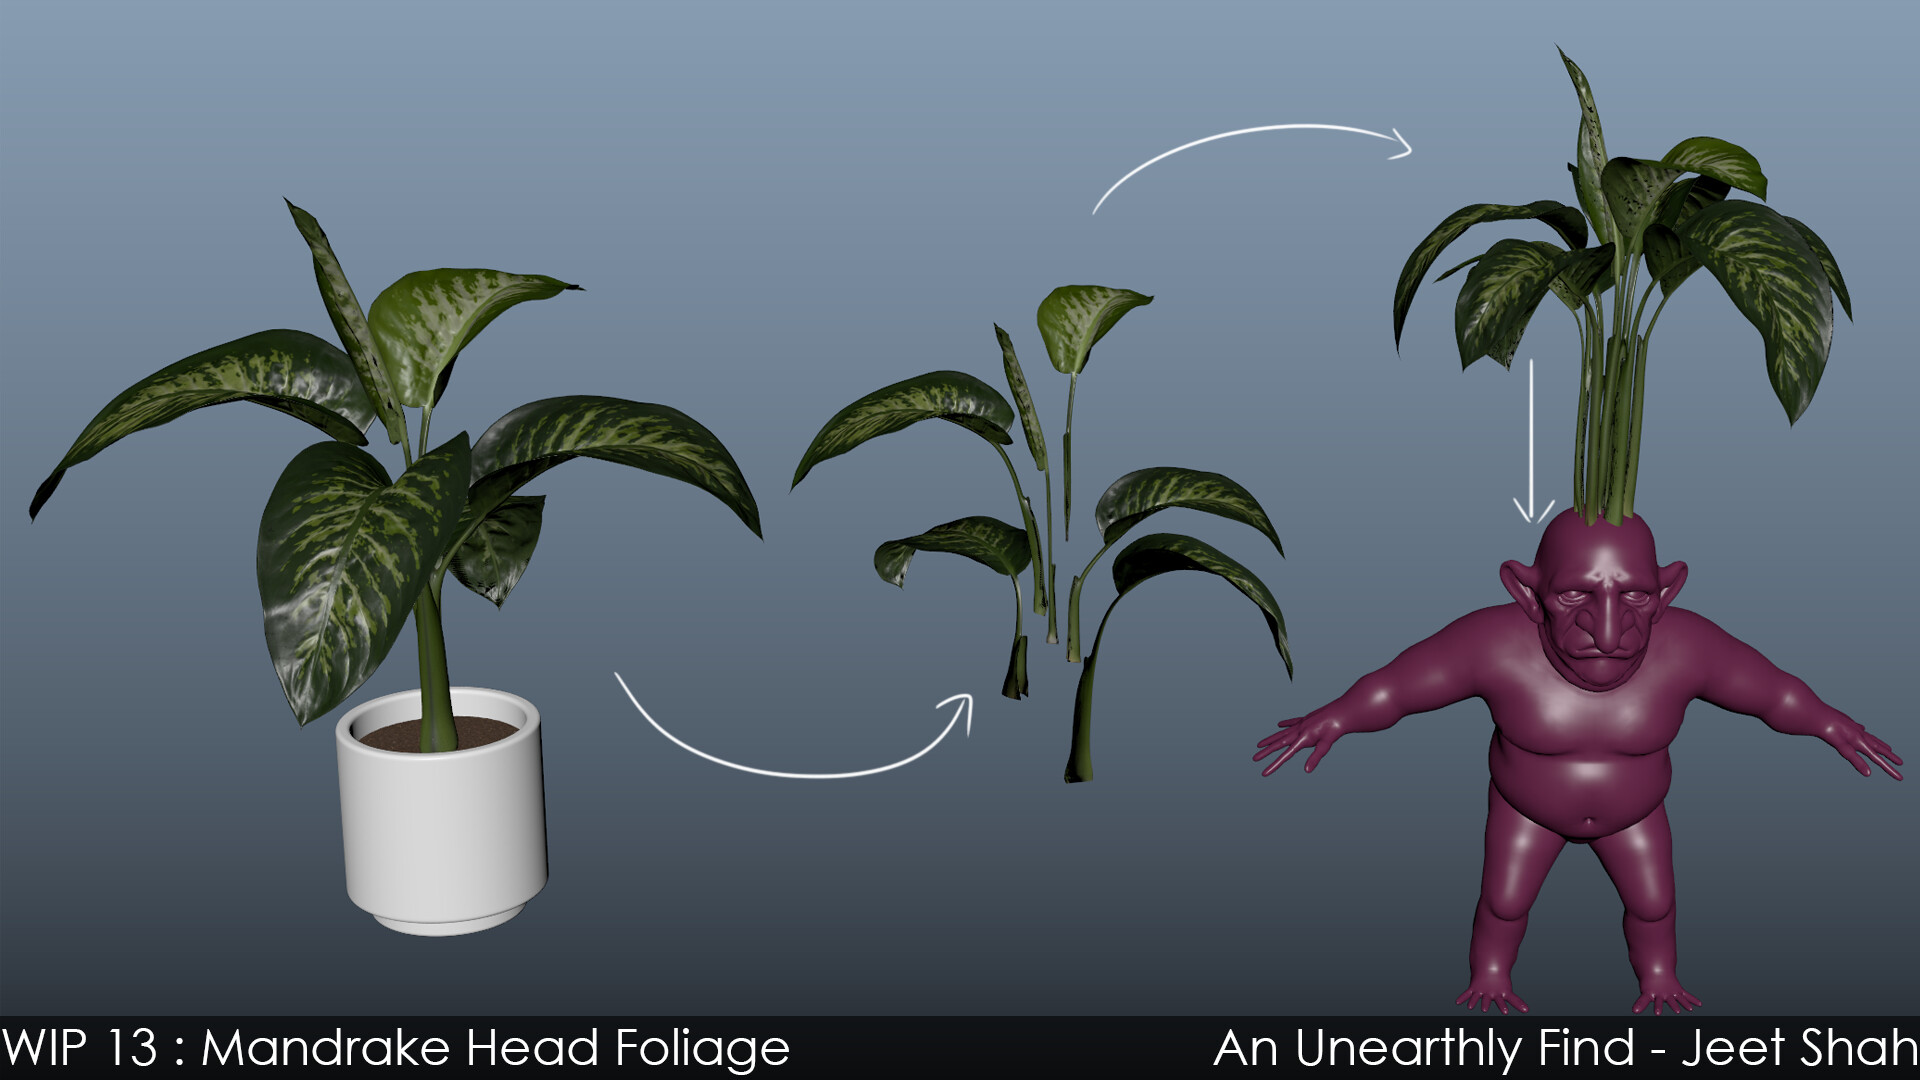
Found a free plant model on textures.com, I would’ve created the leaves on my own using the same technique as I did the flower on her sandals. But fortunately the leaves on the free model were something that matched well so I decided to use those after separating them out and placing them as per my requirement.
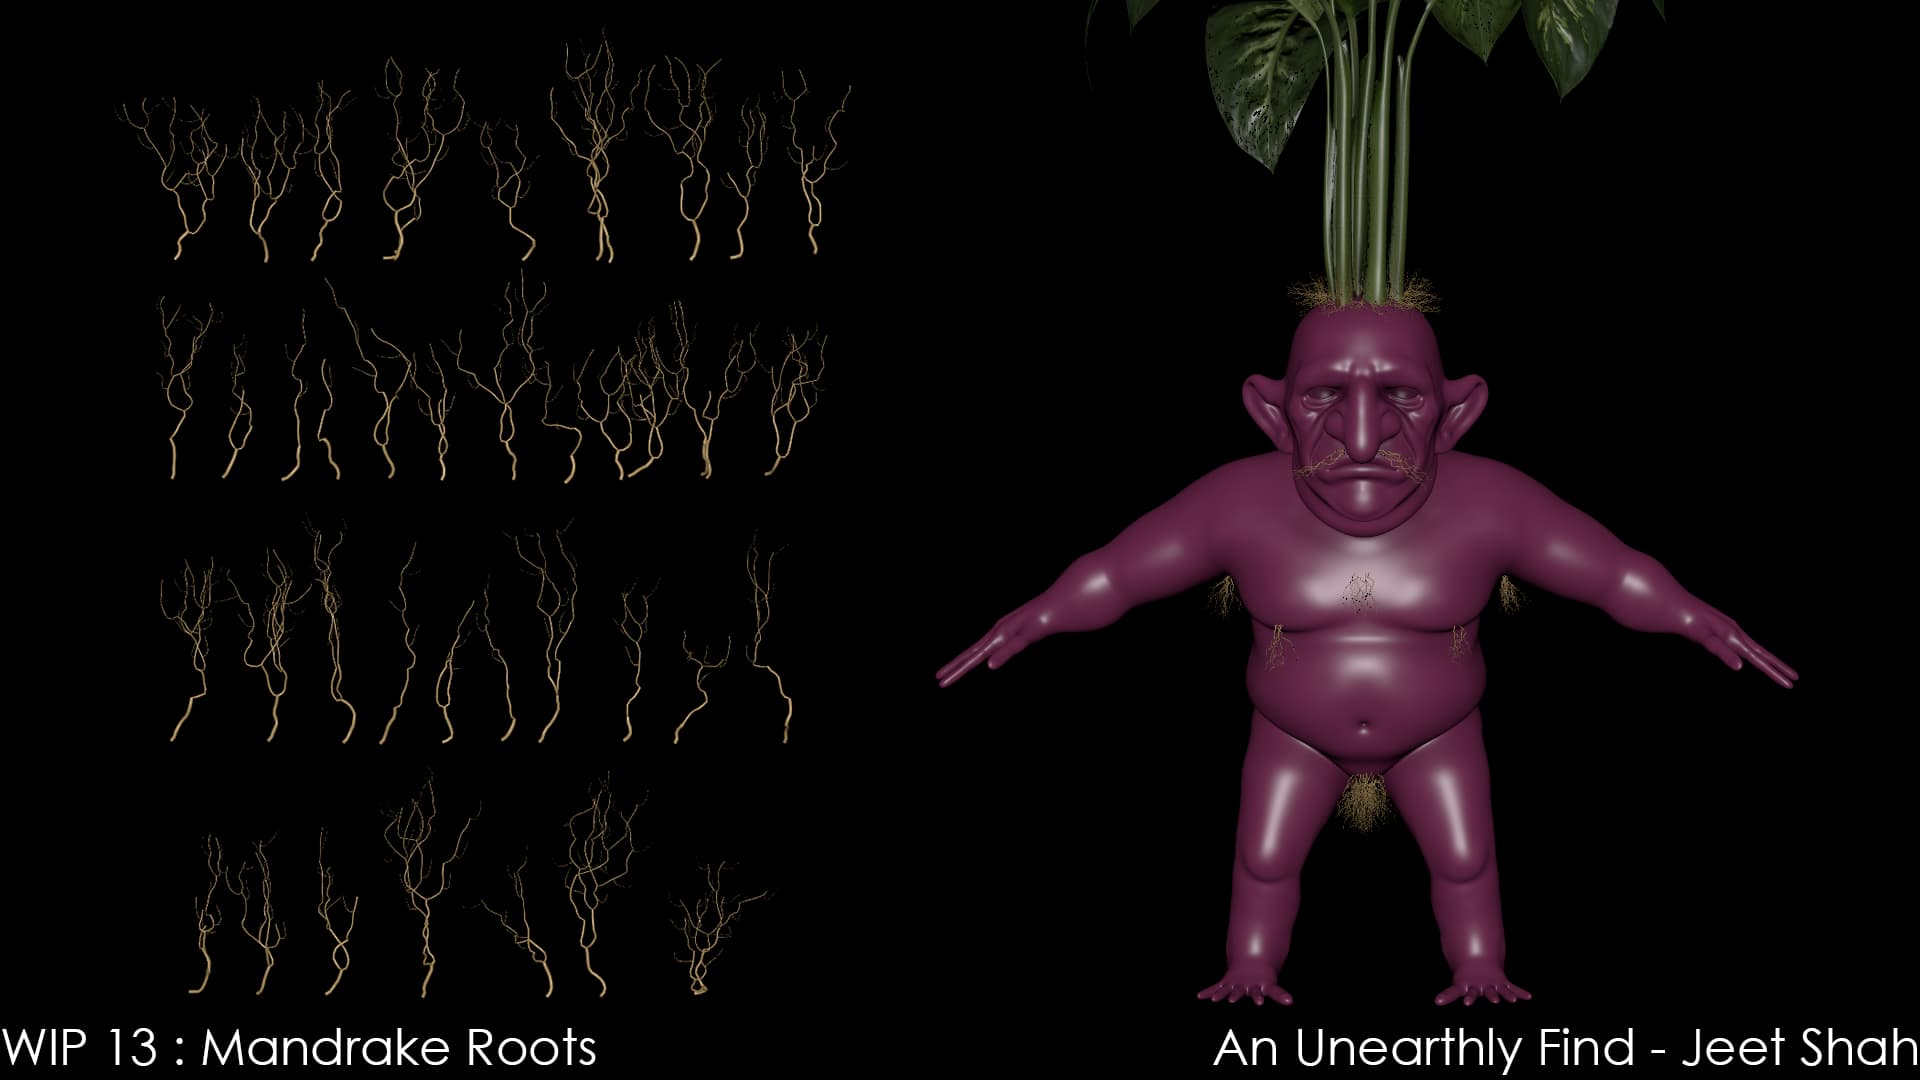
Decided on making the root/tendrils on his body with one of Maya’s legacy tool - PaintFX. It still surprises me how much of a valuable tool it still is. Here’s a timelapse of my process to make them:
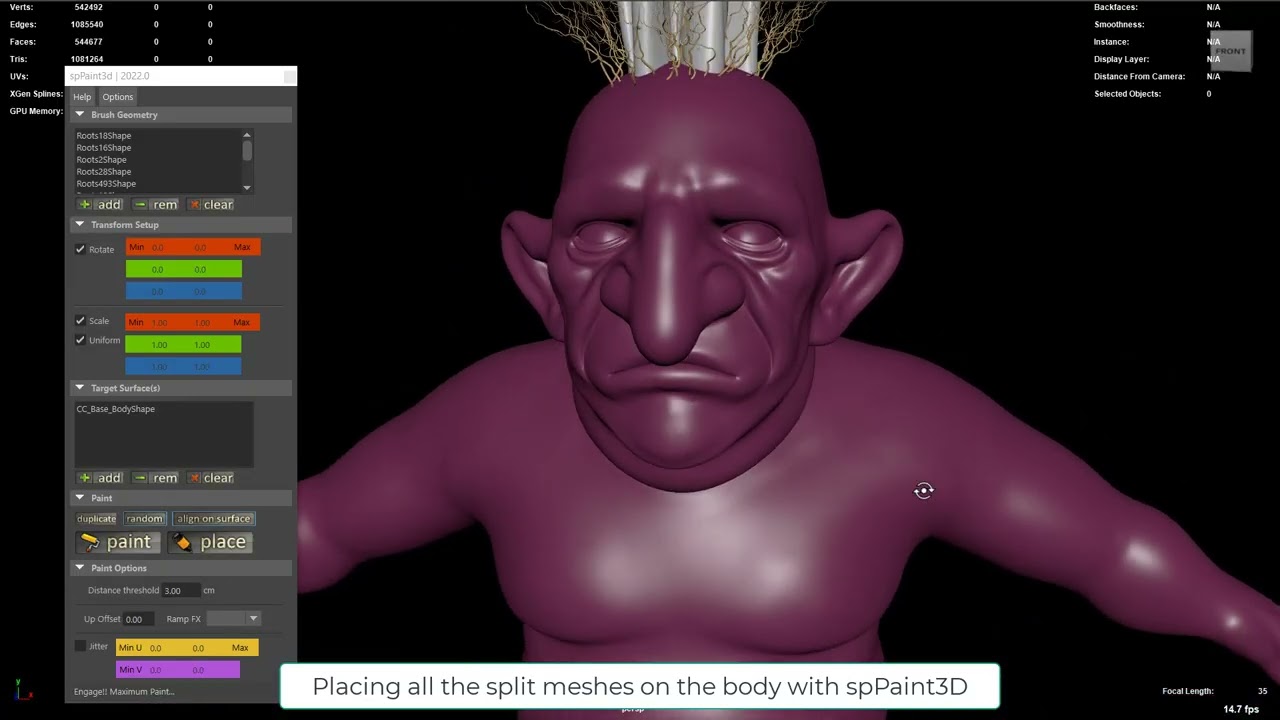
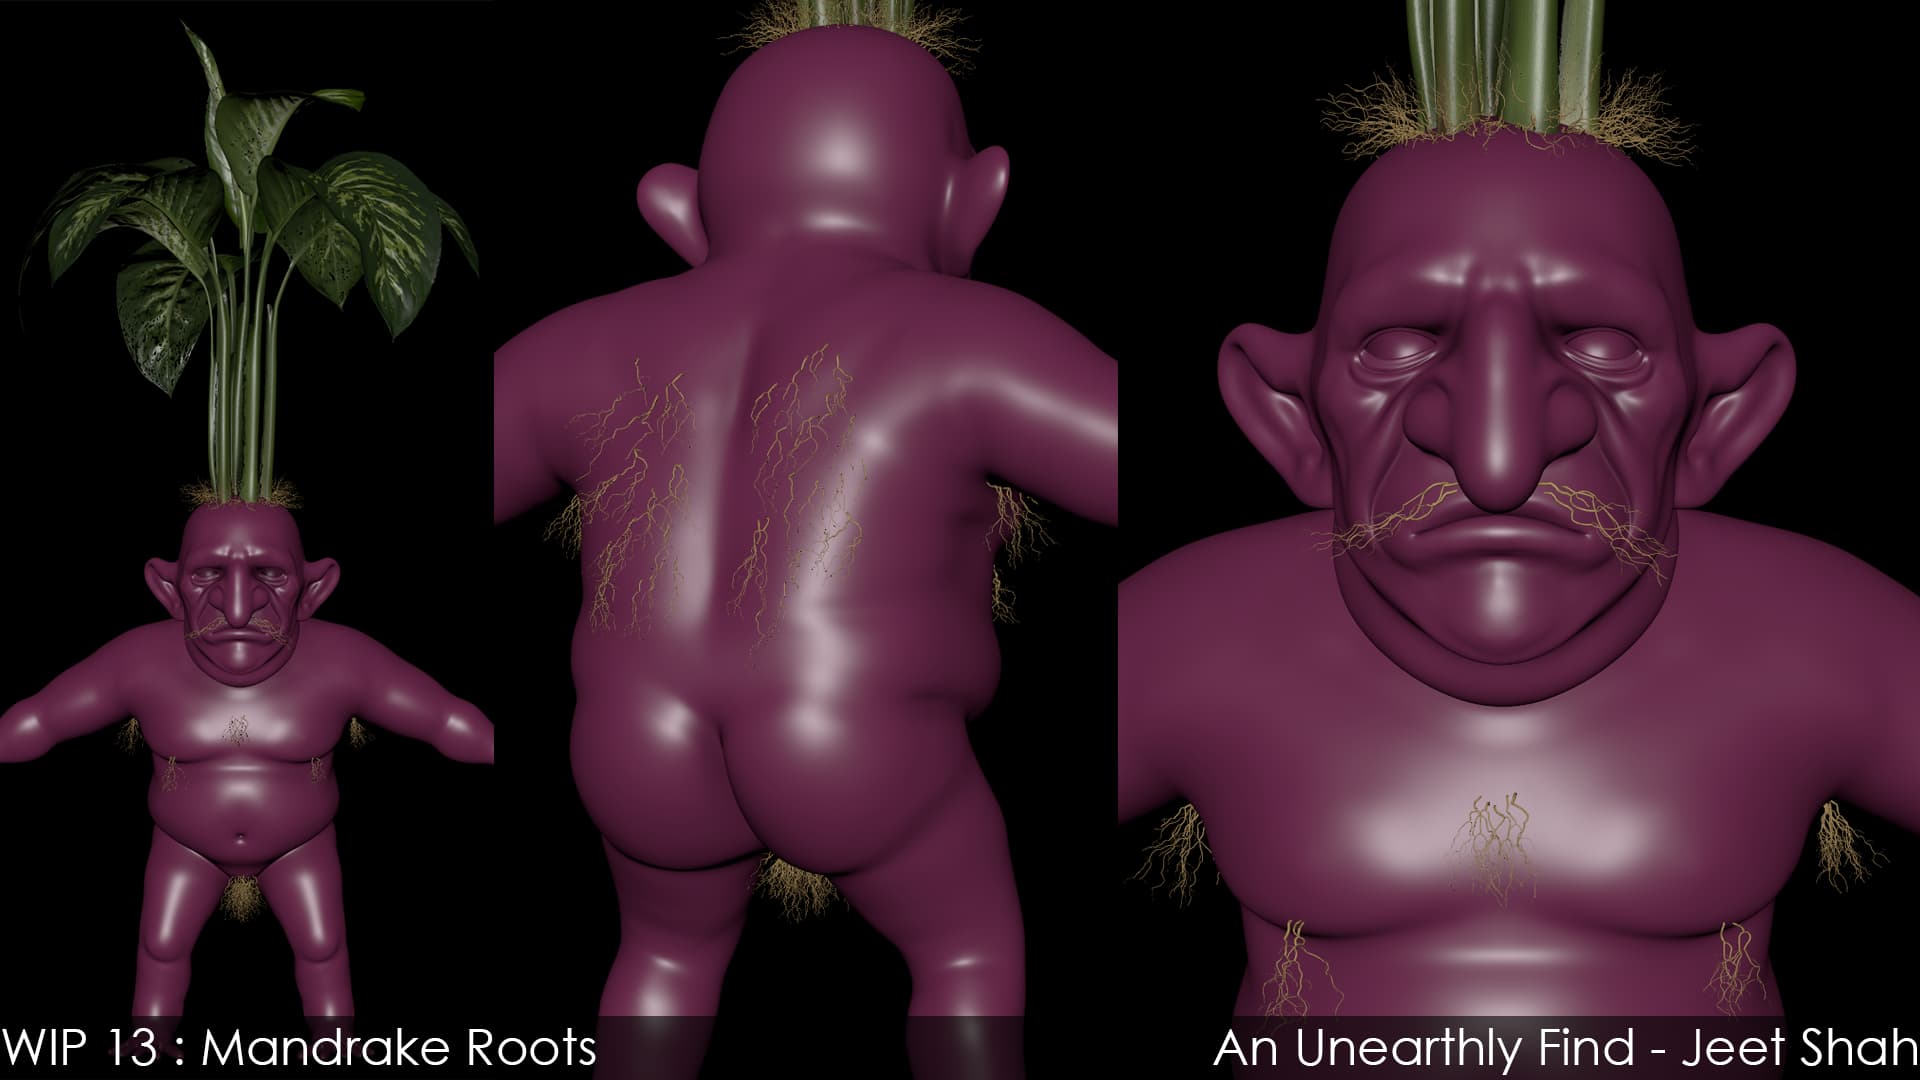
After making the roots I scattered them onto the model by using spPaint3D tool in Maya. I’ll be using the tool again for generating all of the foliage on the girl and her surroundings later on.
And here’s what he looks like with the roots and tendrils.
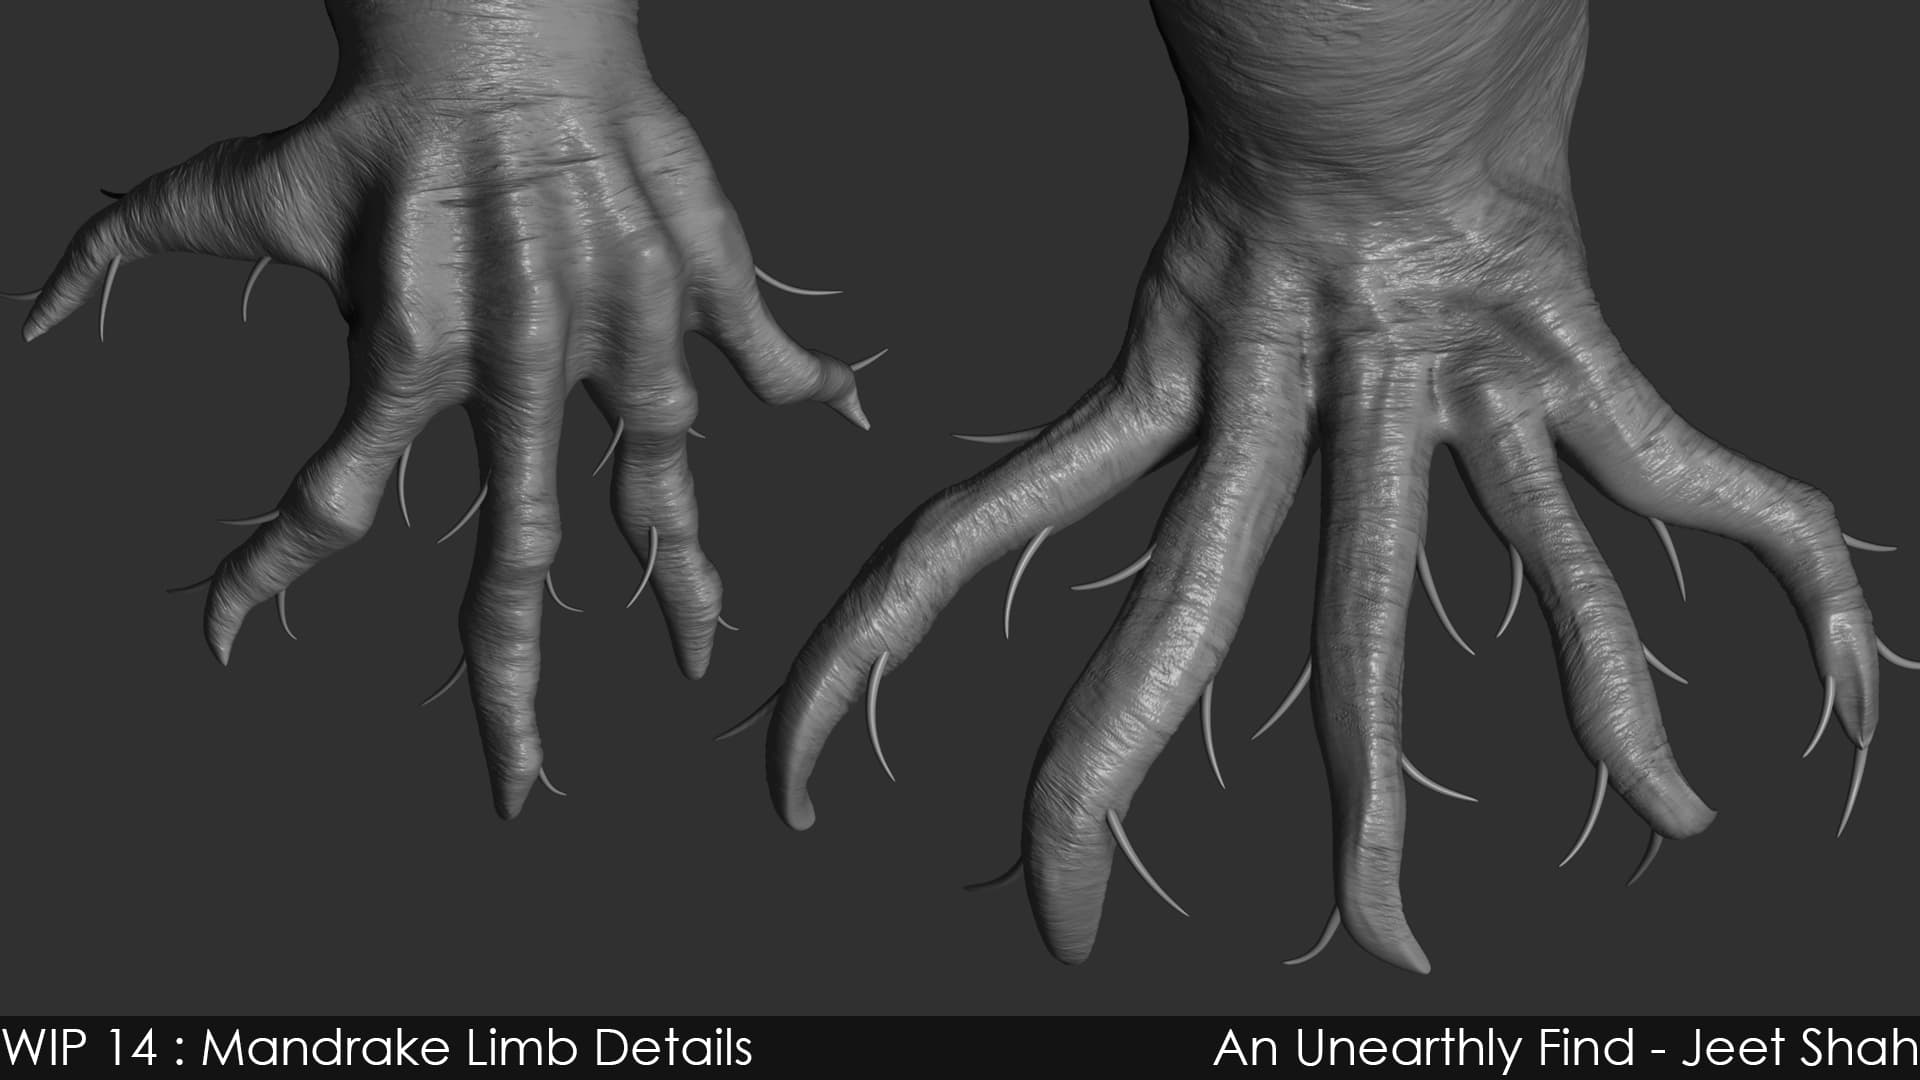
Now back onto Zbrush to shape his fingers and toes into roots.
4 Likes
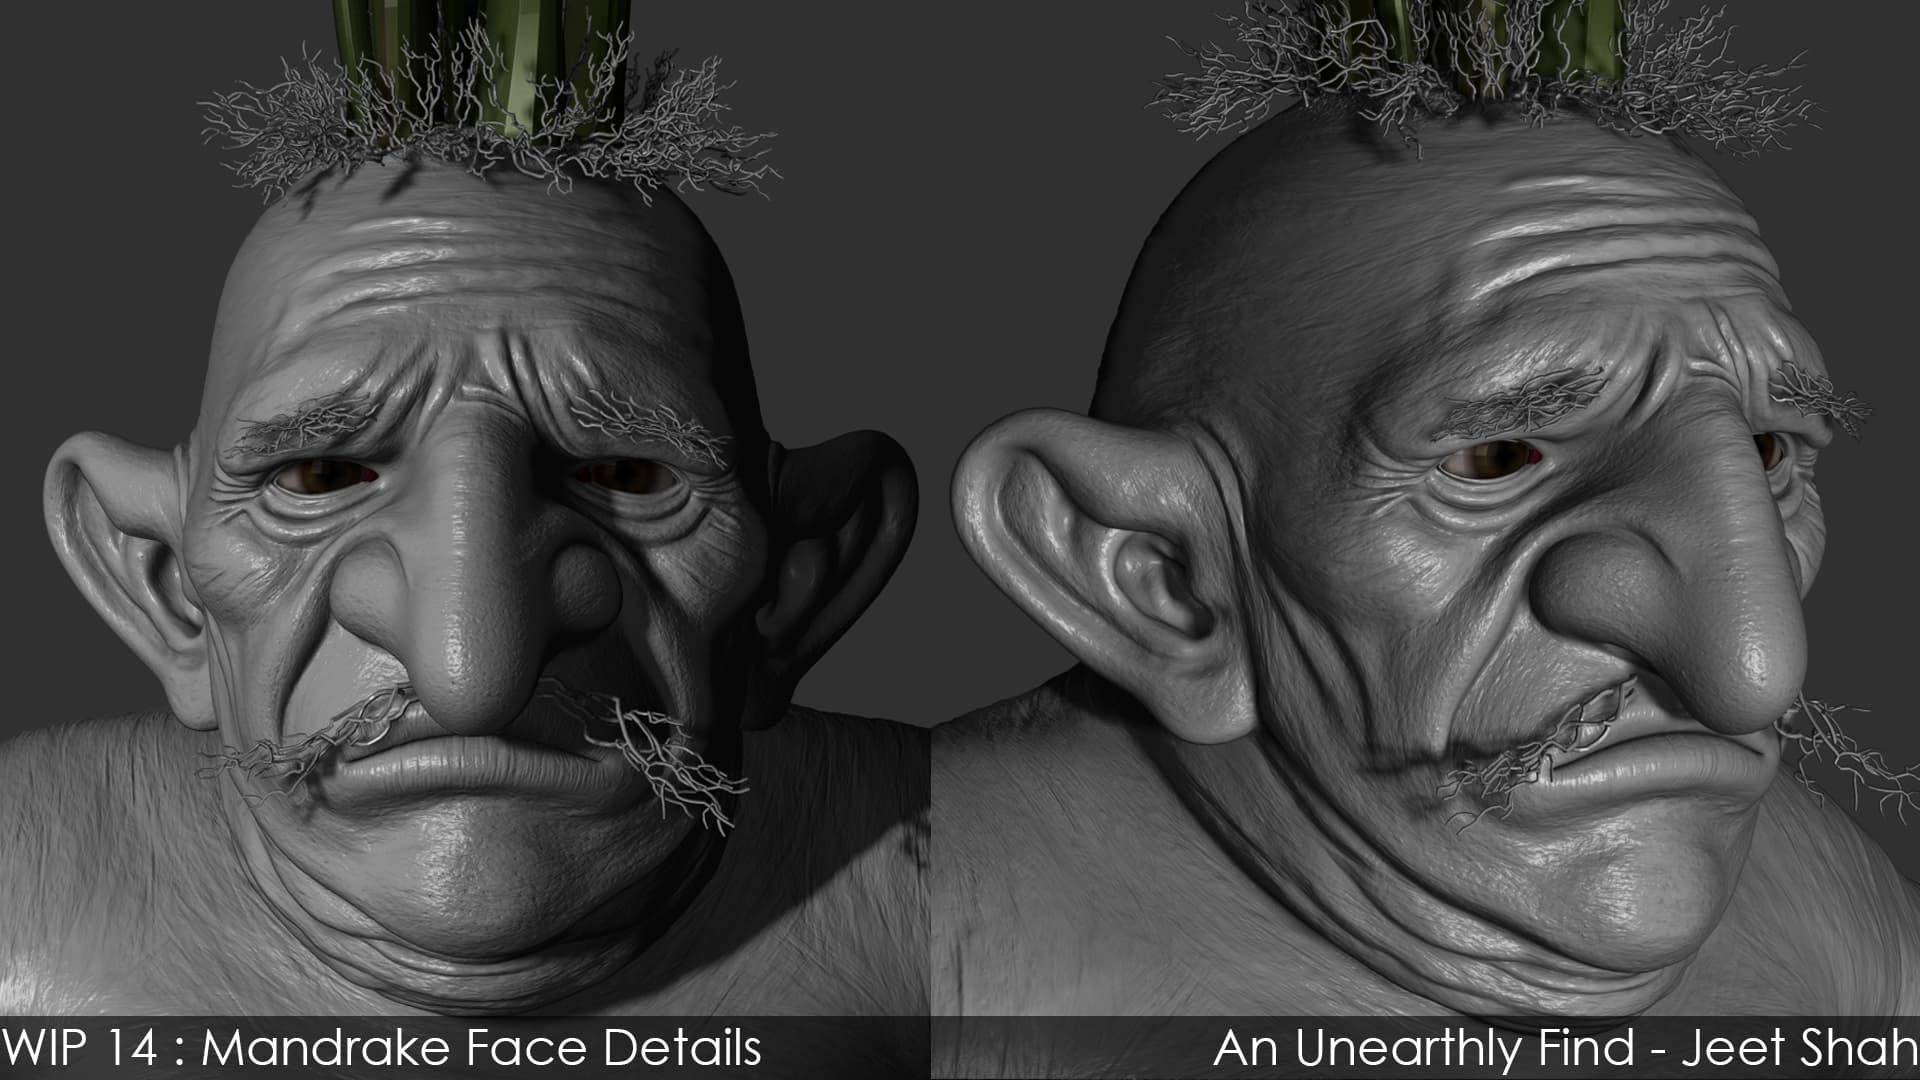
A detail pass on the Mandrake. Hoping to do one more pass before the deadline if time permits. But I guess for a secondary character this would need to do for now.
Now onto detailing the herbologist next.
2 Likes
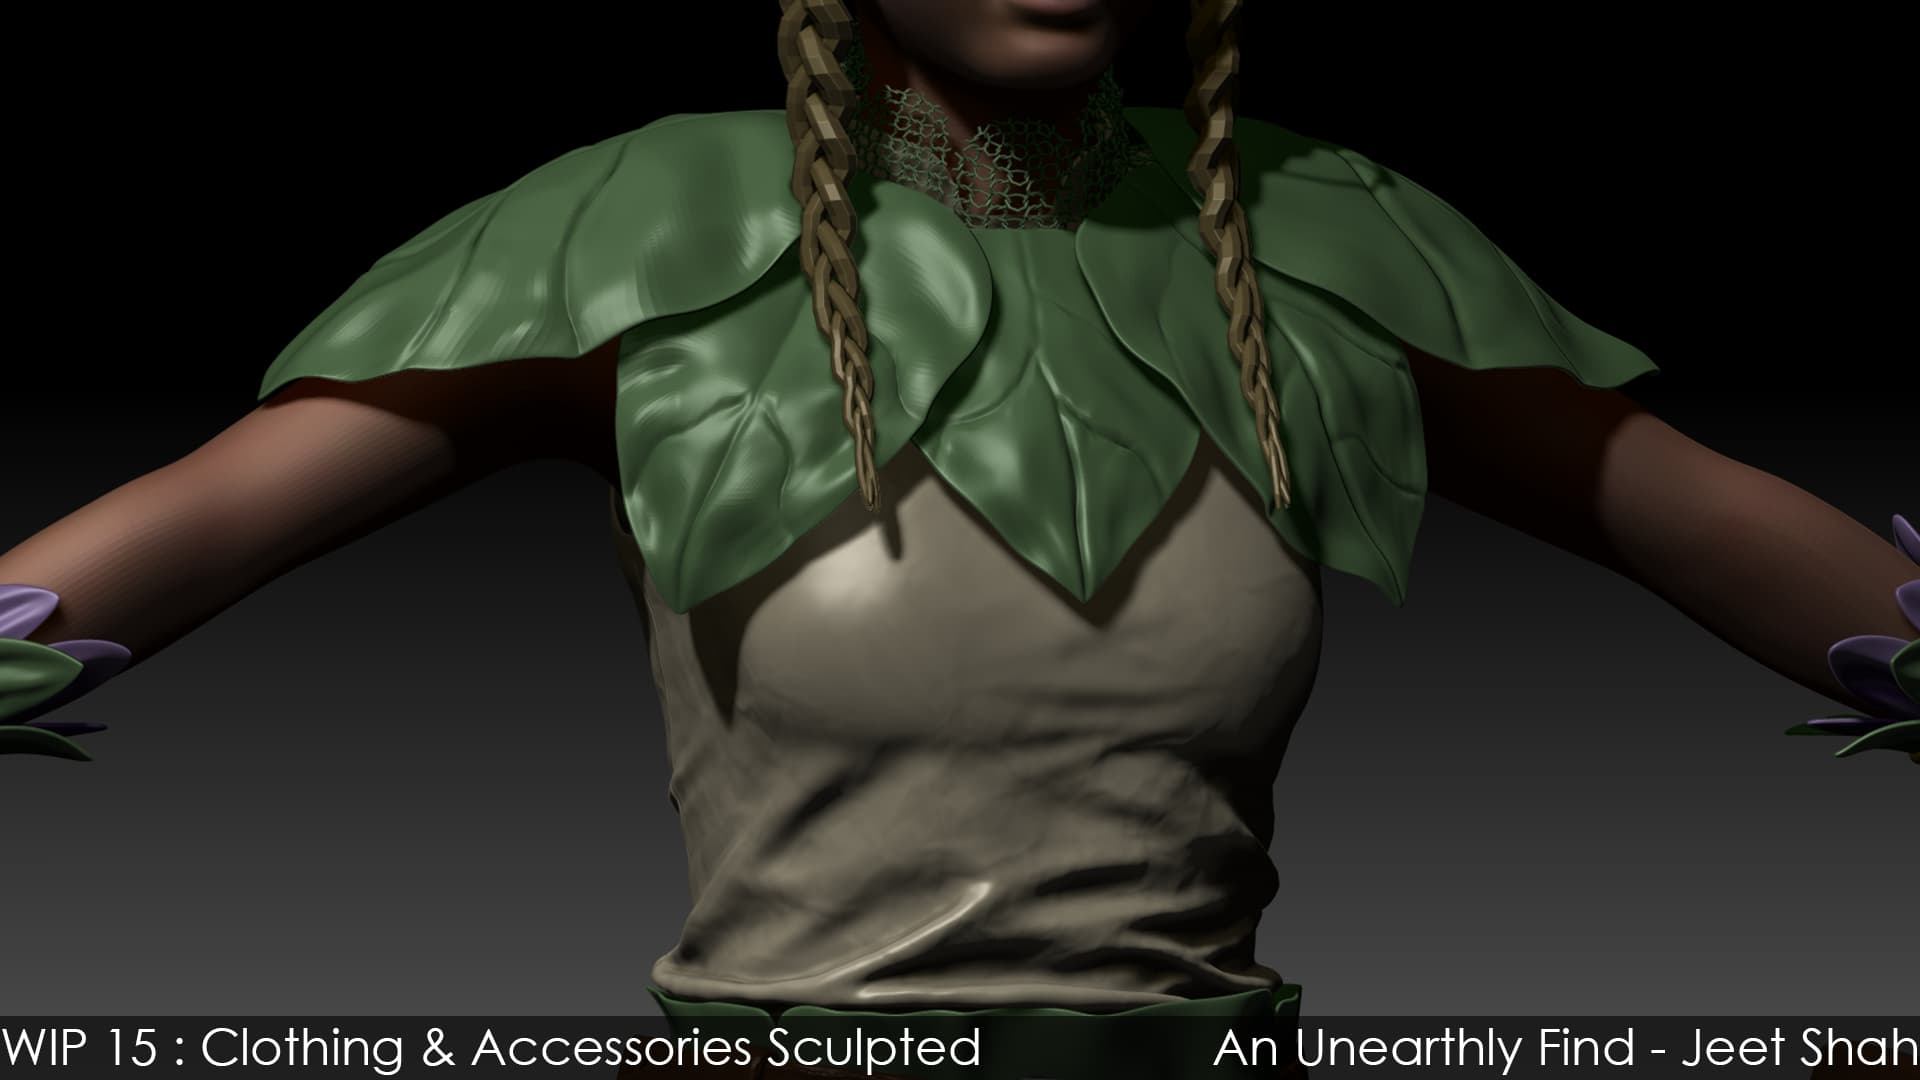
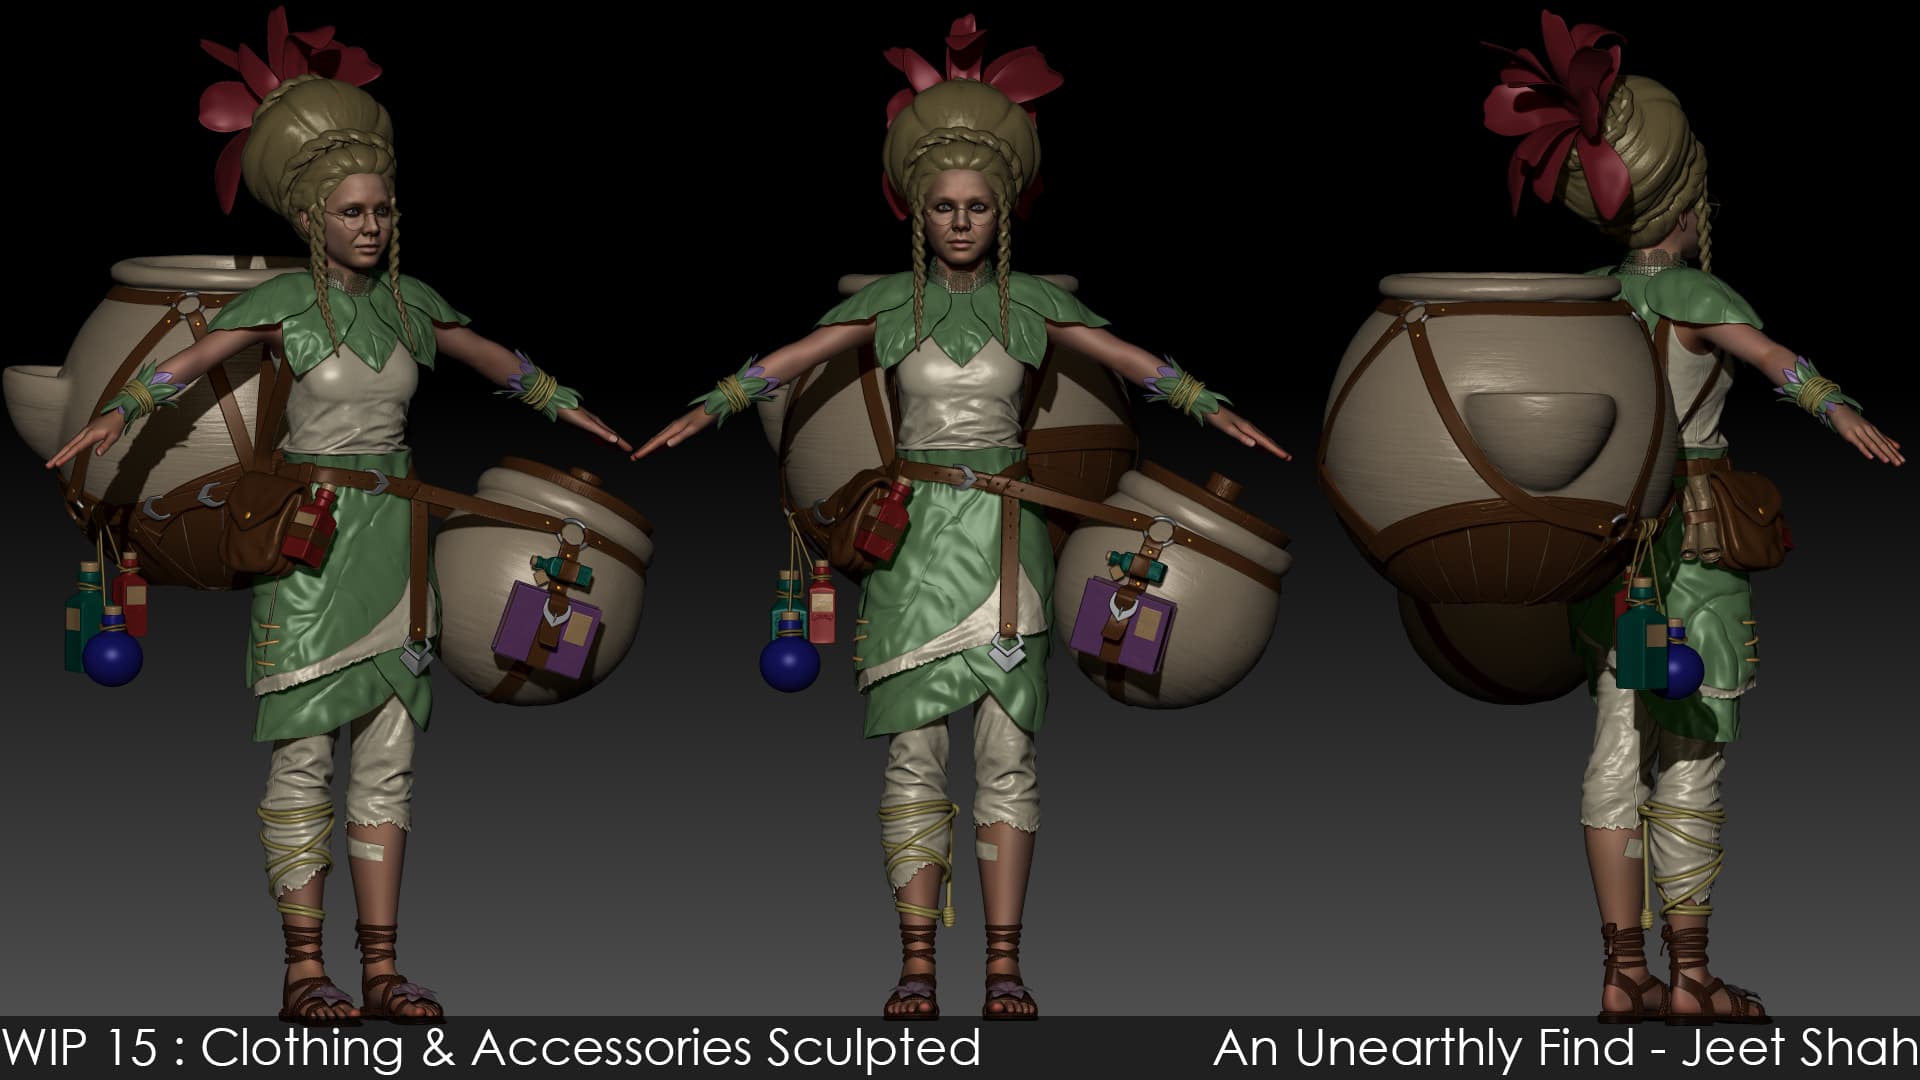
Been a good few days since my last update. Finalized all the meshes on the herbologist- Rosaline. And sculpted the details for the displacement maps.
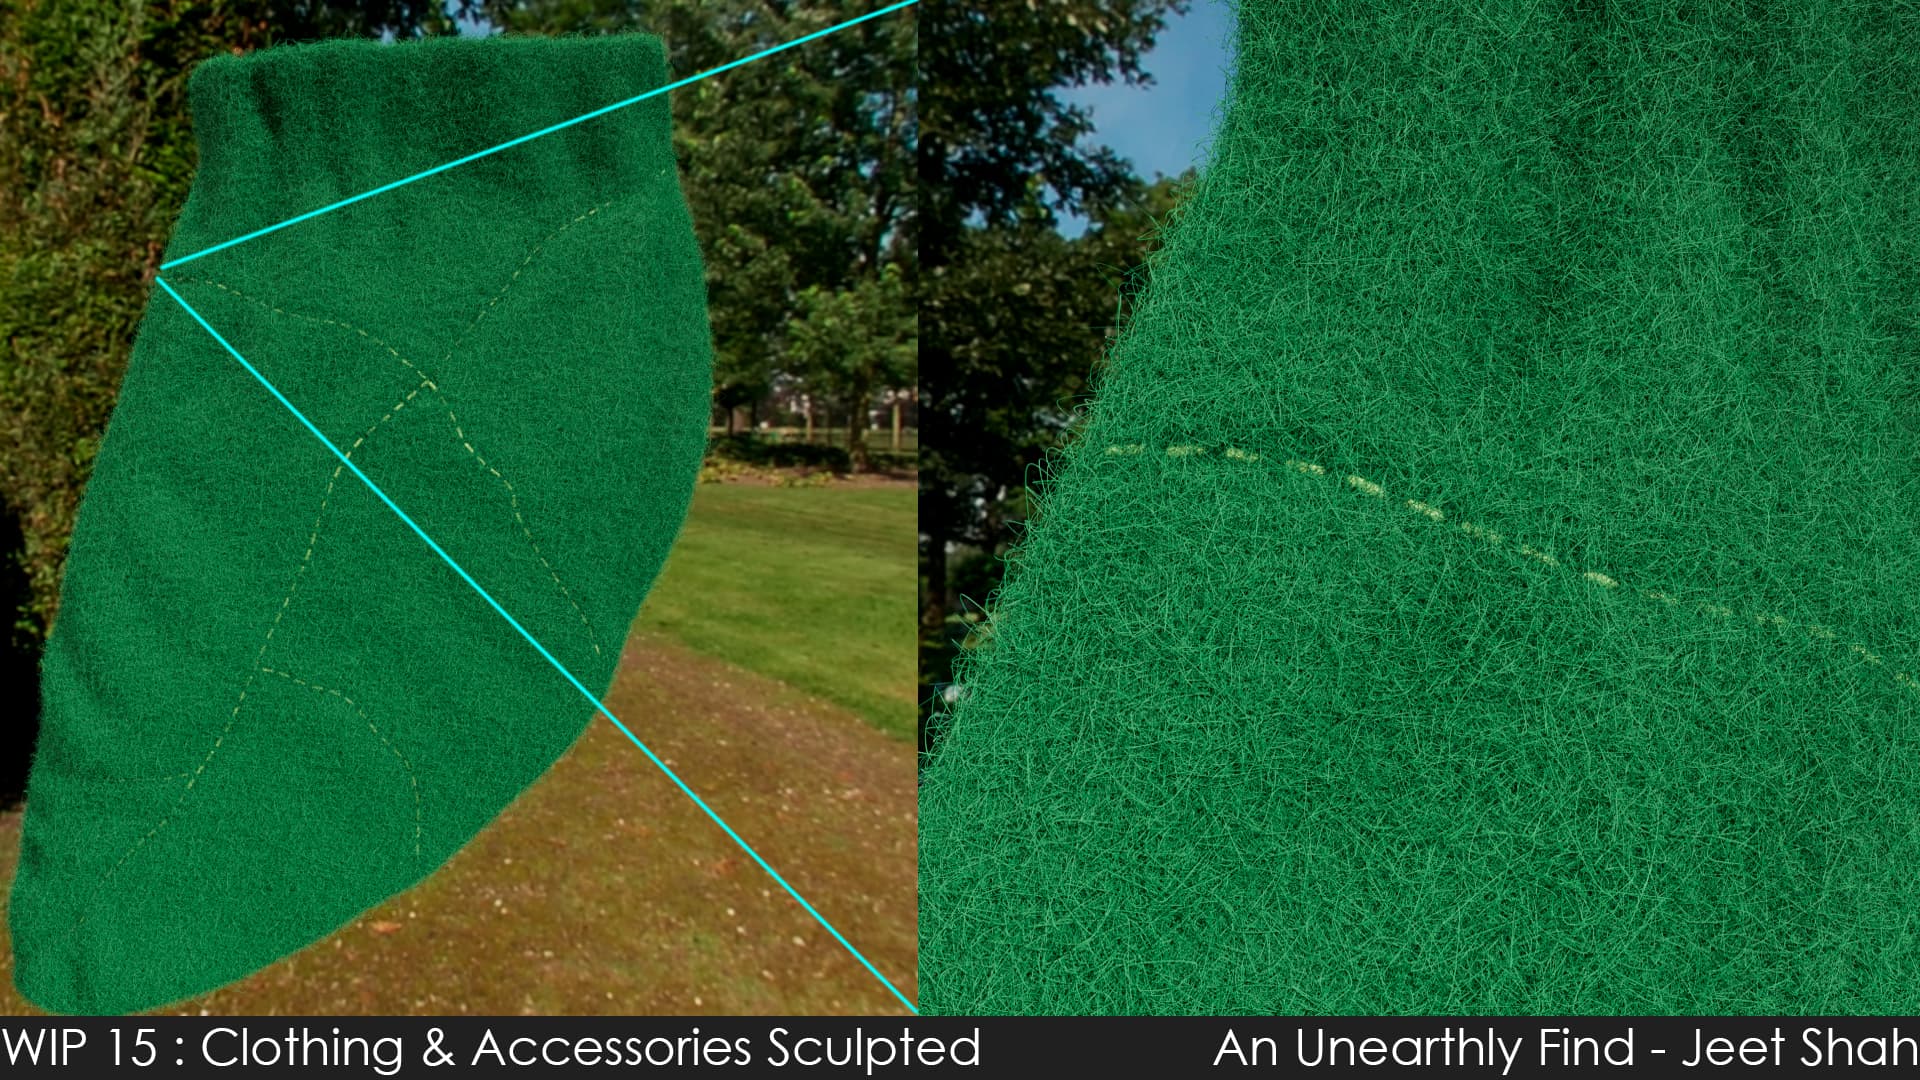
Some quick Lookdev RnD on how the felt material is going to look like in Maya. Instead of relying on displacement maps decided to have actual geometry seamlines and stitches on the felt leaves to get some of surface bumps in the felt.
Haven’t added the stitches to the Zbrush sculpt. Will be adding them once I finalize the Xgen setup and knowing how deep the stitches need to be.
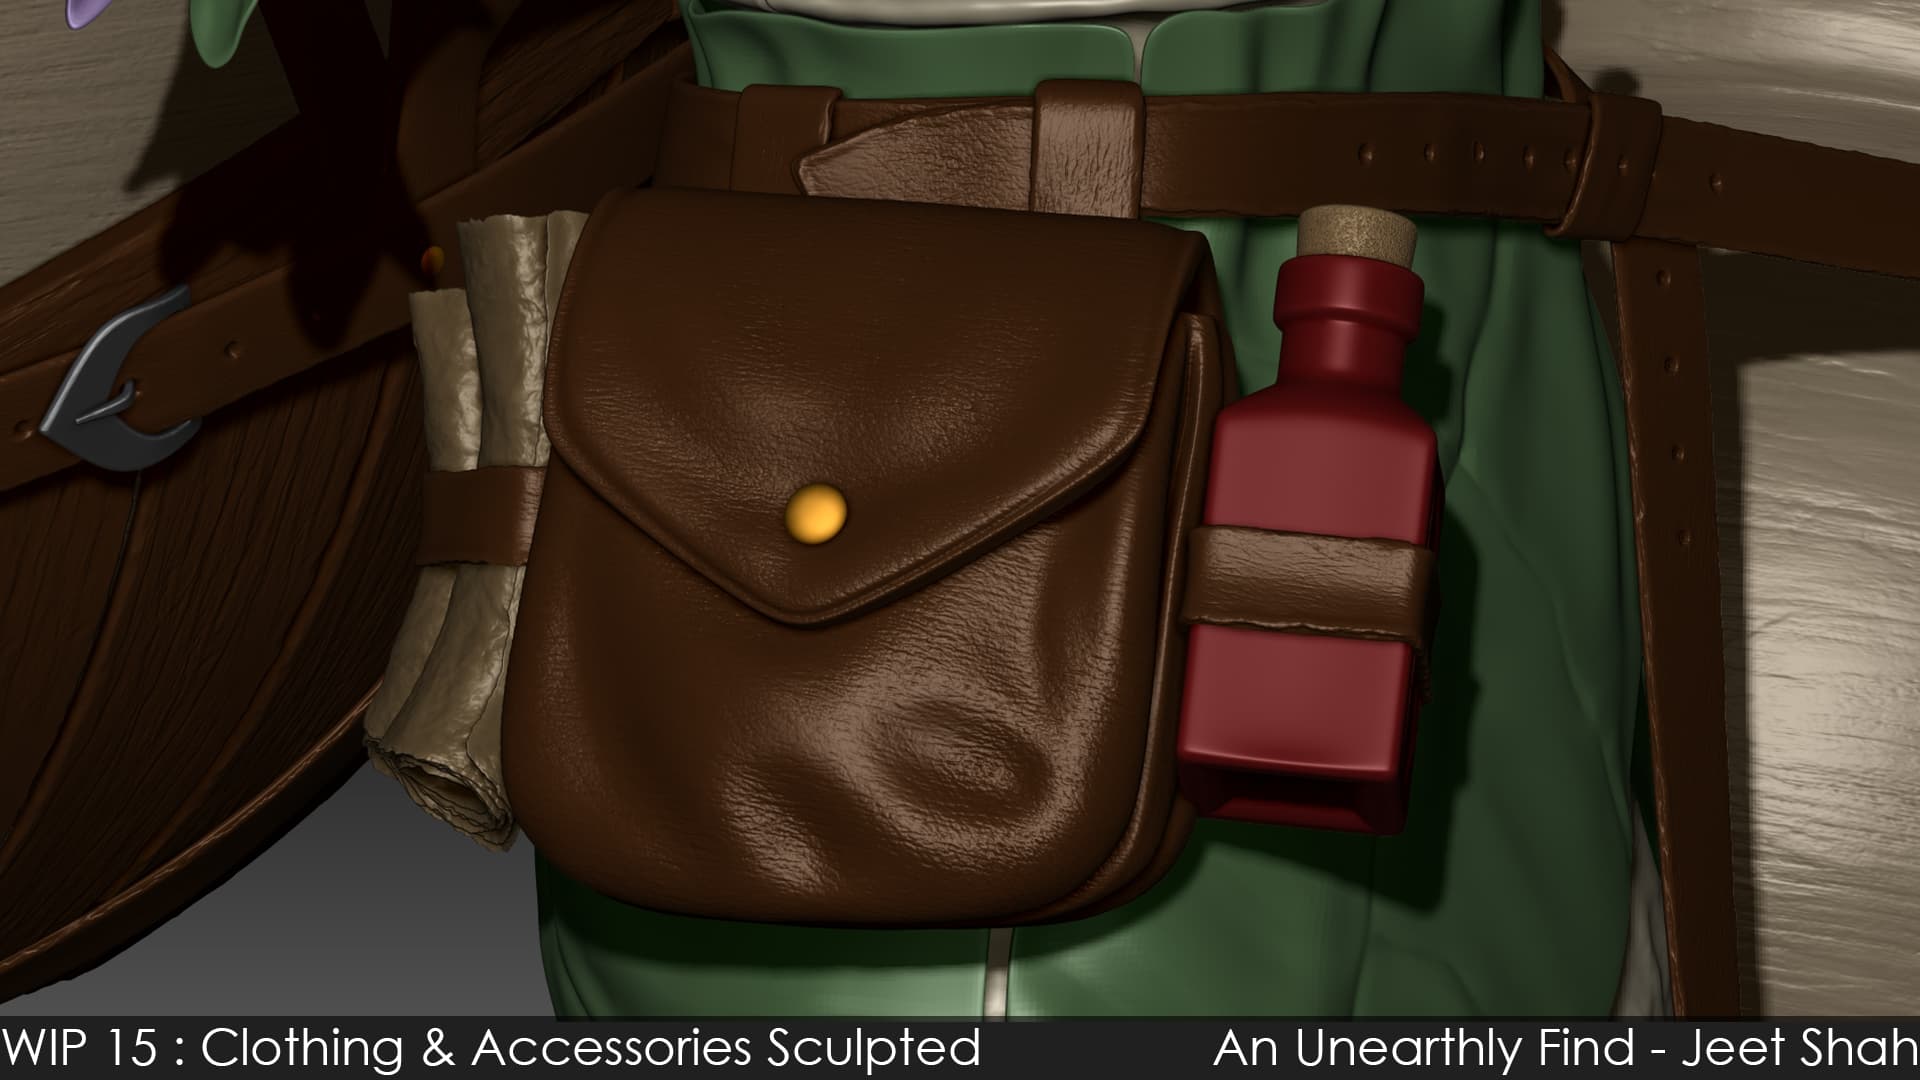
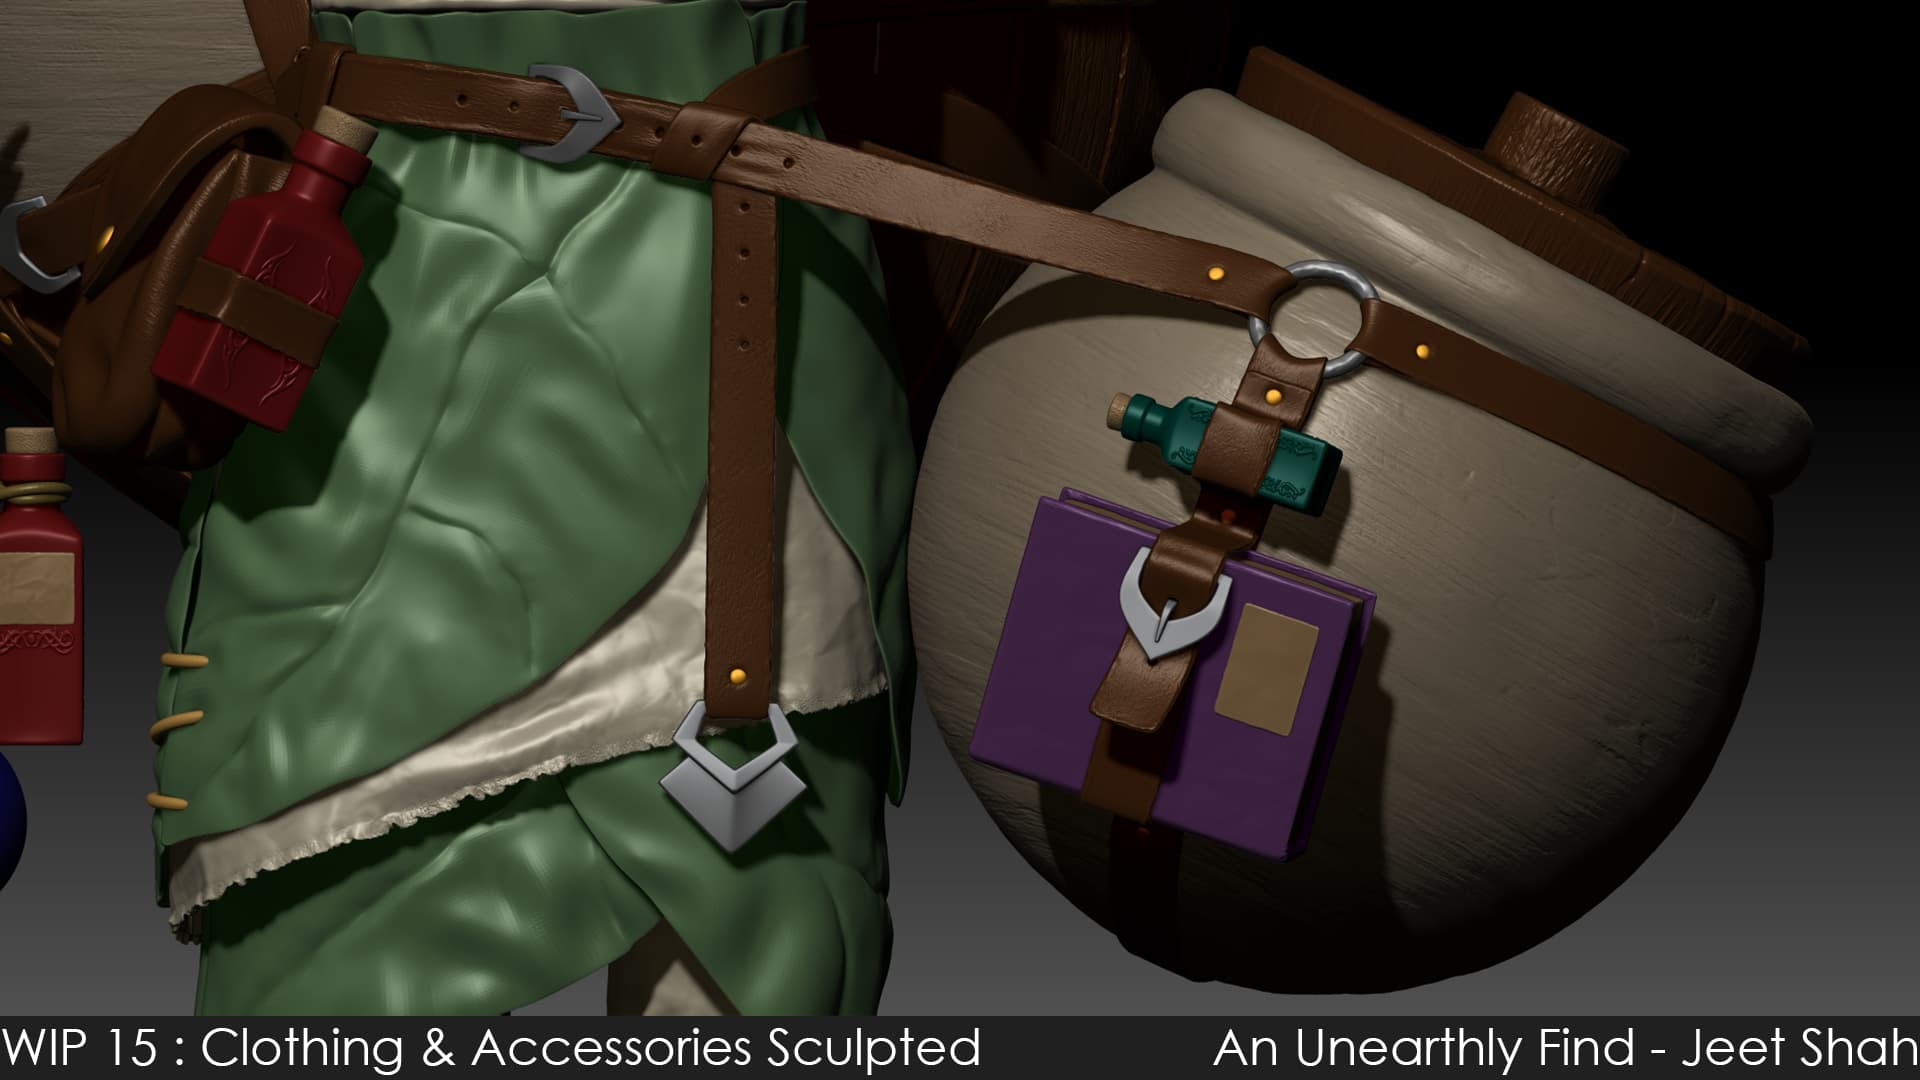
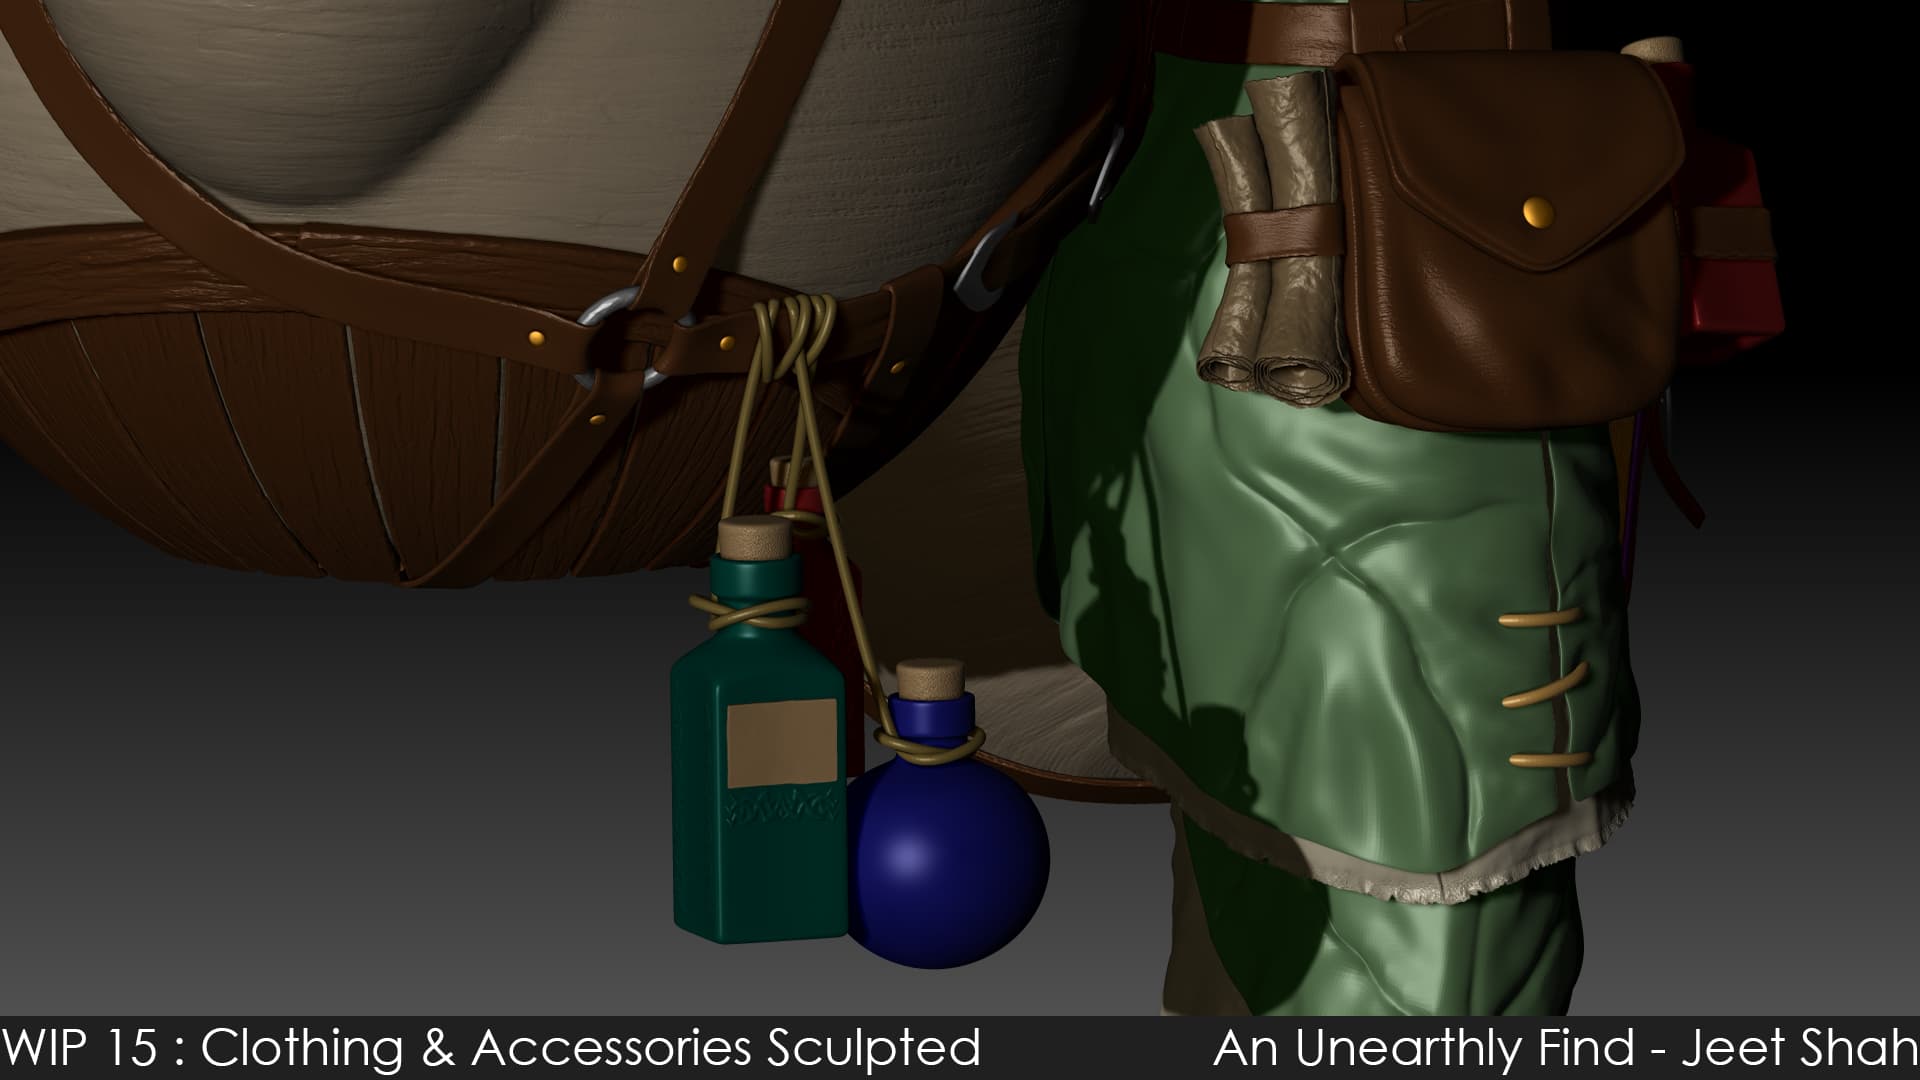
Here are some of the accessories closeup:
Now onto sculpting and detailing the skin on Rosaline
3 Likes
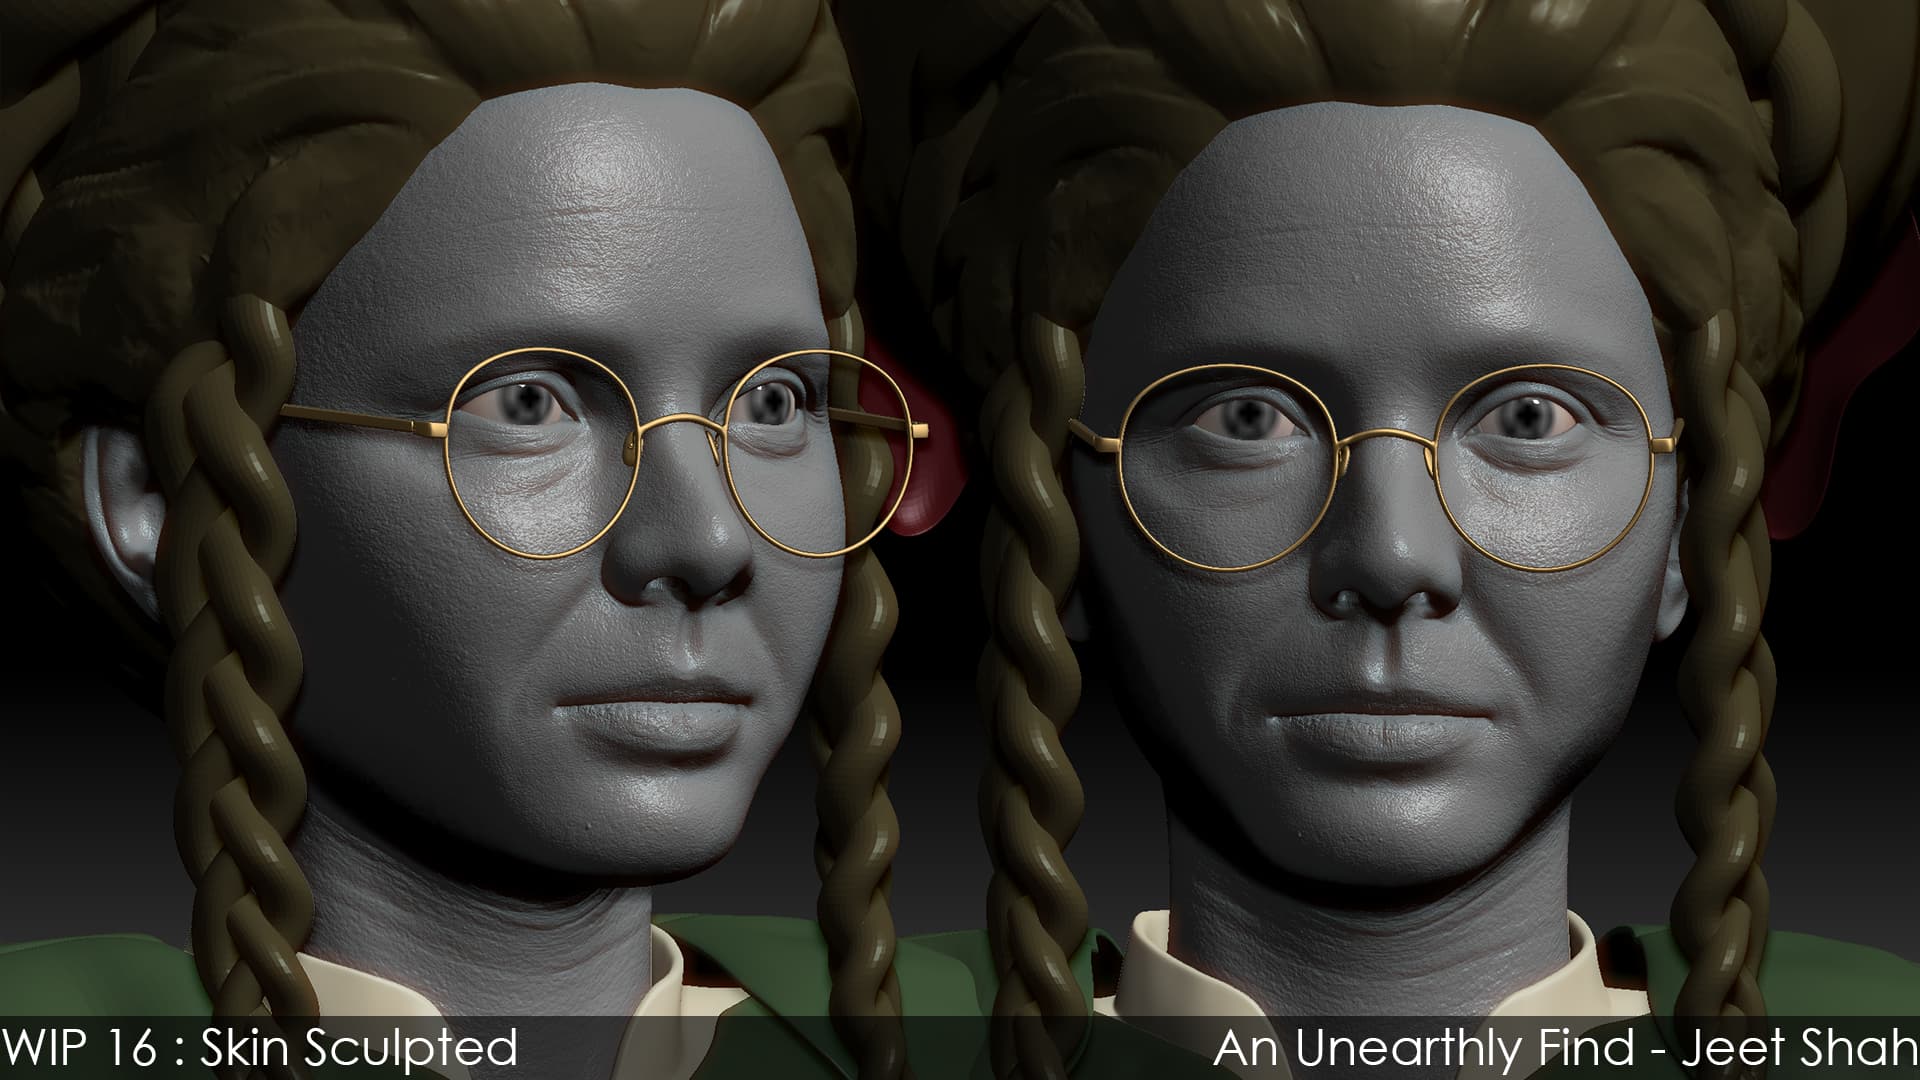
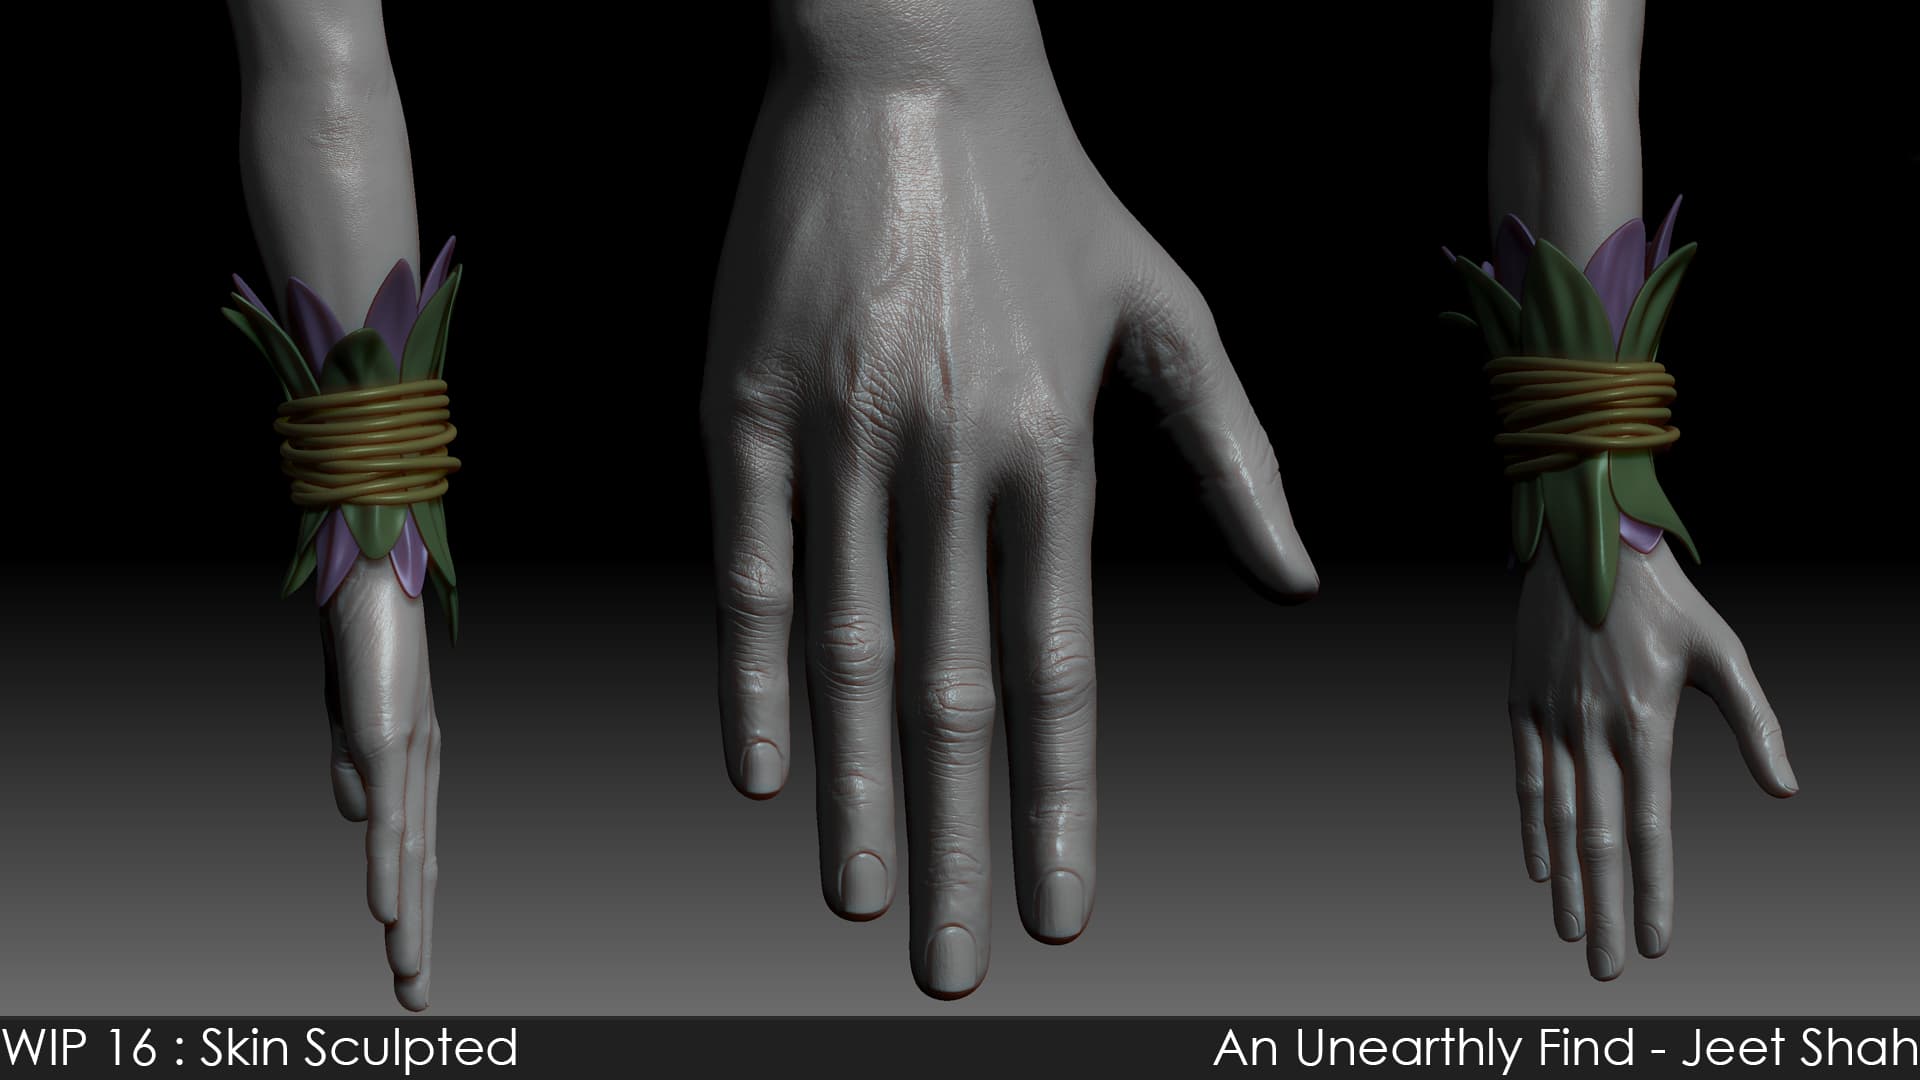
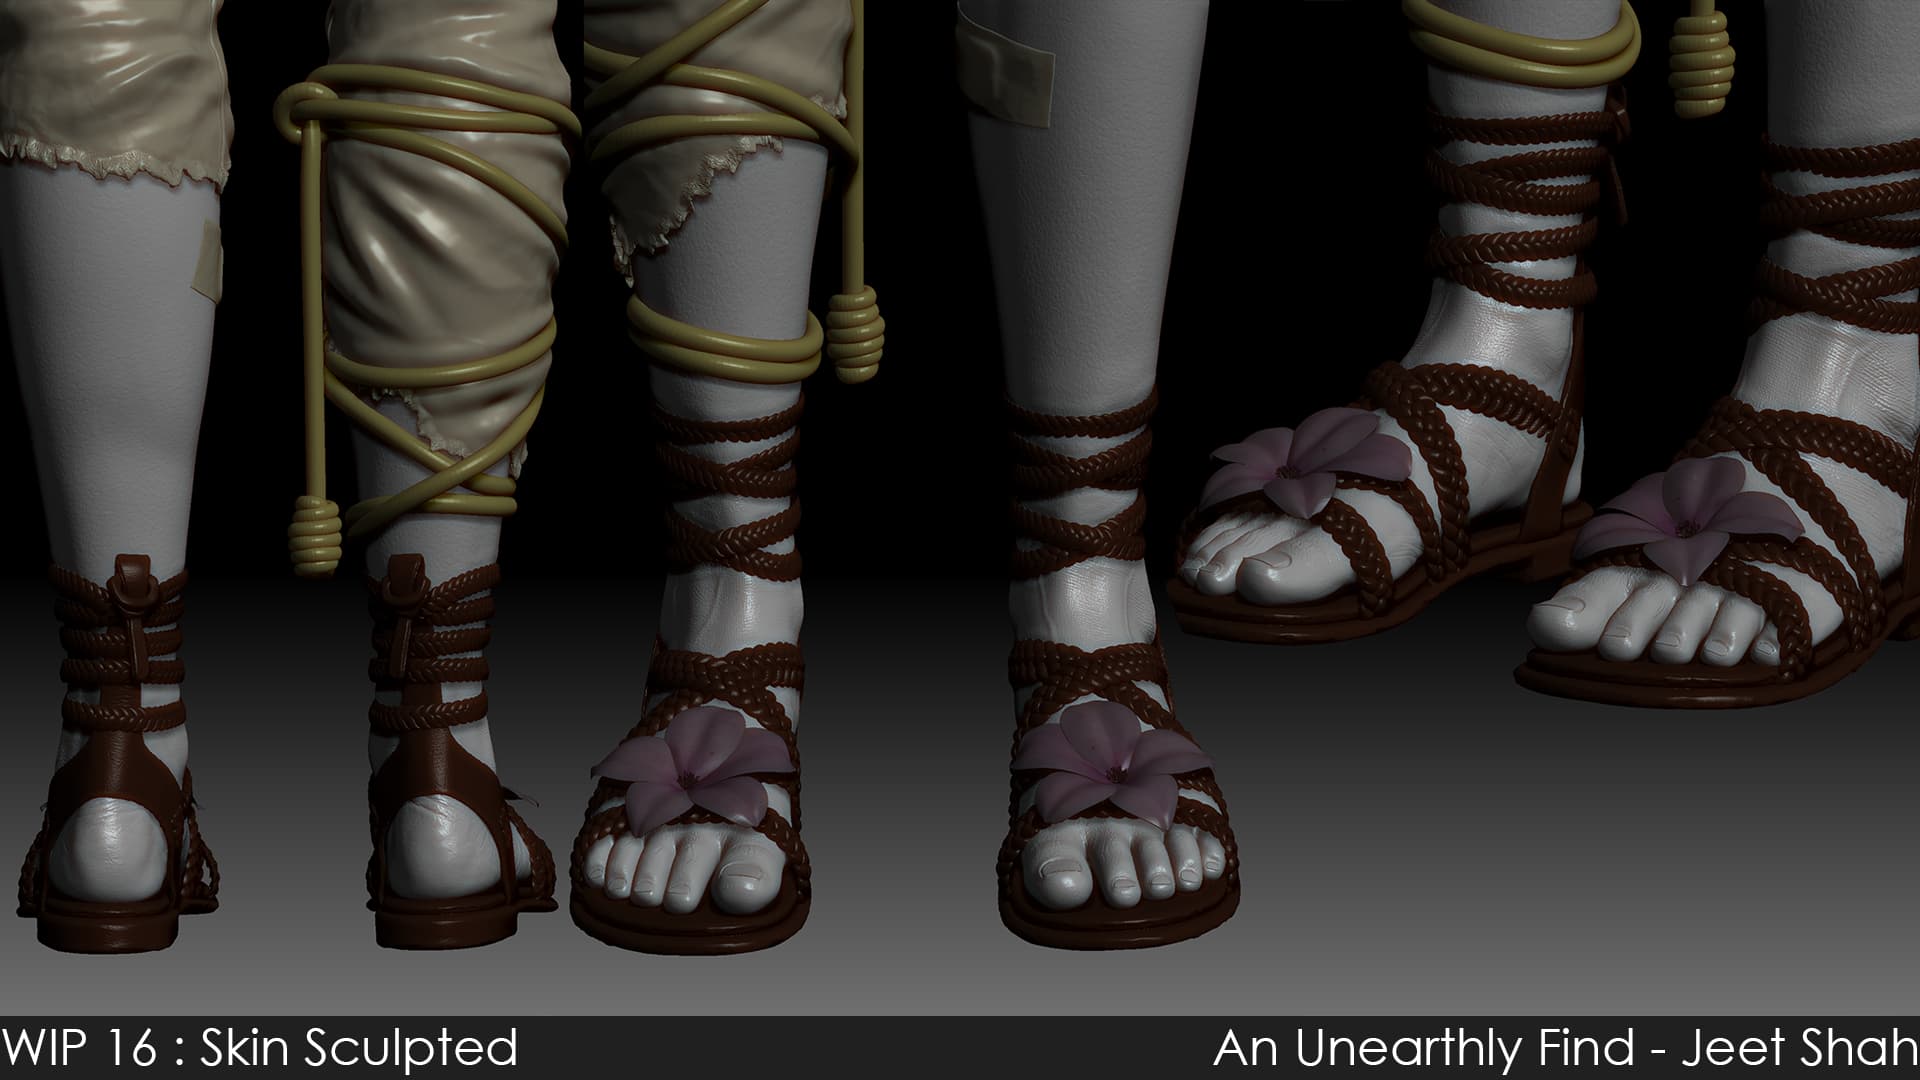
Almost finalized her body sculpt and skin details. Took the Ariana Displacement from CC5 and applied it as a displacement pass. It gave me a solid ground to add more hand sculpted details to enhance certain areas.
Since she’s covered mostly in clothing, it was fairly quick to add these details to the exposed areas.
Also it was long overdue to add some basic anatomical details on her body. Since she’s not very muscular the anatomy details had to be very subtle to not overdo it.
1 Like
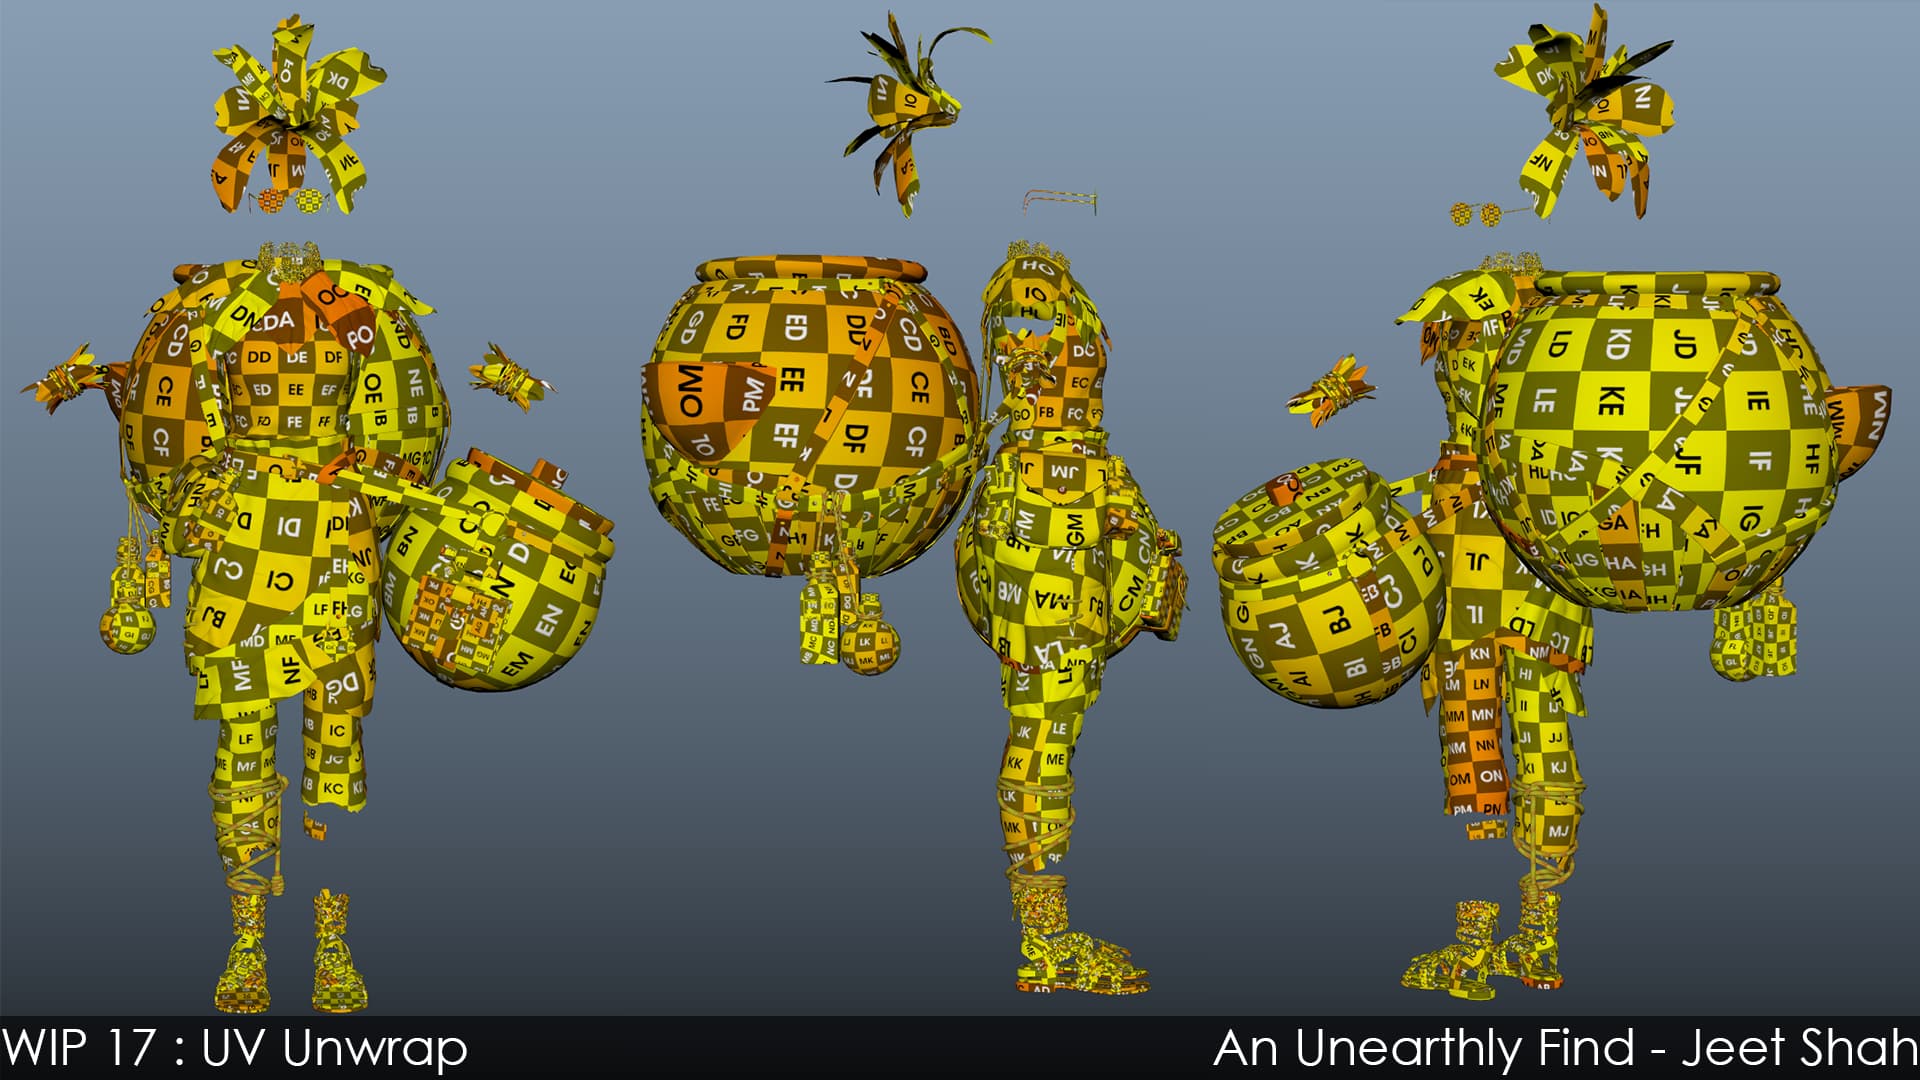
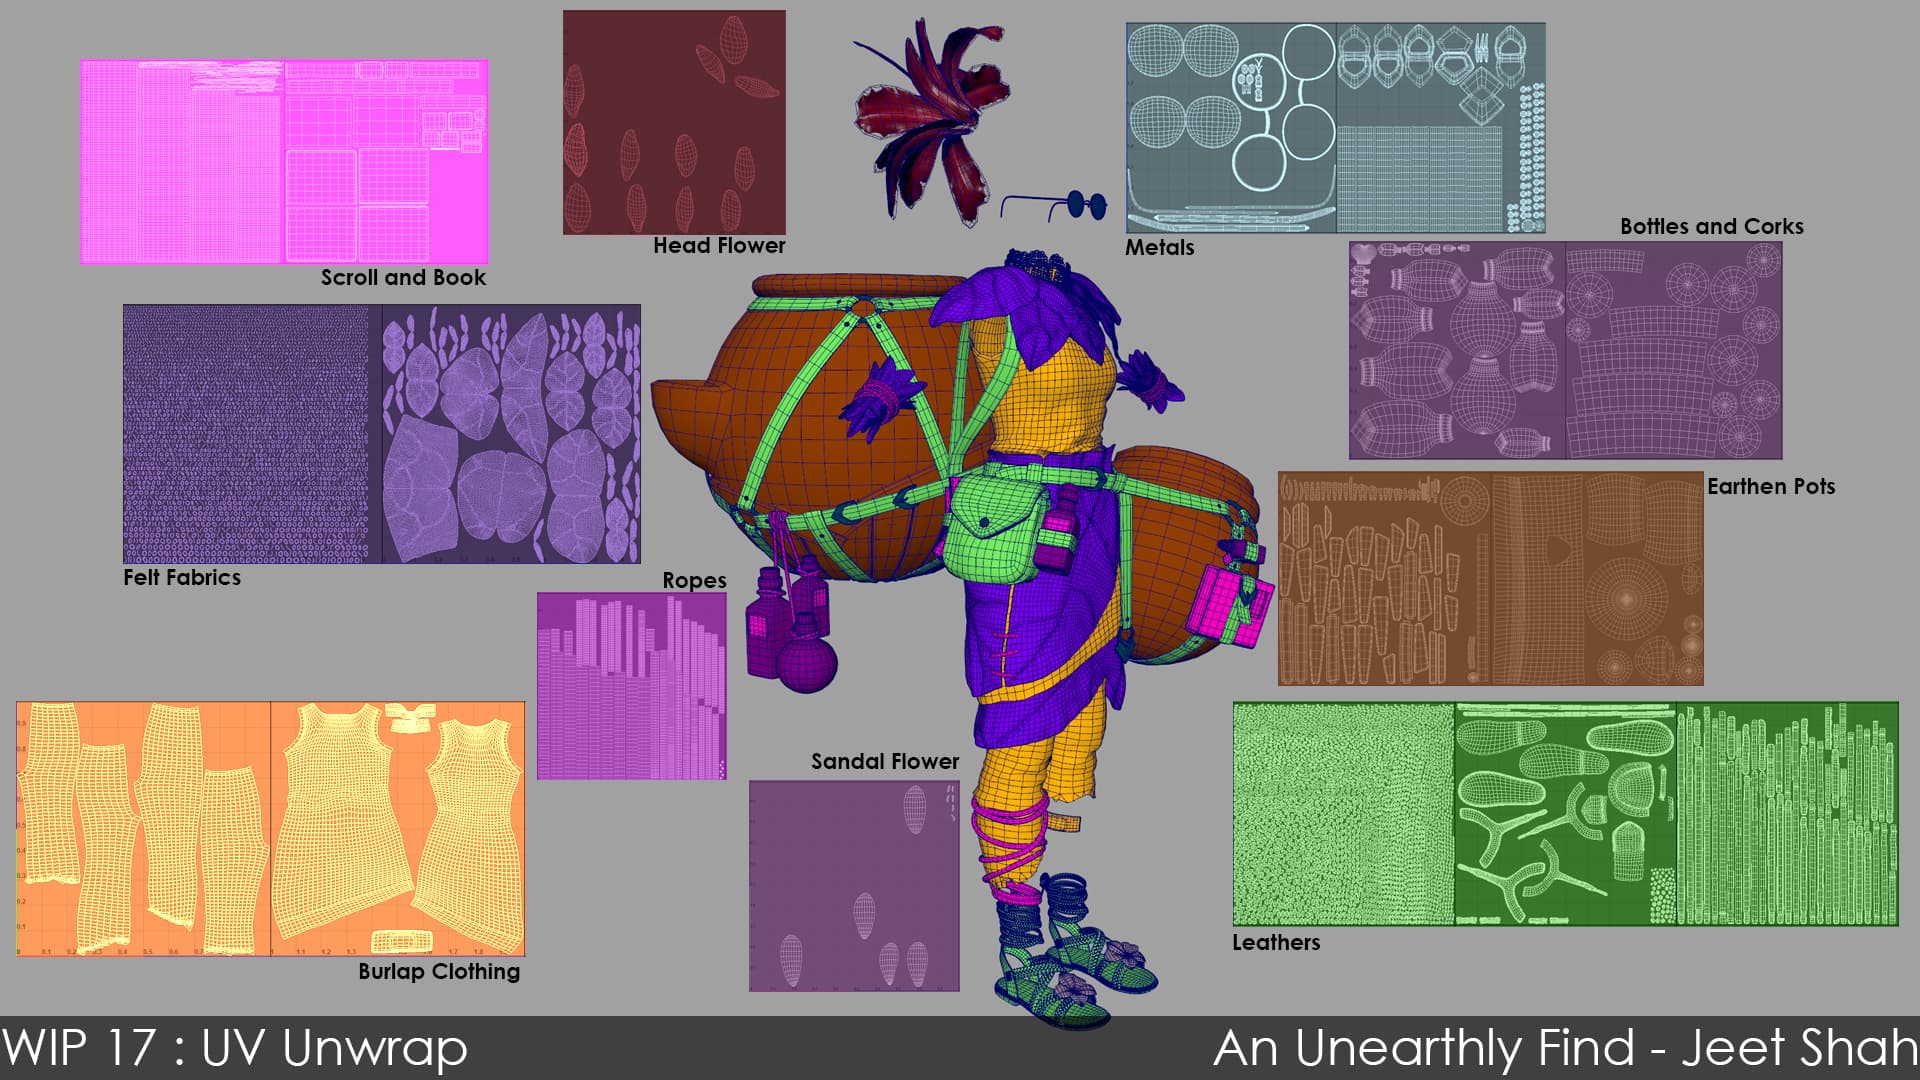
Done with the UVs. Now onto baking and textures. Gotta speed up now.