In AI films and commercials, character consistency is essential — when faces or poses shift, the story loses impact.
Character Creator and iClone already offer a powerful environment for building original IP characters and developing stories around them. Whether for games, animation, or merchandise, they give creators full control over design, rigging, and performance.
Now, with AI Render, your characters can go even further — into AI-generated movies, commercials, and stylized storytelling, with full consistency across frames. By combining 3D animation data, LoRA, and ControlNet inputs, AI Render lets you build a creative universe where your character looks and moves like a real person — across any medium.
 Keep Characters Consistent with LoRAs You Own
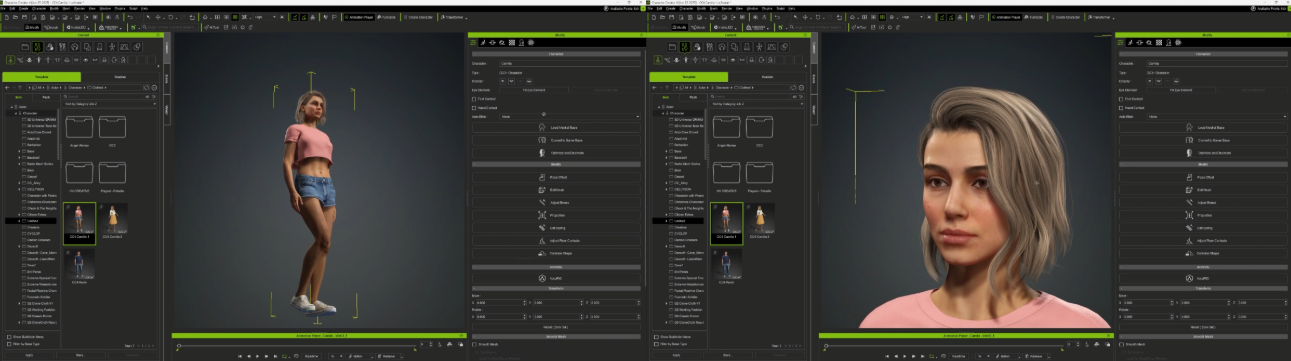
LoRAs (Low-Rank Adaptation models) are essential for keeping your character’s identity consistent across scenes, angles, and styles. While LoRA training is done externally, creating a good training dataset is often the hardest part — traditionally requiring hours of manual posing, camera setup, consistent lighting, and organizing reference images.
iClone solves this with speed, structure, and automation:
- Batch-render hundreds of images across varied angles, motions, and expressions
- Use pose libraries, motion clips, and automated cameras for broad scene coverage
- Control shot diversity (close-up, medium, wide) to enrich your dataset
- Maintain consistent lighting and facial detail with intuitive scene tools
Whether you’re building one character or an entire cast, iClone gives you a fast, repeatable way to create high-quality LoRA datasets.

![]() This video walks you through the LoRA training workflow — from generating a dataset in iClone to training the LoRA externally on RunPod.
This video walks you through the LoRA training workflow — from generating a dataset in iClone to training the LoRA externally on RunPod.
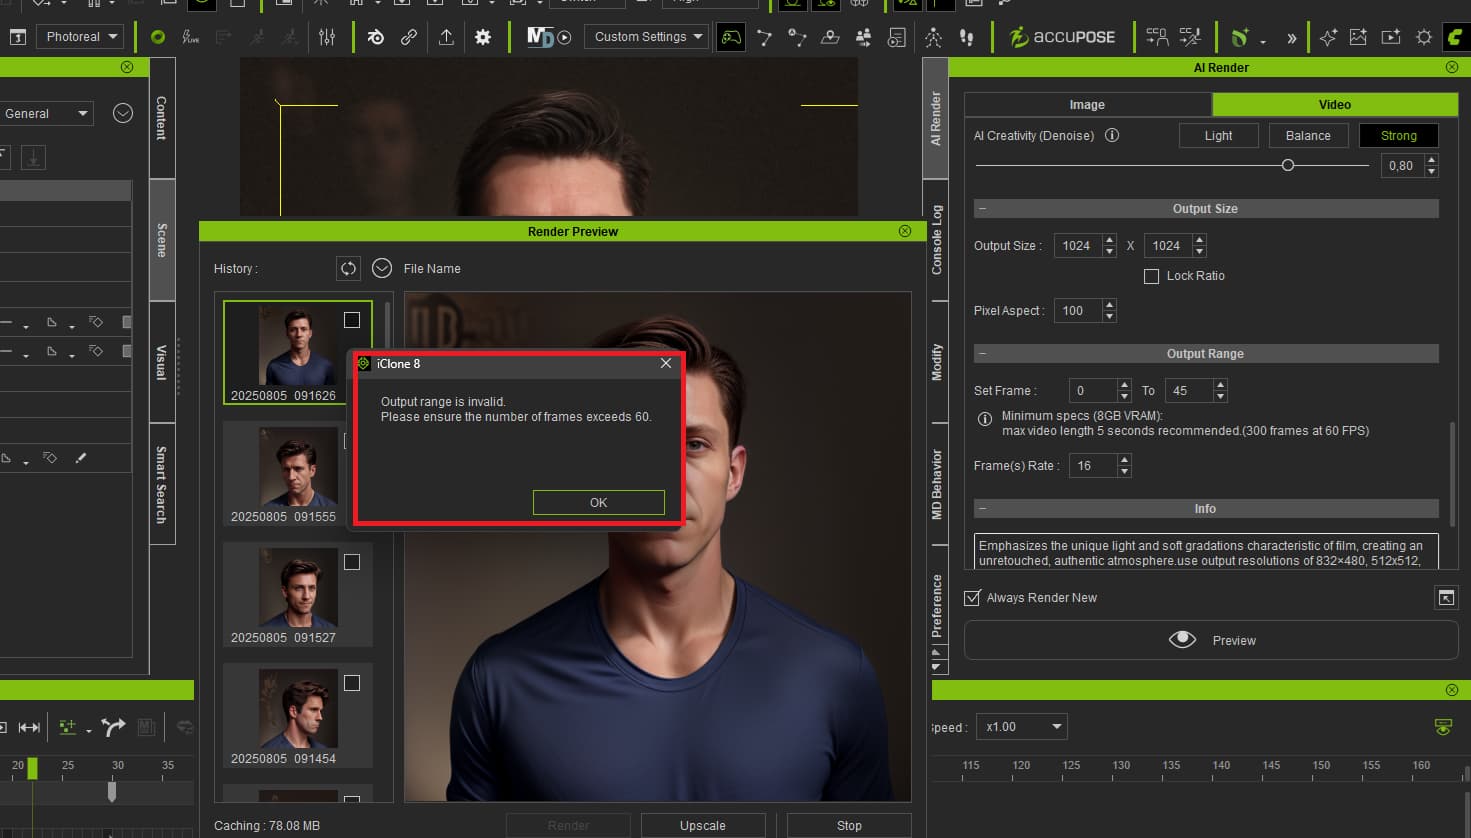
To make it even easier, we provide a template project that generates a full LoRA training dataset — producing 46 images automatically, with no manual setup required. Simply replace the sample character (Kevin) with your own, then go to Frame 0 and adjust your character’s height to match the original camera position. No changes to the render settings are needed — just start the render sequence.
 Apply and Combine LoRAs Inside ComfyUI
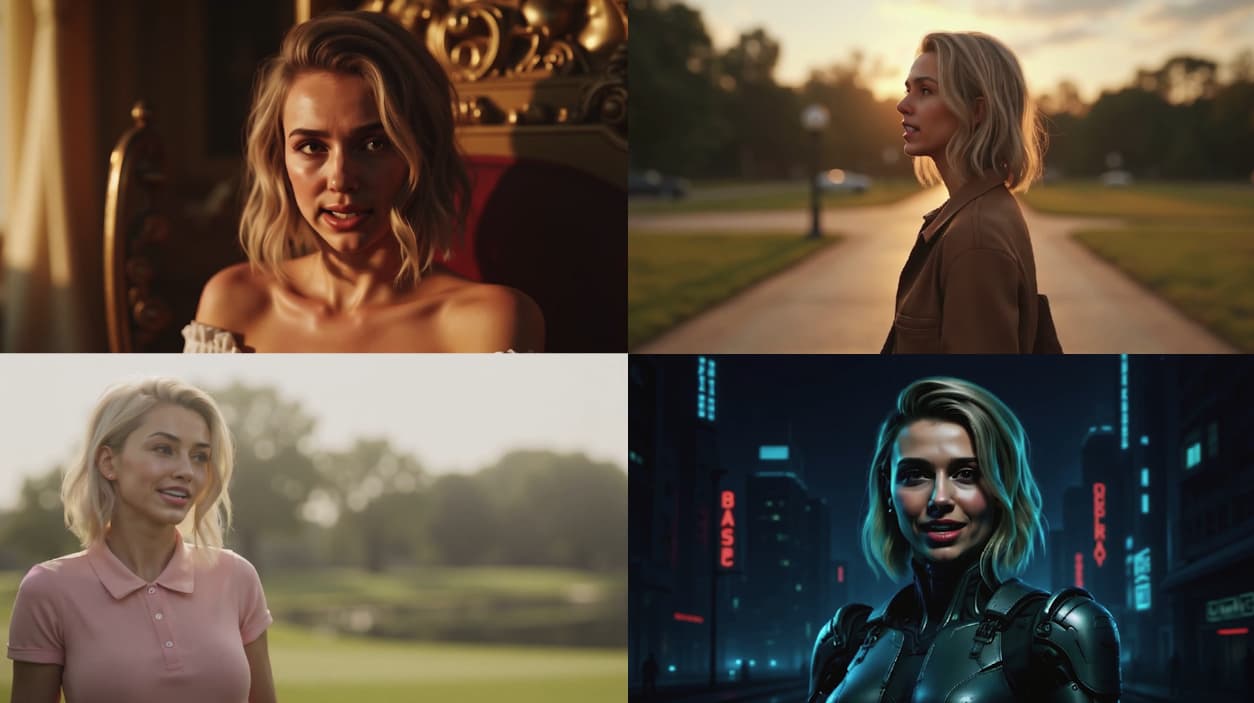
Once trained, apply your LoRAs directly in AI Render to:
-
Maintain character identity across shots and styles
-
Combine multiple LoRAs to swap costumes, moods, or design variations
-
Layer LoRAs with other AI controls for expressive, style-consistent animation
 Beyond Prompts: Precise 3D Inputs and Camera Control
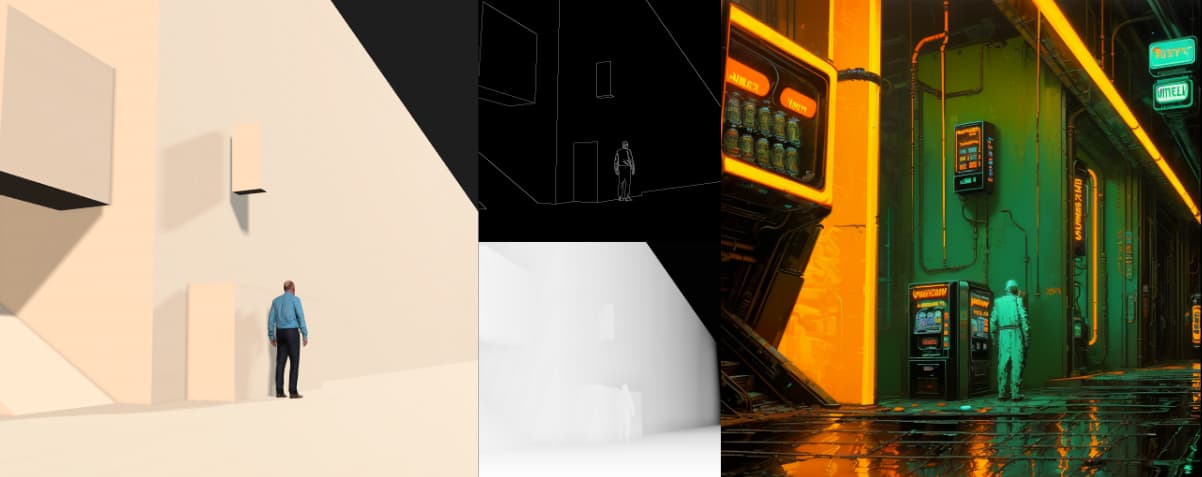
While LoRAs handles identity, ControlNet handles structure. And unlike 2D-extracted inputs, which are prone to flickering and failure, AI Render delivers precision ControlNet maps from real 3D data.

With over 13,000 ready-to-use 3D assets — including characters, motions, cameras, and lighting — all easily searchable with the built-in Smart Search, you can drag and drop everything you need in seconds. Instead of building inputs manually, you can pose, animate, and light full 3D scenes in minutes, creating a solid, production-ready foundation for generating precise and stable 3D ControlNet inputs.

Here’s what sets each mode apart:
 Depth — Shot-Adaptive Depth for Expressions and Framing
-
Generated from the actual 3D mesh — not guessed from pixels
-
Lets you switch between wide shots and close-ups with full spatial accuracy
-
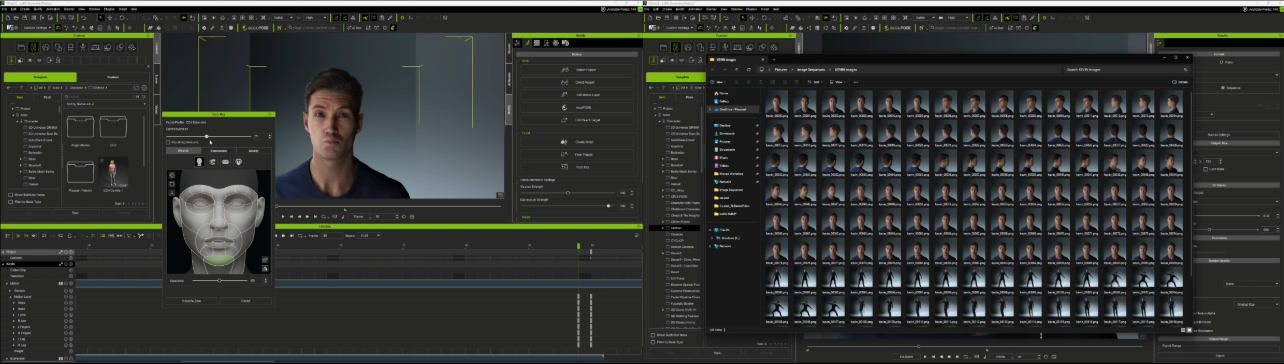
Crucial for capturing subtle facial expressions for precise results when paired with iClone’s facial editing

![]() Facial expressions applied using iClone’s Facial Expression Panel can be precisely rendered
Facial expressions applied using iClone’s Facial Expression Panel can be precisely rendered
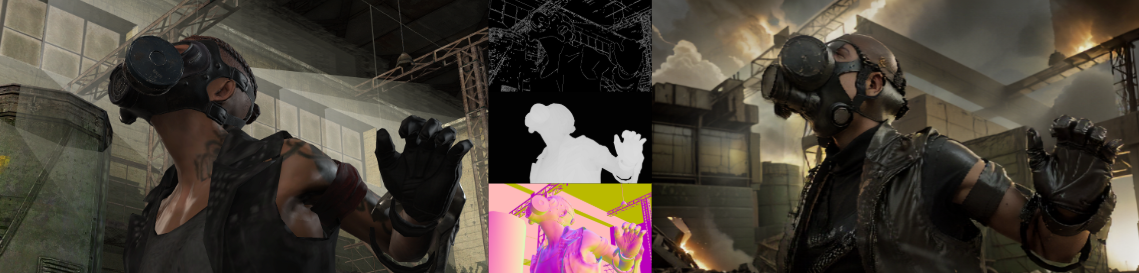
 Pose — Full Skeletal Tracking, Even with Occlusions
-
Maintains joint tracking even if faces, hands, or limbs are covered, turned away, or off-frame
-
Prevents skeleton drift in fast motion, group shots, or partial camera views
-
Especially critical in multi-character scenes like fight choreography, emotional staging, or crowd interactions
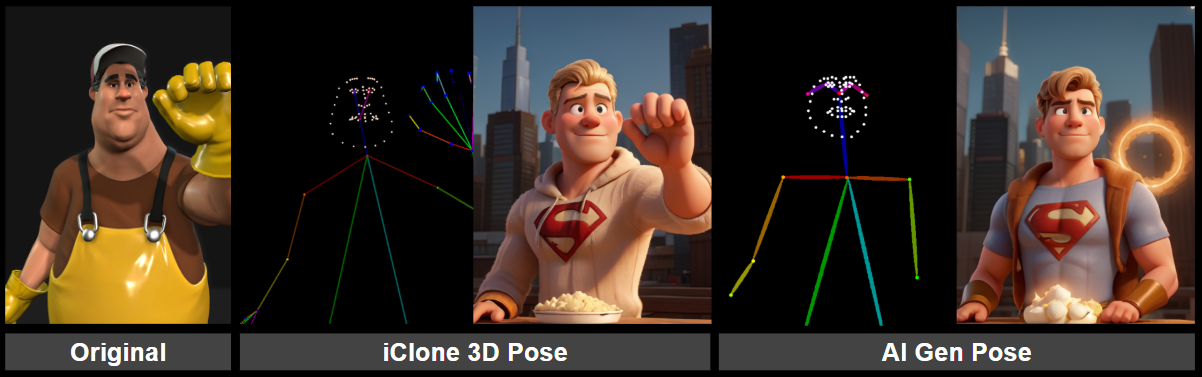
![]() In this case, Reallusion’s 3D pose accurately captured the hand gesture, even though the original input had the hand partially out of frame
In this case, Reallusion’s 3D pose accurately captured the hand gesture, even though the original input had the hand partially out of frame

![]() Ensures high accuracy of character interactions in motion sequences
Ensures high accuracy of character interactions in motion sequences
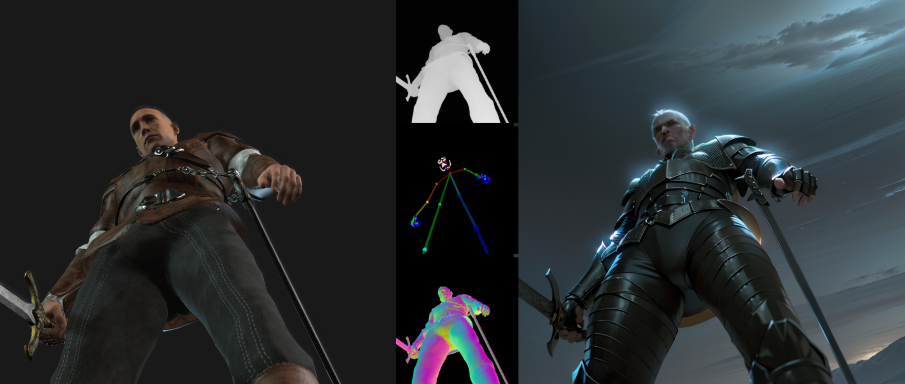
 Normal — Clean Lighting and Form
-
Extracted from the true 3D surface
-
Delivers stable lighting and shading across frames
-
Enhances clarity and visual depth — especially when combined with iClone’s real-time light controls
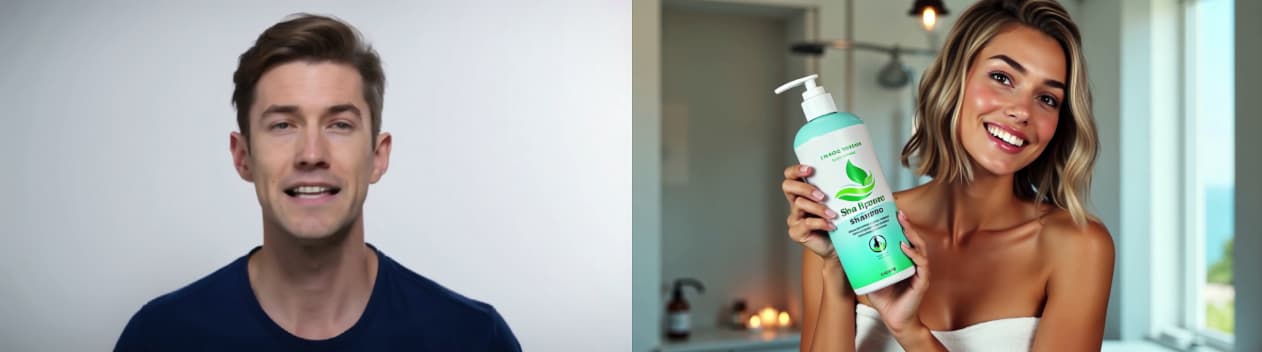
![]() The effect of iClone’s lighting on characters is accurately reflected in the AI-generated results.
The effect of iClone’s lighting on characters is accurately reflected in the AI-generated results.

 Edge(Canny) — Stable Outlines for Stylized Shots
-
Retains consistent outlines across frames
-
Ideal for anime or hand-drawn effects
-
Works best when paired with Depth for layered, line-based rendering
 Pro Tip:
You can combine multiple ControlNet inputs for stronger control over both character and scene. Each input can be fine-tuned with threshold sliders to match your desired influence and visual style — giving you true creative control over both structure and look.
Pair this with iClone’s powerful camera tools — including framing, lens control, and automated camera paths — to precisely shape composition, perspective, and cinematic storytelling in your AI generation.
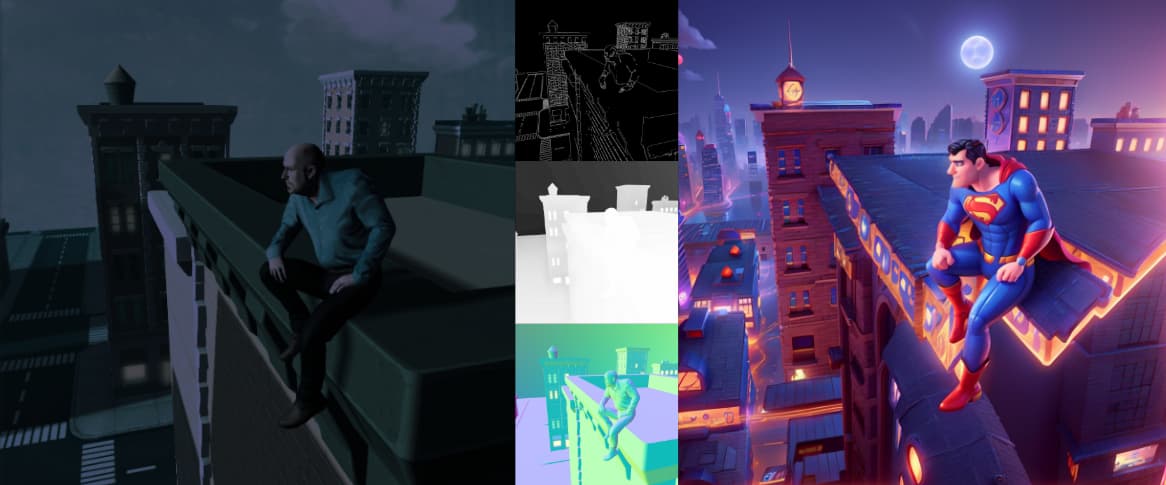

![]() Ensures frame-level consistency in video sequences, even with constantly moving cameras.
Ensures frame-level consistency in video sequences, even with constantly moving cameras.
 Custom Workflows, Custom Models — Full Creative Freedom
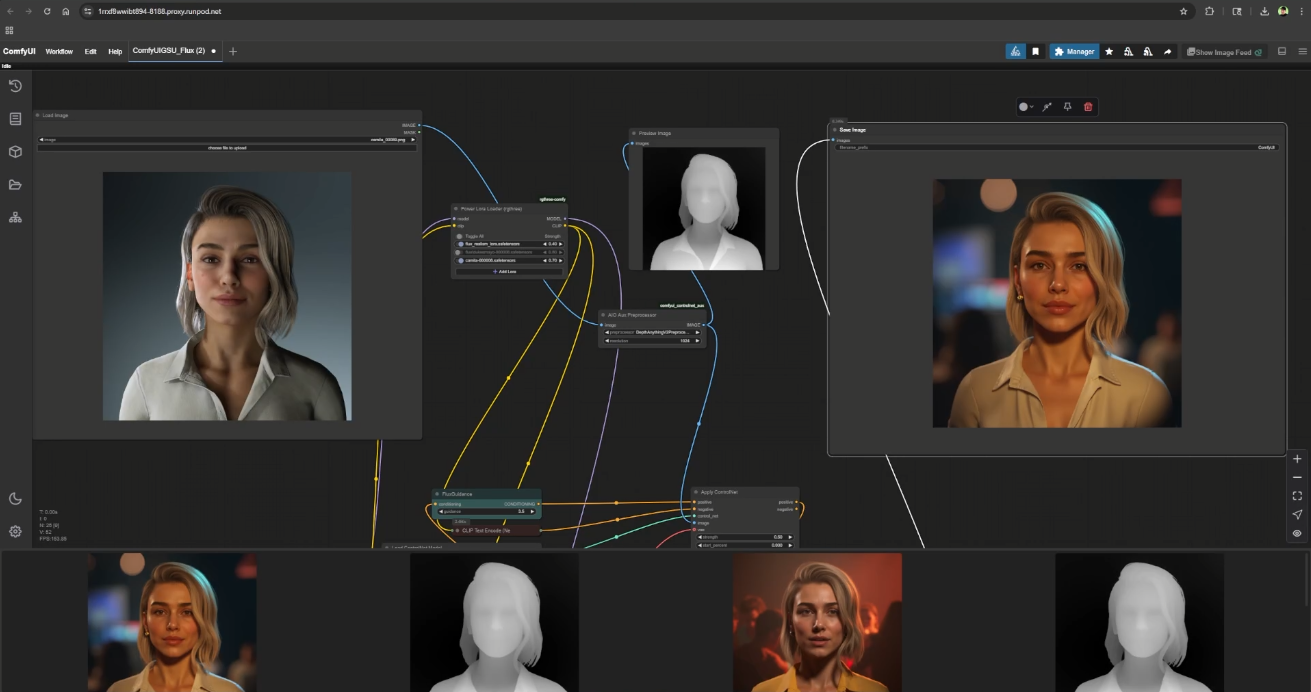
AI Render plugs directly into the ComfyUI ecosystem through Reallusion’s custom nodes — offering flexibility for both beginners and pros.
 Build Custom Workflows
- Thanks to the Reallusion nodes, you can freely modify your ComfyUI pipeline — add, remove, or rearrange nodes — and your changes reflect inside iClone and Character Creator. This two-way connection gives you visual feedback and full node-level control — no extra setup needed.
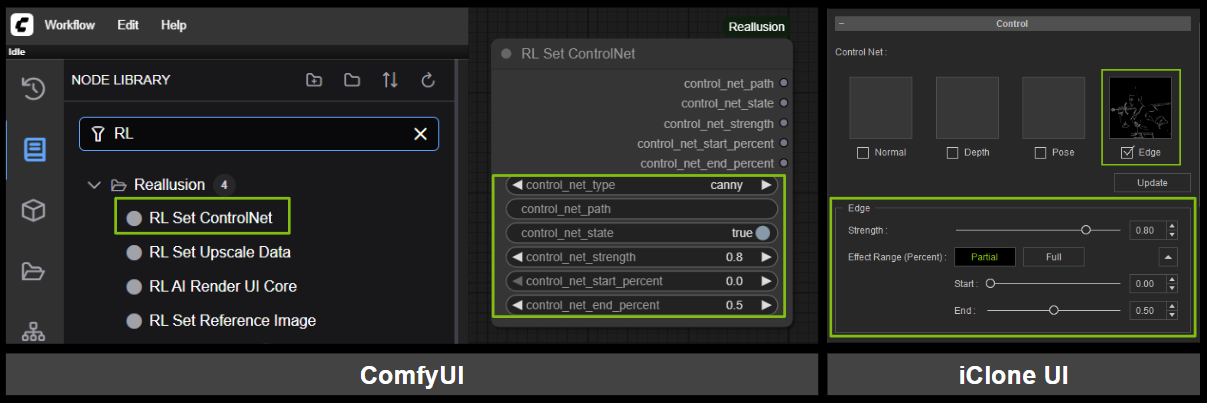

A step-by-step guide is available, showing how the Reallusion nodes works with the UI in CC and iC, and how to save your custom workflows as AI Render presets — so you can reuse your favorite setups instantly. We also provide a Flux image-to-image sample workflow, which you can use as a reference or apply directly to get started with high-quality results right away.
Use High-End AI Models via Cloud
- AI Render runs locally by default using Stable Diffusion 1.5, Wan2.1 Fun 1.3B Control and Wan2.1 VACE 1.3B For creators seeking greater power or cinematic detail, AI Render is fully compatible with advanced third-party models like Flux, HiDream, FusionX, and more. By pairing it with cloud-based GPU platforms like RunPod or RunComfy, you can break through local hardware limits — unlocking high-resolution rendering, batch generation, and full-scale commercial production, even on modest machines.
 Please review the commercial usage terms of each AI model before using them in your projects.
 The Full Pipeline — Built Around You
From rigged character creation to expressive animation, from LoRA dataset to AI video generation — Character Creator, iClone, and AI Render provide a unified pipeline you own.
Use it to:
-
Scale your own IP with creative control
-
Build cinematic-quality characters and scenes
-
Bring high-end AI video to your studio workflow
 Just Getting Started or Focused on Styling?
Head over to [Fully Customizable 2D, 3D, and Photorealistic Rendering Styles]
Explore professionally tuned presets, easy prompt customization, and intuitive style tools — no node editing required. It’s the perfect place to begin if you want fast, creative results with your characters.