Hi everyone,
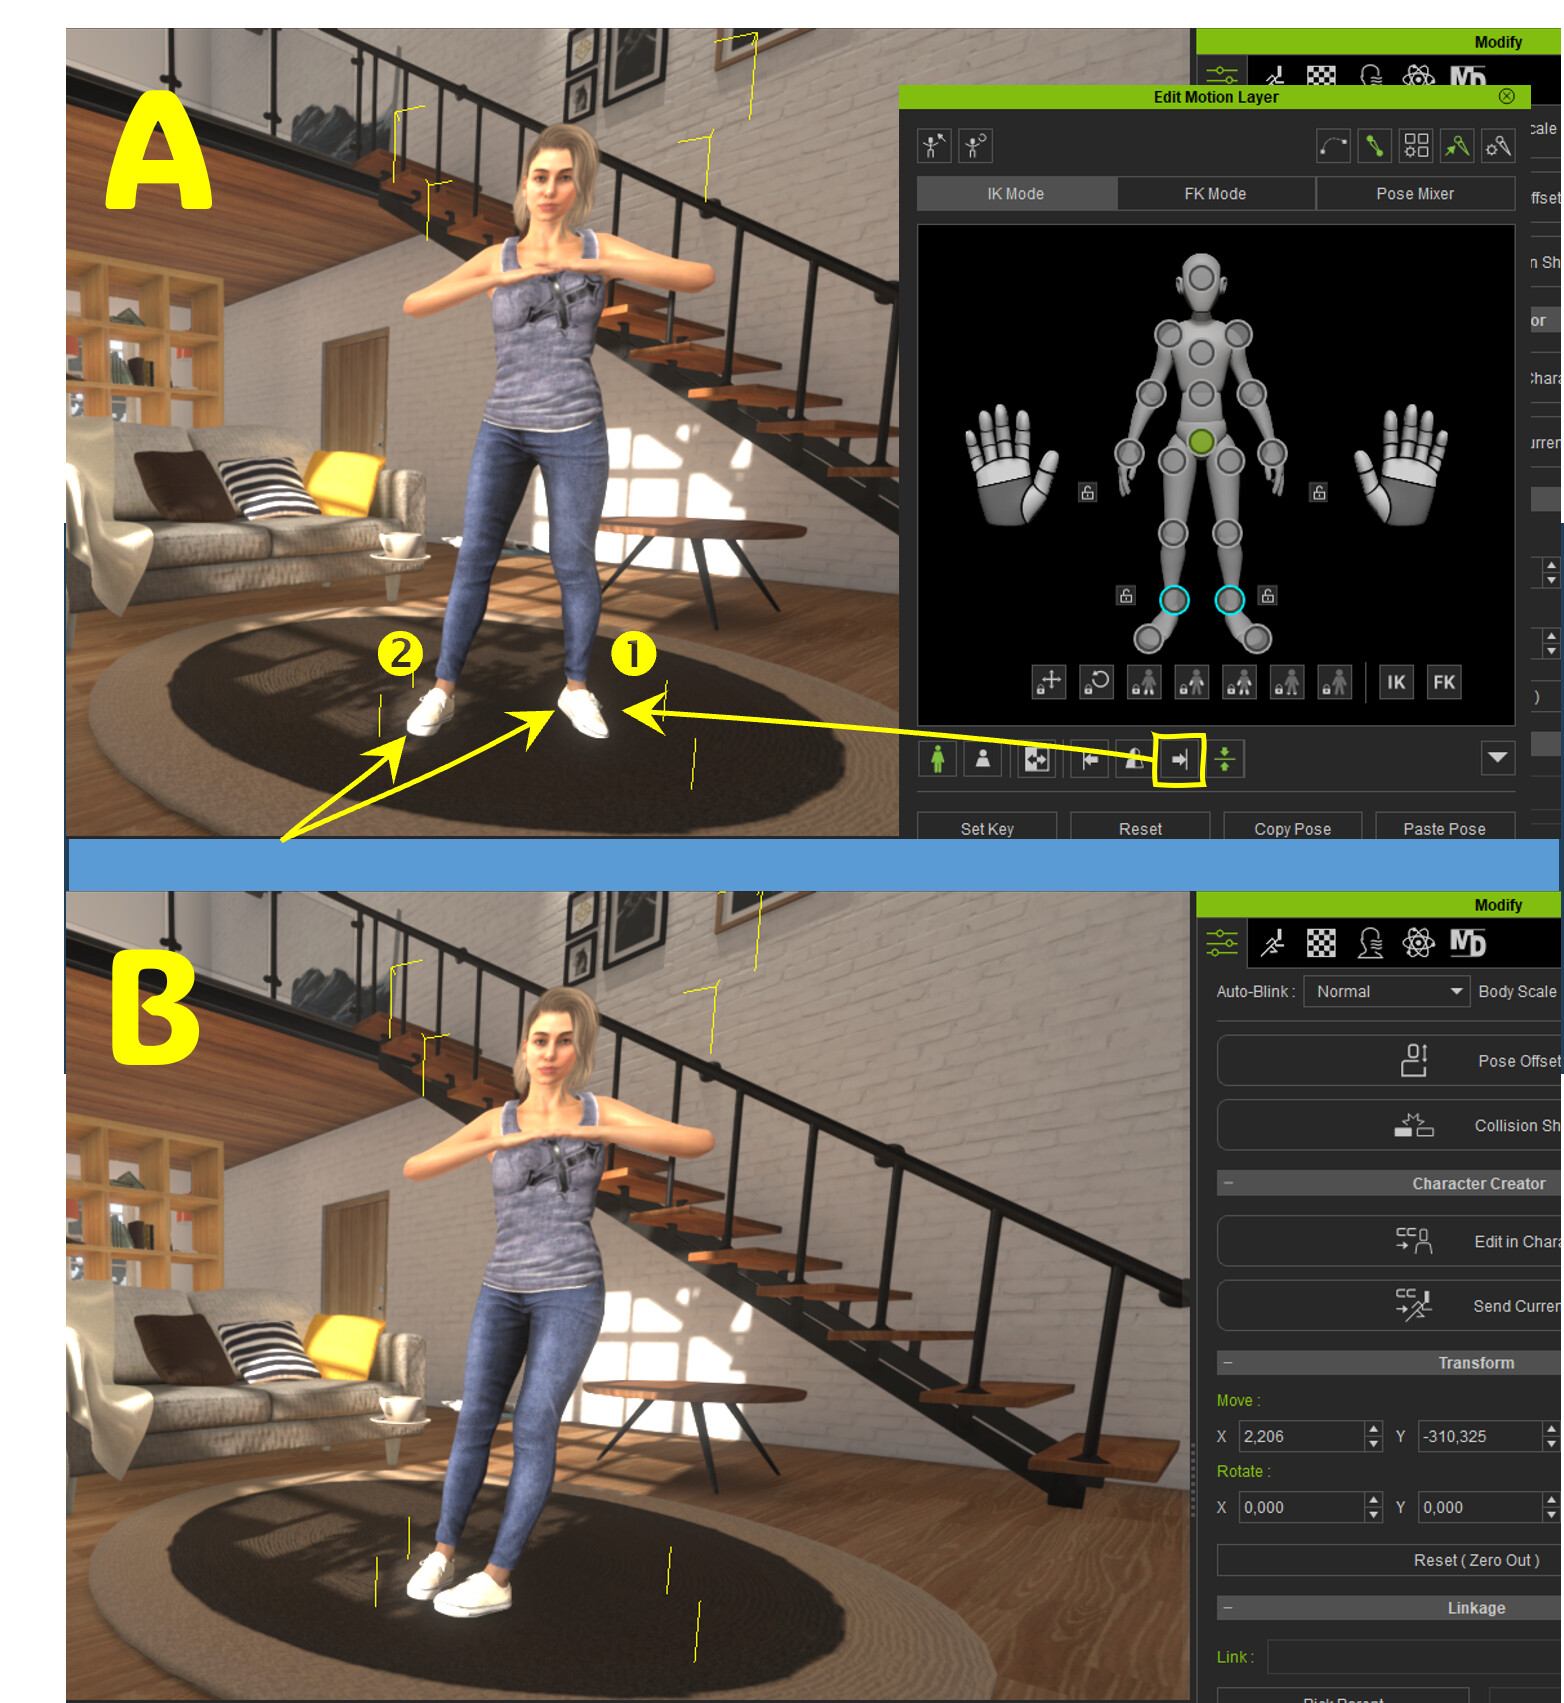
See image A: I want Leg 1 to match the position of Leg 2. To do this, I tried using the button in the Edit Motion Layer window (see the yellow highlighted area), but when I tried it, the result turned out very strange. See image B.
What’s the correct way to copy or mirror the position from one leg to the other?
Thank you, @mark and @K_Digital, for your response. I was already aware of that approach, as shown in my previous image, but unfortunately, it doesn’t resolve the issue. It’s possible the image didn’t fully clarify the problem. To address this, I’ve created new images that I hope better illustrate the issue.
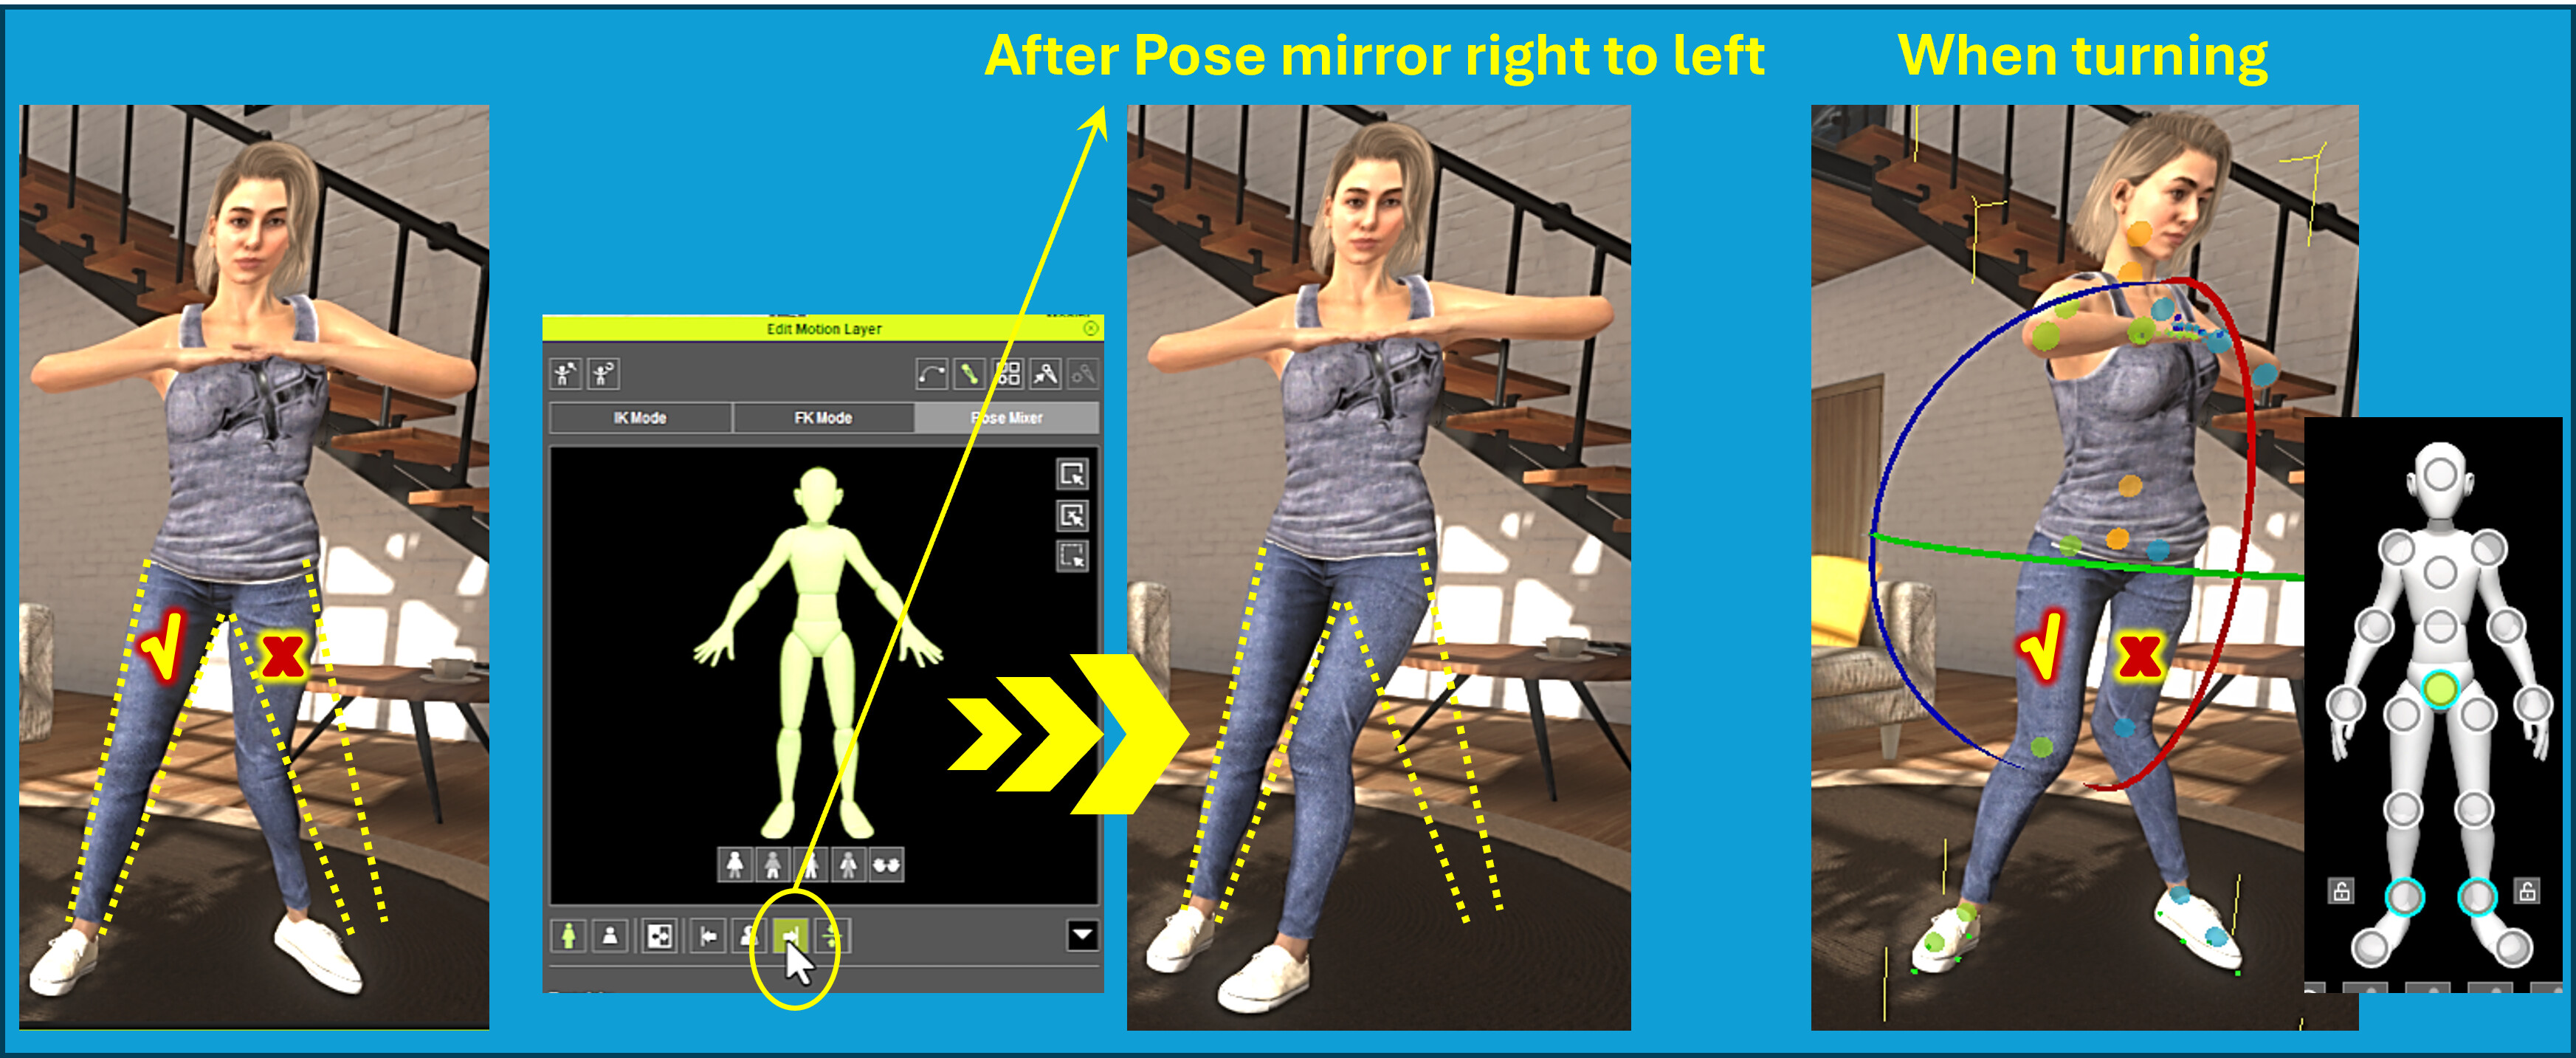
In the left image, I’ve drawn yellow dashed lines on either side of the correctly functioning leg to indicate its proper alignment. I mirrored these lines to the faulty leg to show how it should be positioned. When I use the “Pose Mirror Right to Left” button in the Edit Motion Layer panel, the result is shown in the second image: the faulty leg ends up more wrong.
By the way, the IK was disabled when I used the “Pose Mirror Right to Left” button, although the result was the same when it was enabled.
Also, in the third image, when I rotate the torso, the correctly functioning leg moves naturally, but the faulty leg doesn’t. This leads me to conclude that there’s likely an underlying issue with the faulty leg.
Manually tweaking the faulty leg doesn’t work either. What I noticed was that the circle on the knee of the correctly functioning leg is green, while the one on the faulty leg is blue. Does this provide any clues?
I’d appreciate your thoughts on how to resolve this issue. Thank you!
This looks a bit like a missing bone or a twisted mesh.
I would replace this char with another one in that pose and see if that fixes it. No idea what alse this could have caused.
Hi @mark,
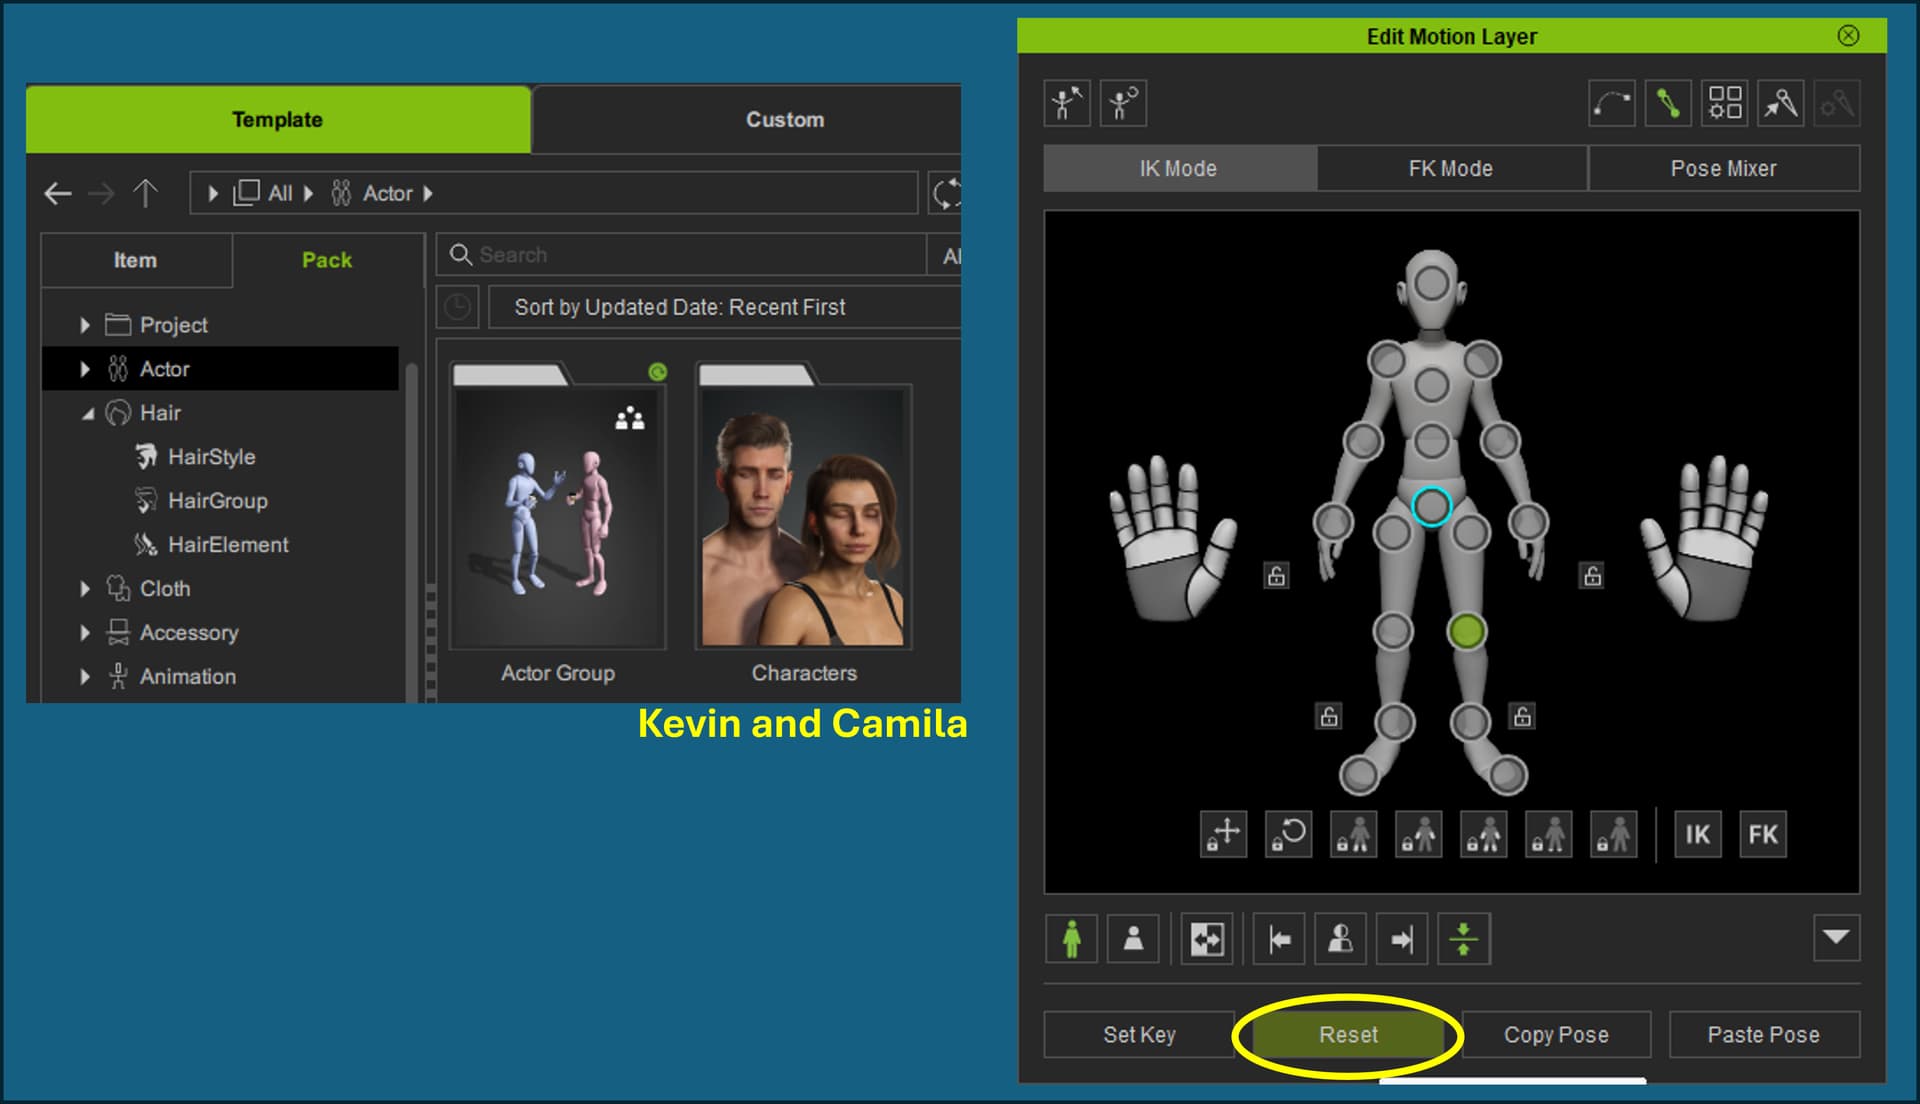
Meet Kevin and Camila — iClone’s standard male and female avatars, as shown in the screenshot.
And @K_Digital,
I’ve found the solution: selecting the leg and hitting the Reset button in the Edit Motion Layer pane did the trick. The leg now does exactly what I want it to do.
Thanks for your reactions. All’s well that ends well.
Well, iClone comes up with a constant stream of cool new things, so staying completely up-to-date probably won’t happen quickly at all anyway. I find the future very exciting!
Indeed. As my experience grows, it’s becoming less frustrating and more fun for me. Today, I’ve been playing around with the lighting and changed the default settings a little.
Lighting is the most fun for me. Here’s a little tutorial I did for a user that wanted to know more about lighting characters that move around the set… https://youtu.be/gjnlBNaD1kk
I watched your tutorial and really liked it. There’s so much more you can do with lighting than I realized.
Your tutorial came at just the right time, actually. I was looking for ways to dress up my scene a bit and make it more visually interesting. You inspired me to try adding a lamp on a table in the background. The thing is, I can see it in the scene collection and I can move it around with the gizmo, so I know it’s there. But I just can’t see the lamp itself in the scene. Any idea what I can do to fix that?
And funny thing: I got an invite for a webinar on the topic of lighting. Talk about coincidence! I’ve signed up, but I won’t be watching it live (it starts at 3 AM for me ).
I saw in your channel description that you received an Emmy at some point? That’s impressive!
Glad it helped. And RL doing that Webinar on lighting and camerawork for a scene should be great…excellent timing I must say.
Now what lamp are you using exactly? Is it the free one that comes with iClone? As you may know in the Scene Collection the first icon to the right of the Prop is the Show/Hide (eye symbol) icon make sure that is activated.
That Emmy was long ago for some commercials I directed … but what has he done lately?
Yeah, you’re right, it’s a free one. I came across it in the content store as an April freeby. And I know about the eye symbol. So, unfortunately, it’s not that. I suspect it’s somehow hiding in the fabric of the scene.
I don’t know why the iClone designers made this possible, but objects can actually sink through the floor or walls and stuff. There’s a separate option to snap them to the floor or something like that, but it doesn’t seem to work in practice. You just have to position it manually and make sure it sits carefully above the surface. Only, that doesn’t work with the lamp. It’s called Vintage_Brass_Desk_Lamp.
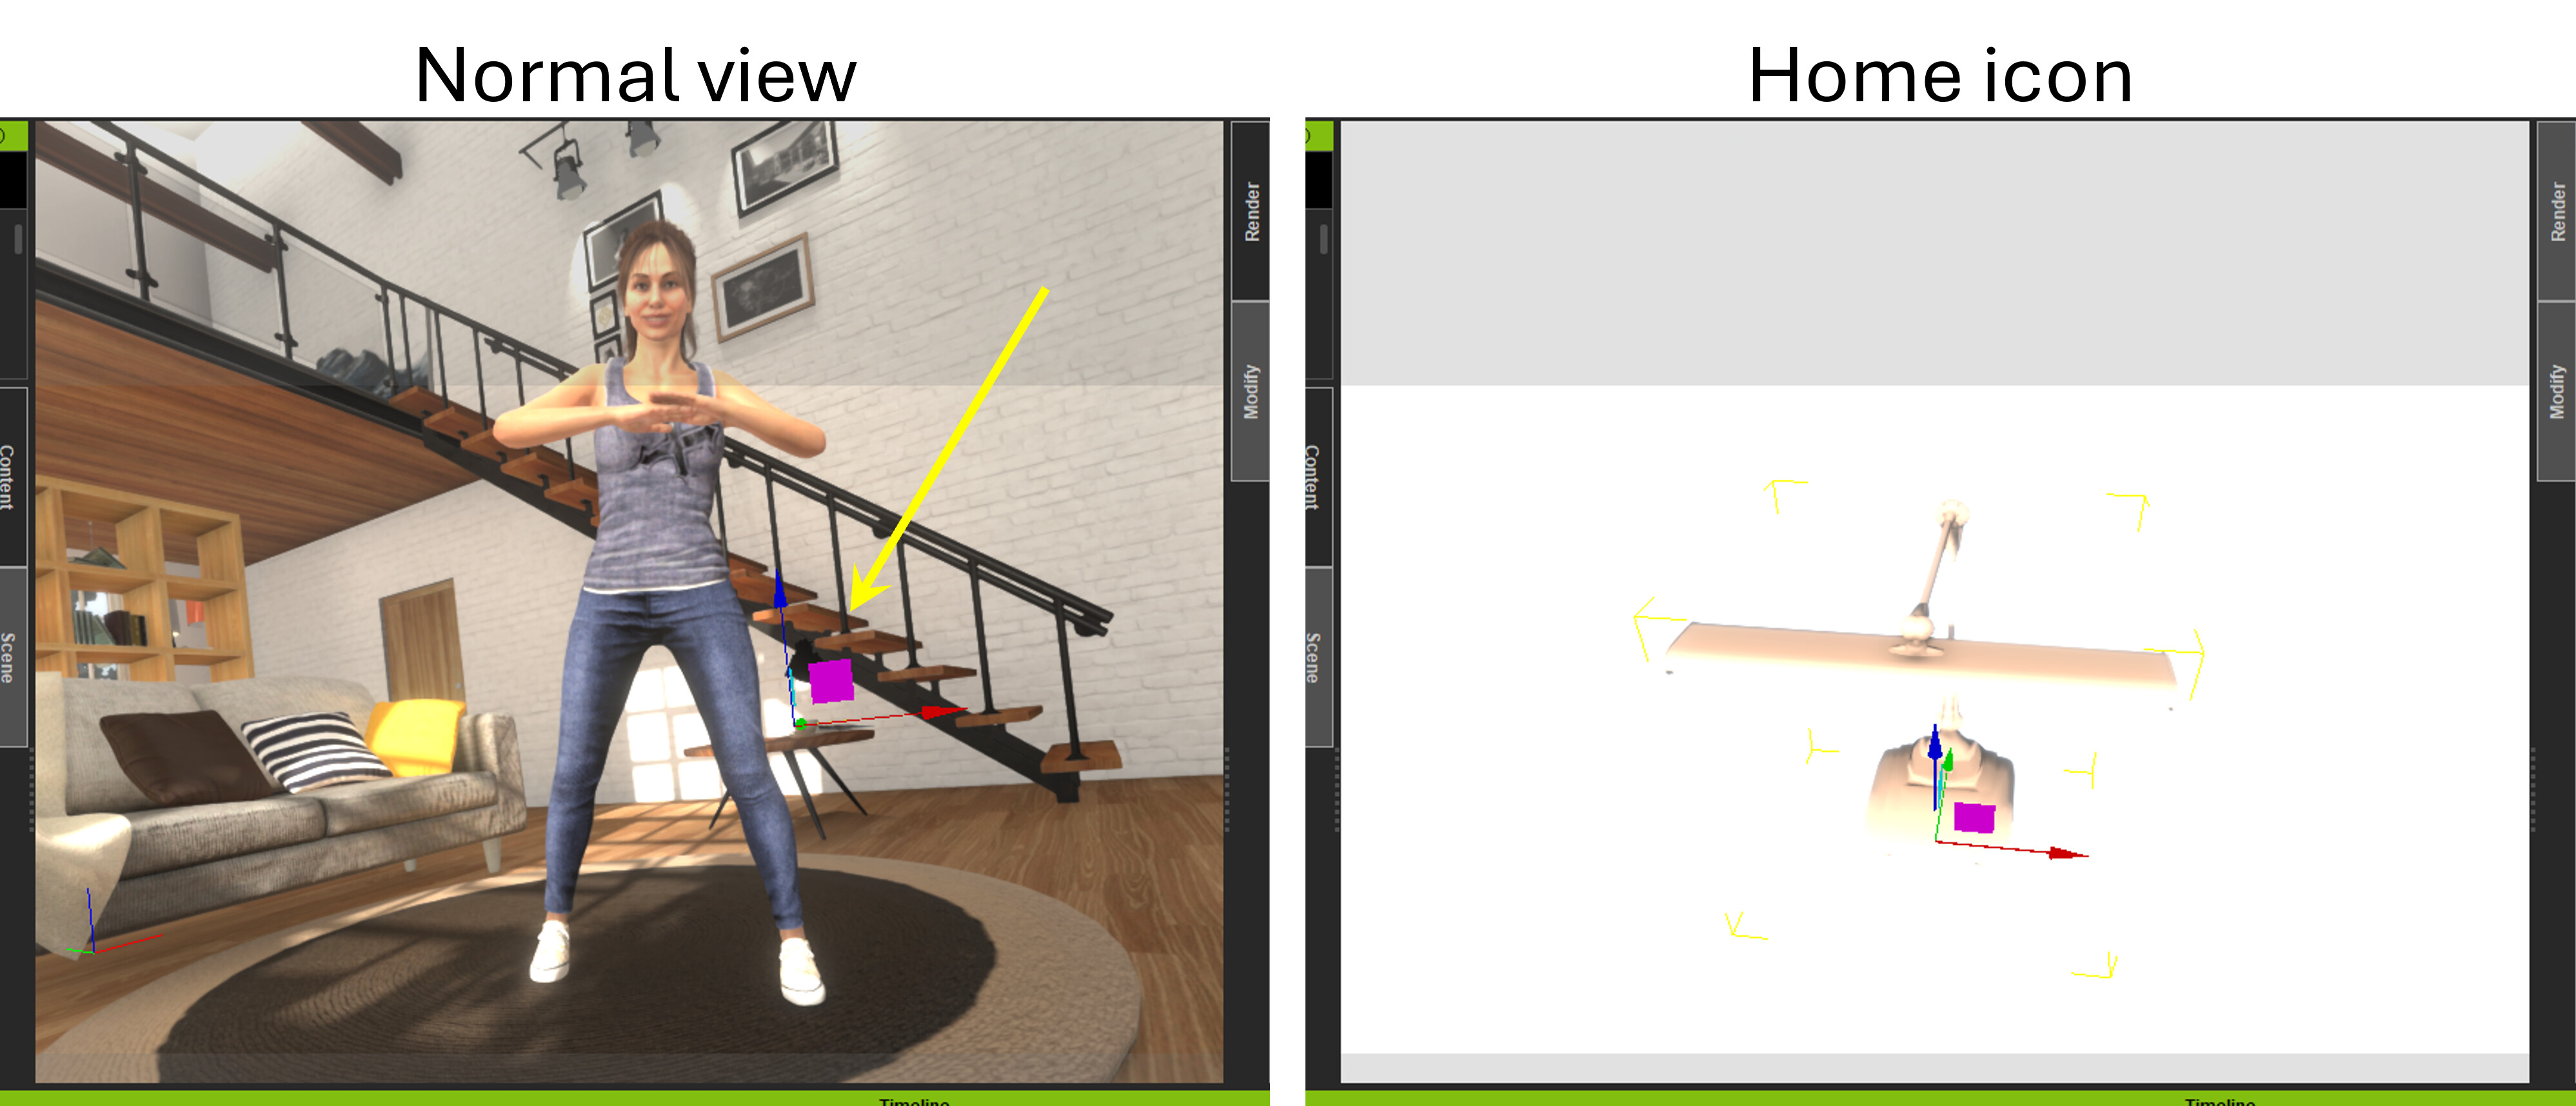
If you select object and then select the Home icon at the top of the page it will take you to the object you have selected …then you should be able to see where it is in the scene,
I found it. It wasn’t where I thought it would be. I moved it and then switched back to the original camera view. Then I saw the gizmo of the lamp in the background. I switched back to the lamp and tweaked it some more. I’ve repeated the process a few times now, but I still can’t get it to stay where it’s supposed to be. And now I cannot recognize the place where the lamp is. It’s still not visible in the scene. Only when I search for it using the Home icon. Then it’s visible.