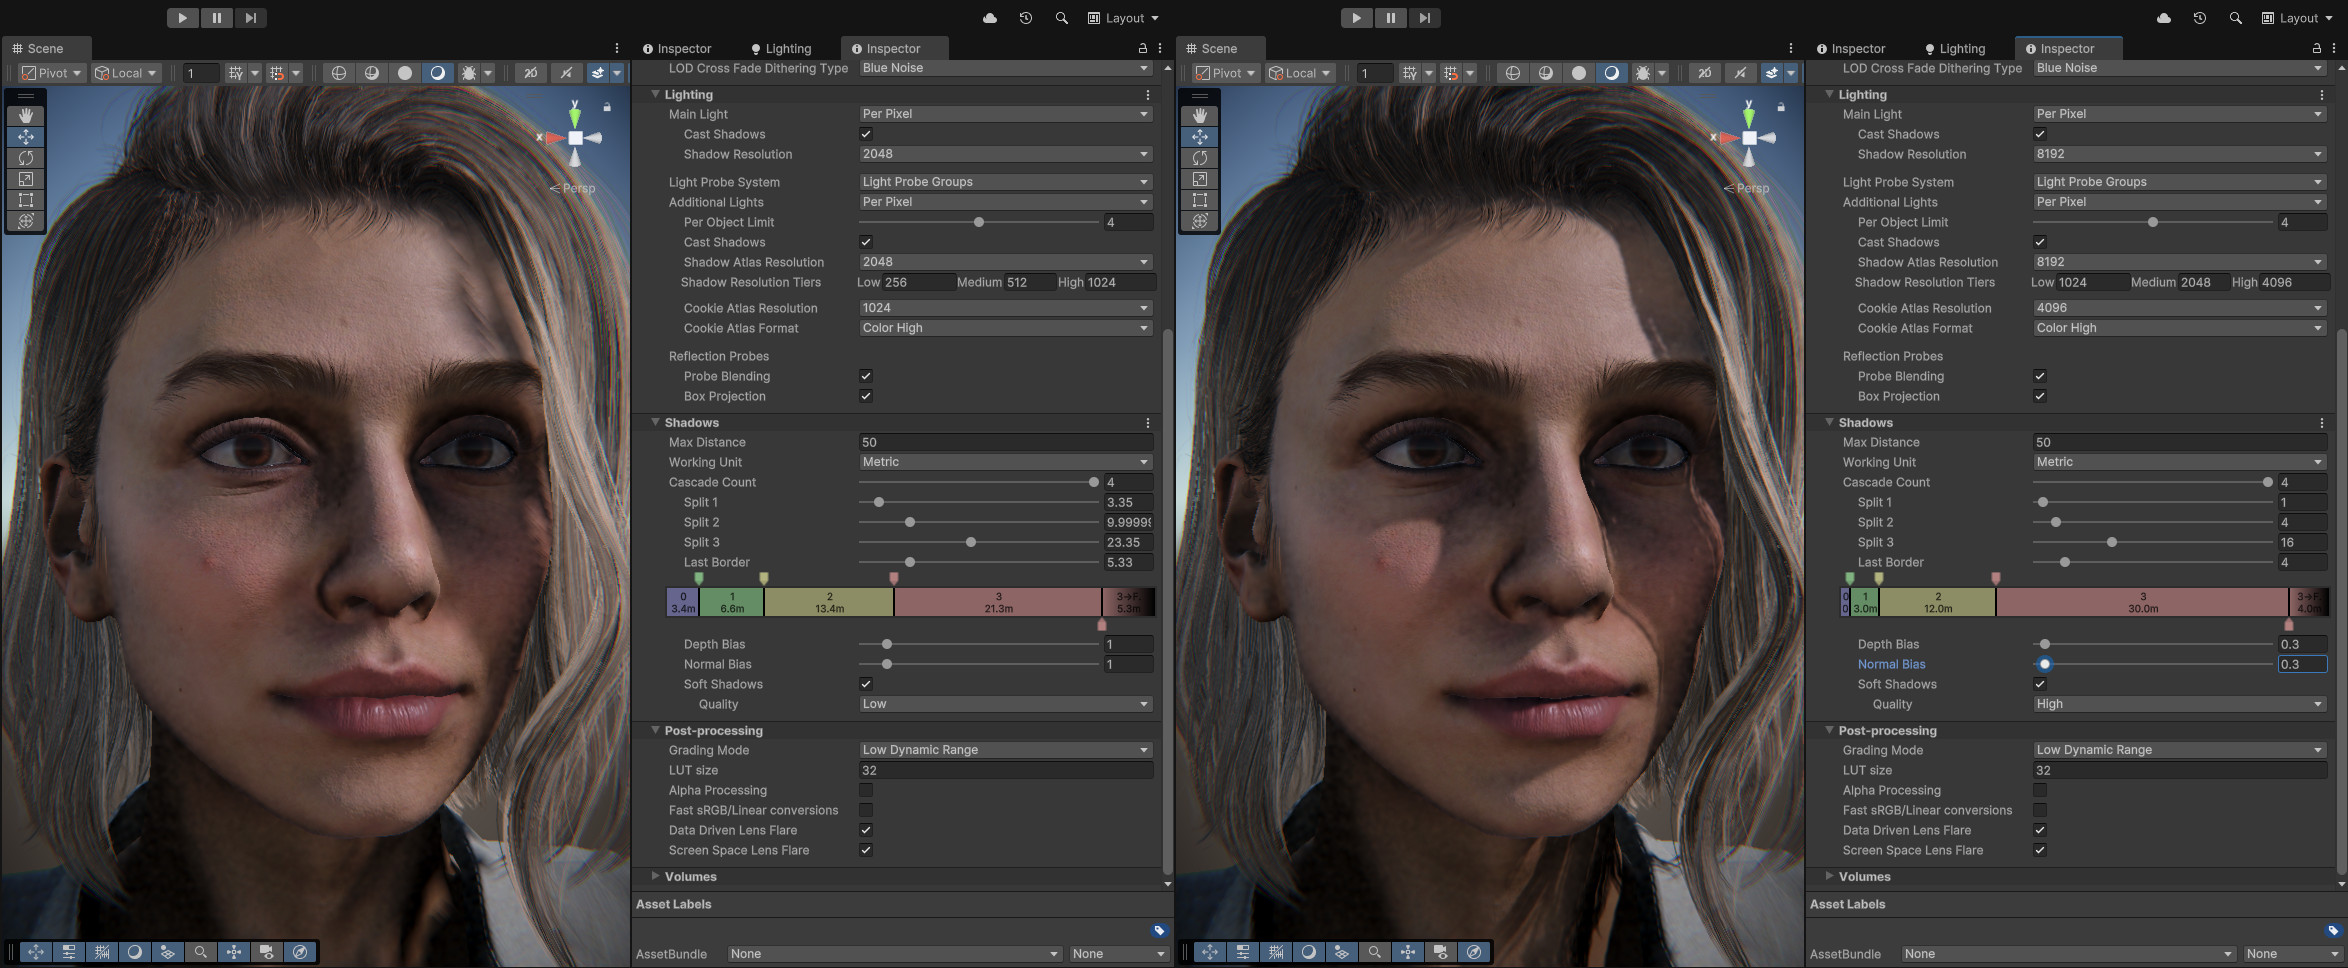
You need to tune your render pipeline shadow settings. (These would be in /Assets/Settings/PC_RPAsset and Mobile_RPAsset)
The default settings in URP17 are quite low quality and the cascade splits don’t lend themselves to close-ups of characters.
You should tune the resolutions first to whatever your target device is capable of, and then adjust the splits to get the best overall quality for each detail level.
But it depends on how your game is going to view the characters. There’s no point tuning for high levels of close up details (the image on the right), if you’re never going view the characters like that in game.
It’s great to see that there’s a new unified auto setup tool! Excellent work as usual Victor!!
I’ve been working with the most recent 1.x version, Unity 2022.3.49f1 with HDRP, and CC4.52. I’ve also been testing out the CC4/Blender/Unity pipeline. I’m seeing generally good results but haven’t yet managed to get all the required features or settings optimized for the best result. In this case, I am aiming to produce a very realistic and high resolution, medium close up view of only one animated character. By medium close up, I mean from about hips up to the top of the head will fit in a standard Full HD or 4K landscape mode display.
As part of this, I aim to include both hair physics and soft cloth physics as well as spring bone breasts for the character. Ultimately, the character will be fitted out with a custom top done in Marvelous Designer and dressed onto the character either in Blender or CC4, whichever works better. My initial thinking was that the CC4 to Unity export path would work best, including setting up all the hair and soft cloth physics, but in my testing so far this hasn’t been entirely true.
So first of all, should I update to the new ‘pre-release’ version of the Unity Auto Setup? Is it ready to be declared as a production release, and will it give better results? In particular, with the 1.6.3 auto setup version (now labelled as ‘legacy’), I didn’t get hair physics working, and had some minor glitches with the eyes looking dull, except in one case where one eye (the right one, I think) looked great, but the left was still dull.
Then again, I got hair physics working properly by following the CC4 → Blender → Unity path, but in that case I didn’t activate soft cloth physics, and in my final character version, the soft cloth physics would have to be added to a custom top cloth. But if that path might be better or easier to follow, I could start further testing!
Then again, I’m not sure if I should use Unity’s native hair and soft cloth physics, or use Magica Cloth 2, or even perhaps something else. Basically just looking for higher level guidance before getting more into the weeds here!
Thanks in advance for help with steering in the right direction.
The legacy versions will not receive any further updates so yes, use the latest and report any bugs.
If you want to use cloth physics on the hair, use Magica Cloth 2. Unity’s native cloth physics works well enough on low poly meshes like Camila’s skirt, but on the high density hair, it does quite badly and the mesh quickly degenerates into nonsense. Also, Magica Cloth 2 has much better performance as it simulates with a lower resolution proxy mesh, though it will likely need tweaking after setup to get it moving the way you want.
Or use spring bones in the hair from Blender, with Dynamic Bone or Magica Cloth 2 spring bones, which has much more control and can look better, but requires a lot more work from you.
It depends on how convincing you want the cloth simulation to look. The collision model both Unity Cloth and Magica Cloth use is quite simple for performance reasons, so simulating cloth close to the body gets quite difficult and needs careful adjustment of the colliders.
Hi Victor, thanks again for all your work on these tools.
I’m getting errors with version 2.0.0, whatever way I try and install using Unity 2022.3.56. Unity 6 works fine.
The errors are:
CCiC-Unity-Tools-2.0.0\CCiC-Unity-Tools-2.0.0\Editor\ShaderPackageManager\RLToolUpdateUtil.cs(4,7): error CS0246: The type or namespace name ‘Newtonsoft’ could not be found (are you missing a using directive or an assembly reference?)
Hey everyone, allow me to share this video about eye and cloth issues with CC4 characters in Unity :
An issue that has been there for a long while is that positive values for the Iris Depth parameter cause the iris to move upward. The default value for this parameter is 0.0036 so it’s visible on freshly imported characters, I personally always set it to 0 and I’m honestly a bit confused as to why this wasn’t addressed before.
For cloth physics it’s possible that the issue isn’t on Reallusion’s side, but basically when using the demo wavy hair model (the one Camila has) and one of the demo skirts, physics quality leaves to be desired for the hair in particular when simply moving a character forward. For some reason physics issues are less visible when using a dance animation with root motion (especially on the cloth which already looks good at that point), and the jittering can be attenuated by lowering the World Acceleration Scale on the Unity Cloth component.
As I say at the end of this video, I’m really grateful and respectful of Viktor’s work to which my project owes a lot, but one thing that is missing here would be a simple demo example of a movable character with cloth and hair physics. Having such an example would be extremely useful and give more confidence in using Reallusion characters in Unity.
Thank you for reading, and I’m open to any suggestions.
That’s because this the first I’ve seen of it. And no-one has ever reported it. And it doesn’t do this for me, but I noticed your characters do not have a separate eyes object. What export settings are you using?
If you want something fixed you have to tell me about it. Don’t just assume everyone works the same way you do and sees exactly the same things you do, because for nearly three years, I did not see it.
The eye depth for the refractive eyes is done in the vertex shader. It adjusts the pupil vertices in a specific direction in model space. But if something is combining object meshes, that direction looks like it needs to be different, just for that case. The Parallax eyes are a UV distortion effect and won’t suffer from this problem.
Unity Cloth physics on the hair does not work well at all. The hair meshes are too dense, and they just tend to collapse into a mess of tangled vertices. You’d think it wouldn’t be problem as both Unity and iClone use PhysX. But Unity’s PhysX implementation is much older than iClone’s, and I don’t think they have ever upgraded it. You can get passable results if you ramp up the iterations to 5000 or so, but it turns your project into a slide show.
Magica Cloth 2 is better, but it still takes a lot more tweaking to get it right as there is no direct translation from PhysX settings to Magica Cloth 2.
To get better hair physics in Unity I even added a whole hair spring bone system in the Blender add-on, specifically to create hair rigs for Unity to animate with spring bones:
You can get visually superior results with this, but it takes the most set up.
If your player controller is causing jitter issues, where a static animator is not, this suggests that your player controller script is not updating the character movements in the correct update block? Physics compliant motion should be done in the Fixed Update, but I don’t know if that applies to Unity Cloth. It’s worth looking into.
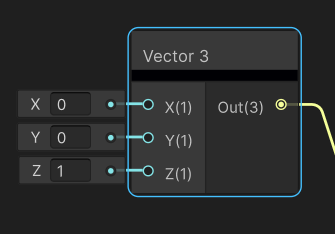
Edit: You can quickly fix the eye depth problem yourself by editing the Shader Graph: RL_EyeShaderRefractive_Variants_HDRP
In the “Iris Vertex Depth” section if you change the Vector 3 from (0, -1, 0) to (0,0,1) that should fix it for your particular export settings, if you’re using the settings I think you are…
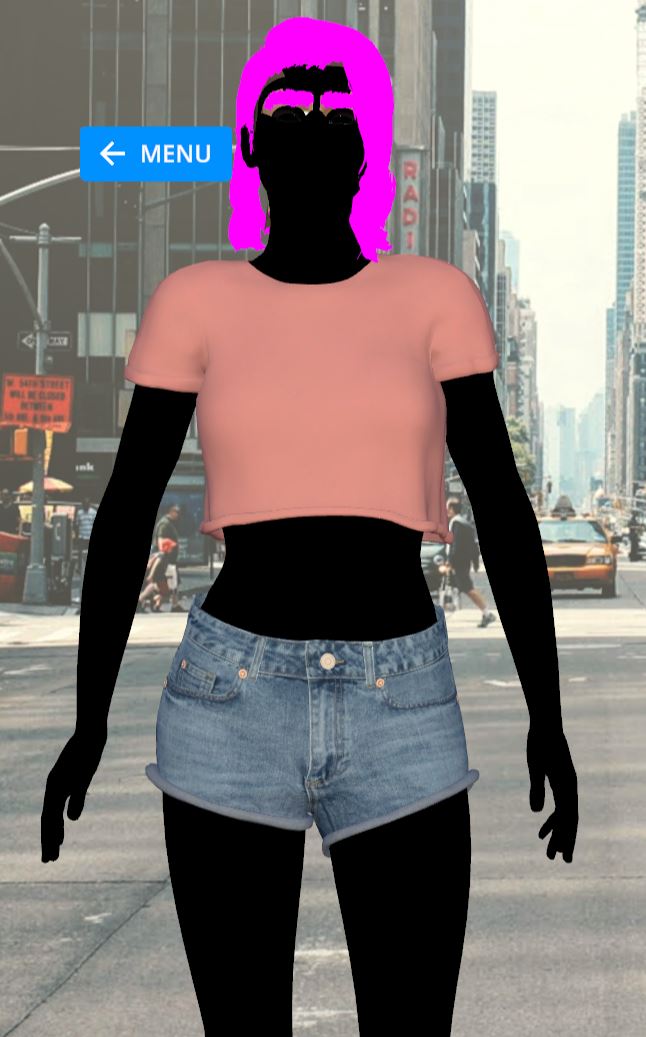
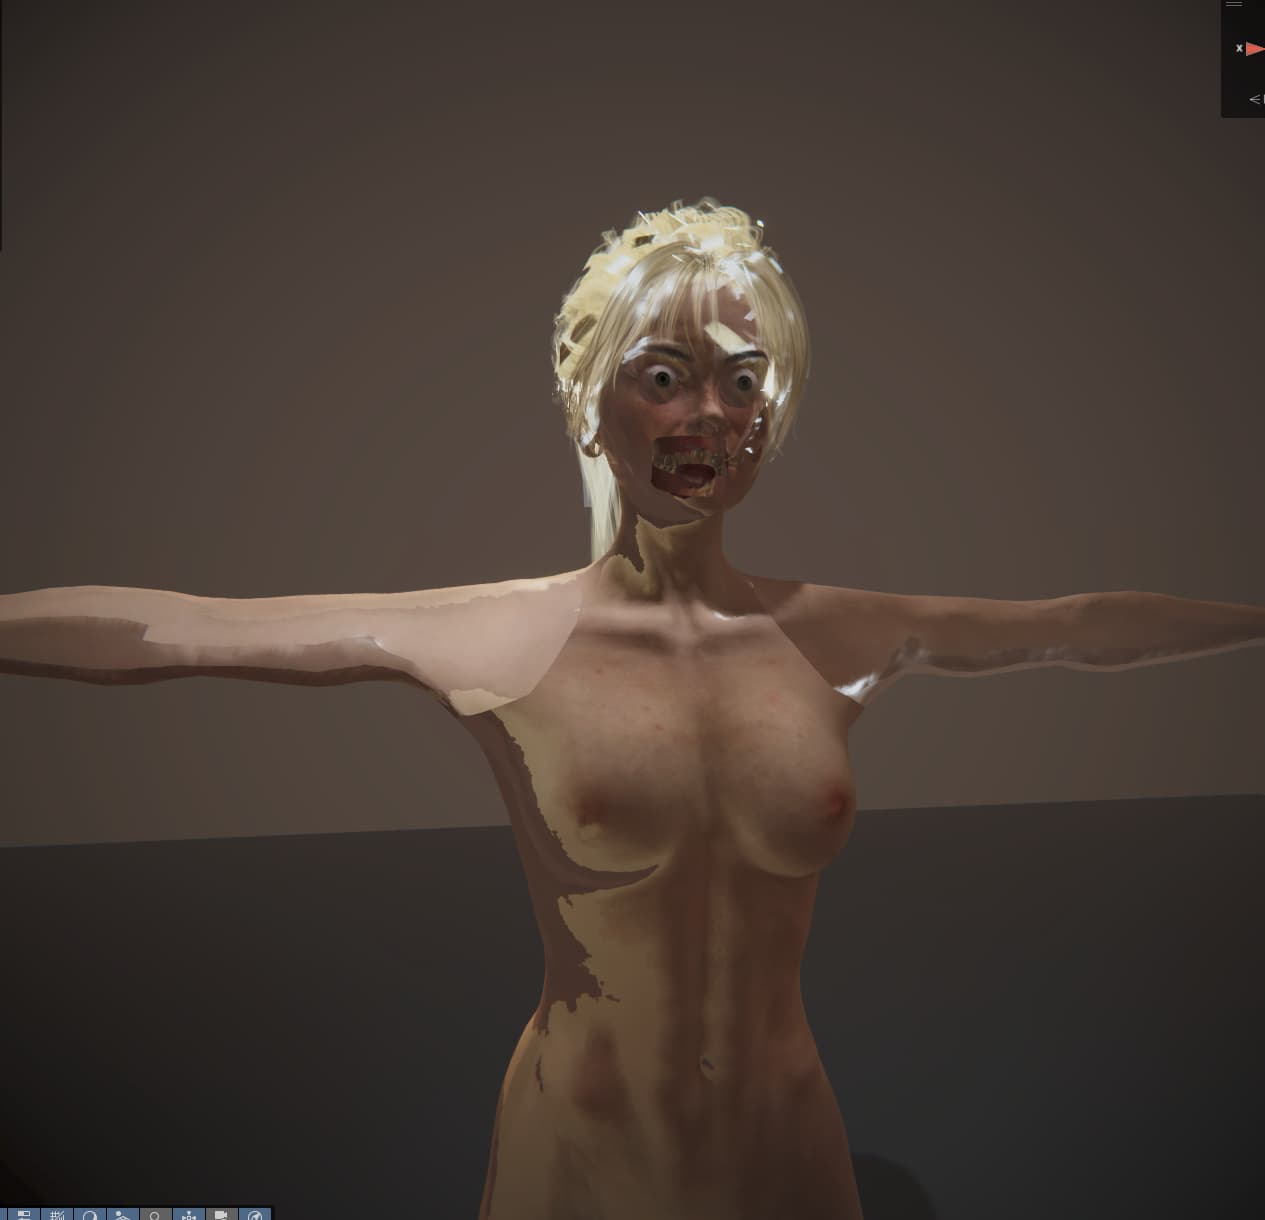
hello. i have two and a half questions for now i am using CC4 with Autosetup 2 in Unity 6 but i want to use it for webGL and i would like to use mostly the blendshapes (and some animations which are ok) .
a) Half question is that on base body i have three times all the blendshapes ( during the export i chose to add wrinkles as morphs) i want to use it salsa so can i fix it? (it has extended profile)
b) on tutorial Expression Wrinkles — CC/iC Unity Tools 1.3.0 documentation it says about the expressions. but how can i find them? can not use them as blendshapes for example?
c) on webgl on camila i have this result (photo) any hint? or something during the build materials option? Thank you!
And you were correct about changing the Vector 3, it does fix the Iris Depth issue !
I saw the same hair issues when using Ultimate Character Controller which is based on kinematic physics, and I showed in the video a character moving forward using a walk forward animation with root motion enabled and having the same hair issue, so it doesn’t look like the nature of movement is at fault here but rather Unity’s cloth physics.
I’ve heard good things about Magical Cloth 2 and intend to get it at some point. I should also give Obi Cloth another shot. If I get good results with either I’ll be sure to share them on this thread.
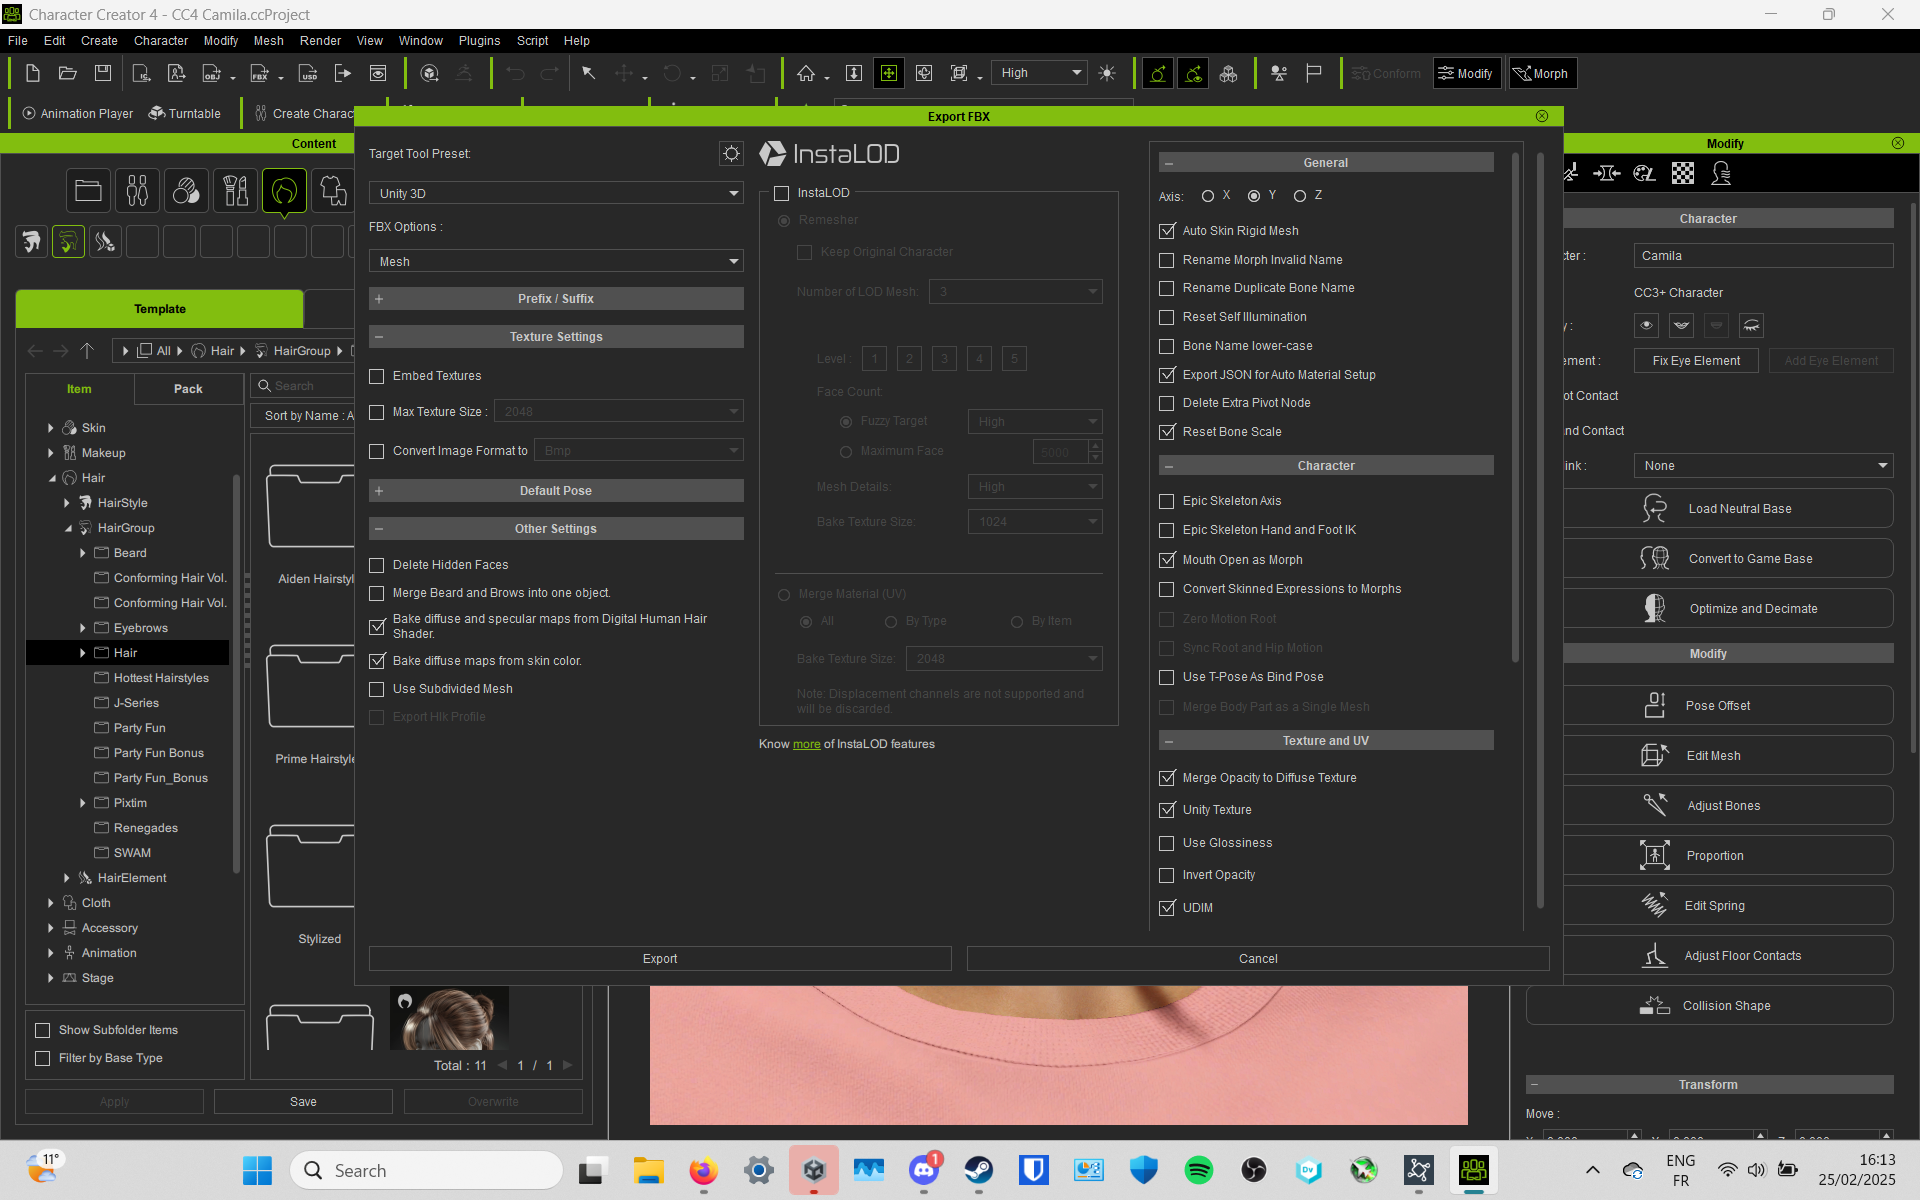
I have a problem with the RL hair shader in HDRP, Unity version 2022.LTS. I am trying to produce a highly realistic, high fidelity avatar, which is working well now except for the hair. All else looks good but the hair is more cartoonish, while in CC4 before export it looks great. I suspect that this is due to an issue with either the RL shaders or the autosetup process. At this point I have not implemented the hair physics due to an issue with the hair weight map, but that one is for certain and RL issue. I tried the two pass hair, with tessellation, and in this case the idea is to achieve a dyed (pink) effect.
I hope all is well! Just wanted to check your plan/timeline for Unity Auto Set Up with the Character Creator 5 release? As i’m super happy with CC4 and the great job your tools do in creating realistic characters in Unity. I’ll probably stay pat on CC4 and not consider CC5 unless your Unity Auto Set Up tools are available.
Unified version, for all versions of Unity and pipelines.
Automatically installs and updates run time shaders and scripts.
Checks for missing shaders and runtimes.
Fixes for:
HDRP shader recompiling.
Wrinkle masks not being detected when installed in Assets.
I’ve patched up the latest live version of the Unity setup to 2.0.2, to fix some of the problems preventing physics colliders and spring physics being generated correctly and includes Unity 6.1 shader support.
Hopefully the full 2.1 release for Unity should be out just before CC5 lands, that should have full CC5 support and initial DataLink functions, unless Reallusion sneaks in features before then.
Fantastic News all around! I just switched to Magica Cloth 2 and your setup is spot on for cloth and hair - colliders align just right - many thanks. And thanks for the update on CC5 - great to hear that’s on roadmap for 2.1 ! I actually wouldn’t be moving to CC5 without your tools which make my characters look amazing in Unity. Now, i’ll preorder my copy of CC5…
One question - i think is part of your 2.0 push - i believe you refactored the runtime vs. setup components so among other benefits, the former could be under an MIT license and the latter under GPLv3 - do i understand this correctly?
Again, and as always, thanks for your amazing work on the Unity Auto Setup tools.
If you’re merging materials, stick to merging materials with the same shader variant.
e.g. The head and body skin shaders may use the same overall shader, but the wrinkle system and additional face masks of the head material are part of a shader feature that is compiled separately and is therefore considered a different shader.
But keep in mind if you’re using a scriptable render pipeline like URP or HDRP: Combining materials will not have much, if any, effect on performance, as URP and HDRP batch draw calls by shader variant, not textures.
In traditional rendering methods like the old Built-in renderer, changing textures on the GPU before each draw call was the most expensive operation going, so the idea was to combine as many things as possible onto a set of single large texture atlases so that everything on the screen could be drawn in a single batch without changing textures.
The problem with this is that it makes the objects and materials extremely difficult to manage and change. And if you weren’t drawing everything in the atlas, then you were wasting huge amounts of texture space.
HDRP and URP no longer work like this and they batch their draw calls by shader variant. Which means everything with the same shader variant is drawn at the same time in a single call, which removes the need for texture atlasing and material merging.
That’s why I made the material baking function of the auto-setup, this reduces the texture complexity and shader variations down to as few shader changes with as few textures as possible whilst retaining the same visual quality.
Further optimization by merging materials will probably have no noticeable effect. (Though you might want to test that to be absolutely sure).
The only real benefit to material merging is maybe reducing texture space with careful selection of which materials to merge. But unless you’re desperate for extra texture memory that could well be a waste of time.
I tried to optimise as well with the LOD system but it came out weird for me, like there was no LOD 0 and the others were extremely broken looking.
I have a bigger issue where if I built the character with magica cloth 2 for hair physics enabled, the character drops framerate from 90 down to 1 FPS when I try to move or rotate it with the unity transform tool.
It’s especially weird because disabling the hair (turning it off) that has the magica component doesn’t fix it, I HAVE to rebuild with magica physics disabled.