Before I describe the problem, let me give a little background.
Usually, my workflow is that I create (i.e. dress) the characters in iClone/CC and export them as FBX (at 30 fps) for use in C4D. So far so good. The problem is that I cannot export any cloth or hair simulations from iClone that way (the clothing or hair would be static in C4D); to do that, I need to export this as an Alembic. Since I need the skeleton/joint hierarchy from the FBX version for all kinds of things, I thought I would combine, for example, an FBX character with Alembic hair simulated in iClone using the exact same animation as for the FBX export. At first this seem to work, but then I noticed that the FBX and Alembic would diverge/drift apart. To show this issue, I animated the standard Camila character in short and a crop top with the Catwalk_F animation from CC4 and exported this both as an FBX and Alembic to C4D.
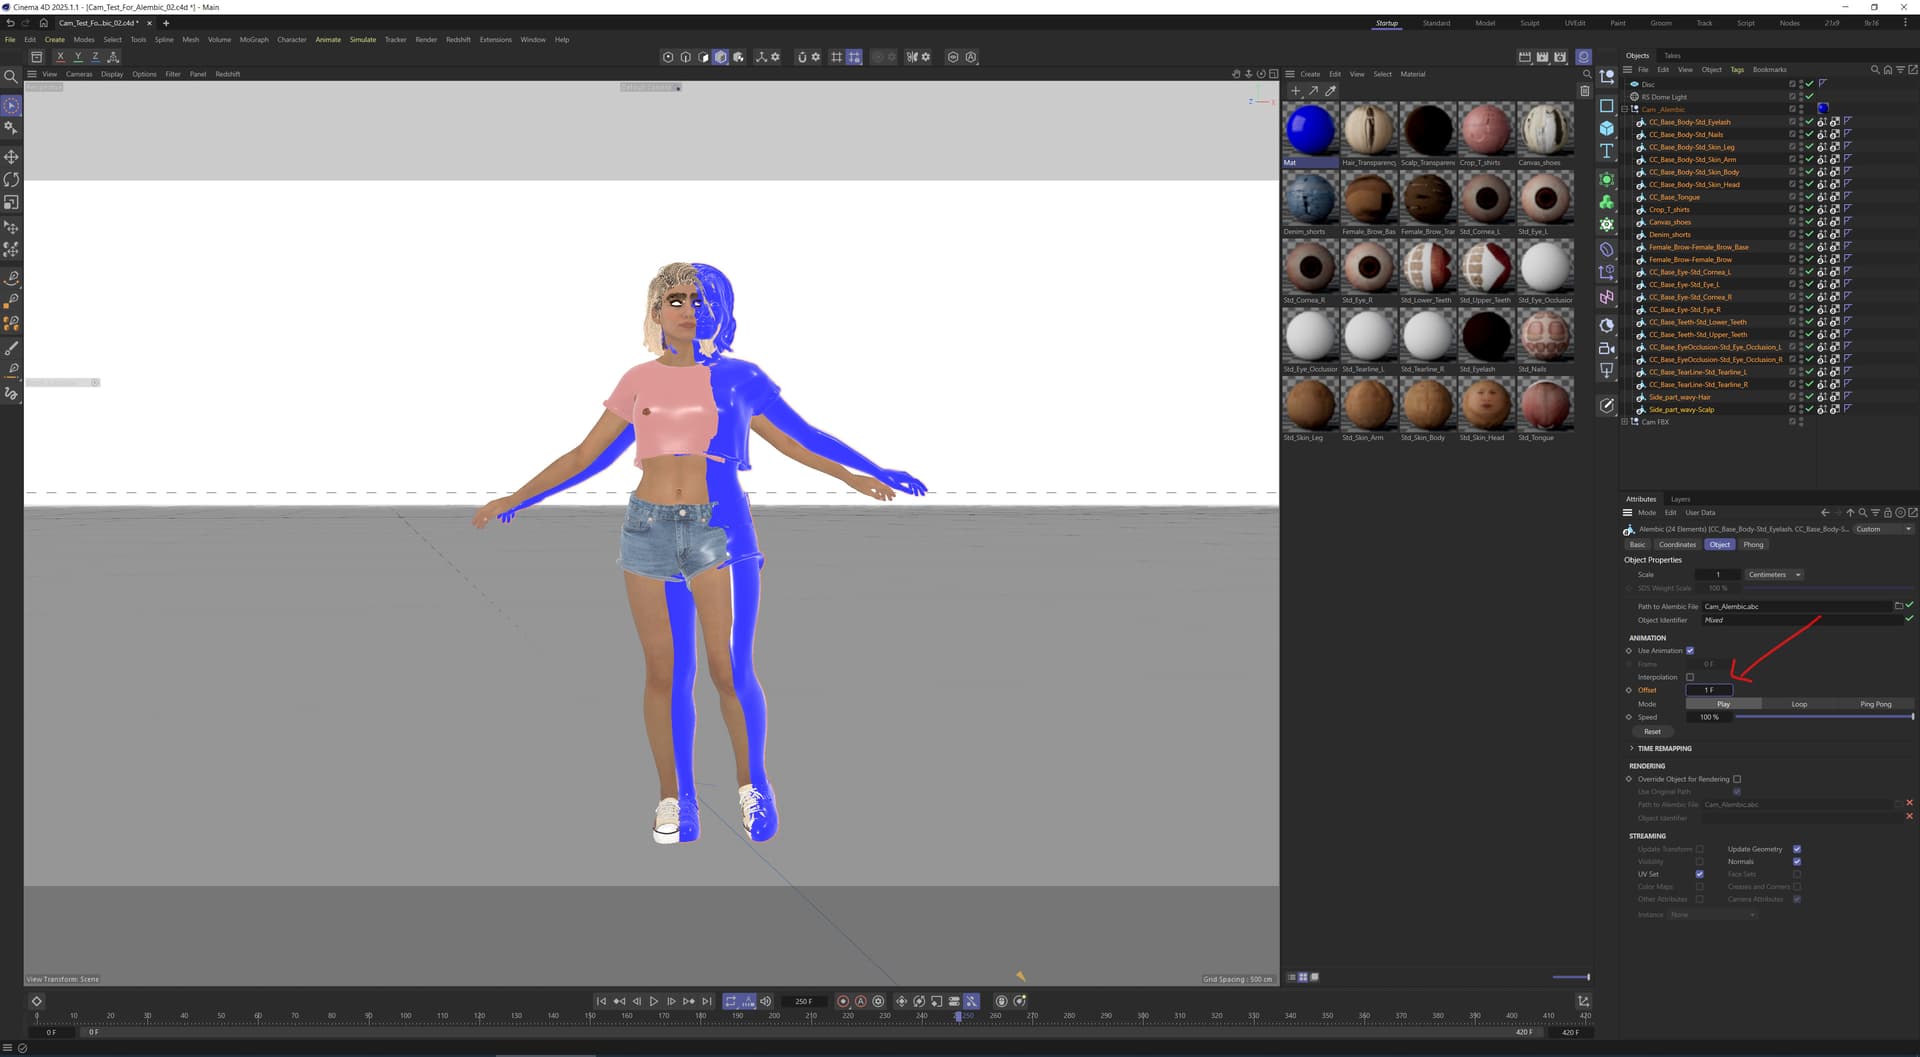
The video should show the problem (the Camila with the “regular” textures/colors is the FBX, the blue one the Alembic). In the beginning they are pretty congruent; at the far end, when she turn back towards the view, the divergence is pretty pronounces. Any such hair on the FBX would shift almost 1/2 width of the head out of place which looks very weird. I don’t really care about Alembic clothes simulated in iClone because I rather simulate those in C4D, but I would like to use the ton of iClone hair products that I own.
Now my questions:
What if anything am I missing?
Can anyone else using C4D reproduce this? How about people using Blender or other 3D applications besides iClone? (This is why I used a standard character and standard animation for this test that every owner of iClone 8 and CC4 has at their disposal.)
Is this a bug or a feature, i.e. something that RL would need to fix?
(Note: The imported textures were not modified/adapted for use in C4D which means that some of them look strange (e.g. the missing transparency of the corneas); usually, I would fix this of course, but for this quick test I did not bother to.)
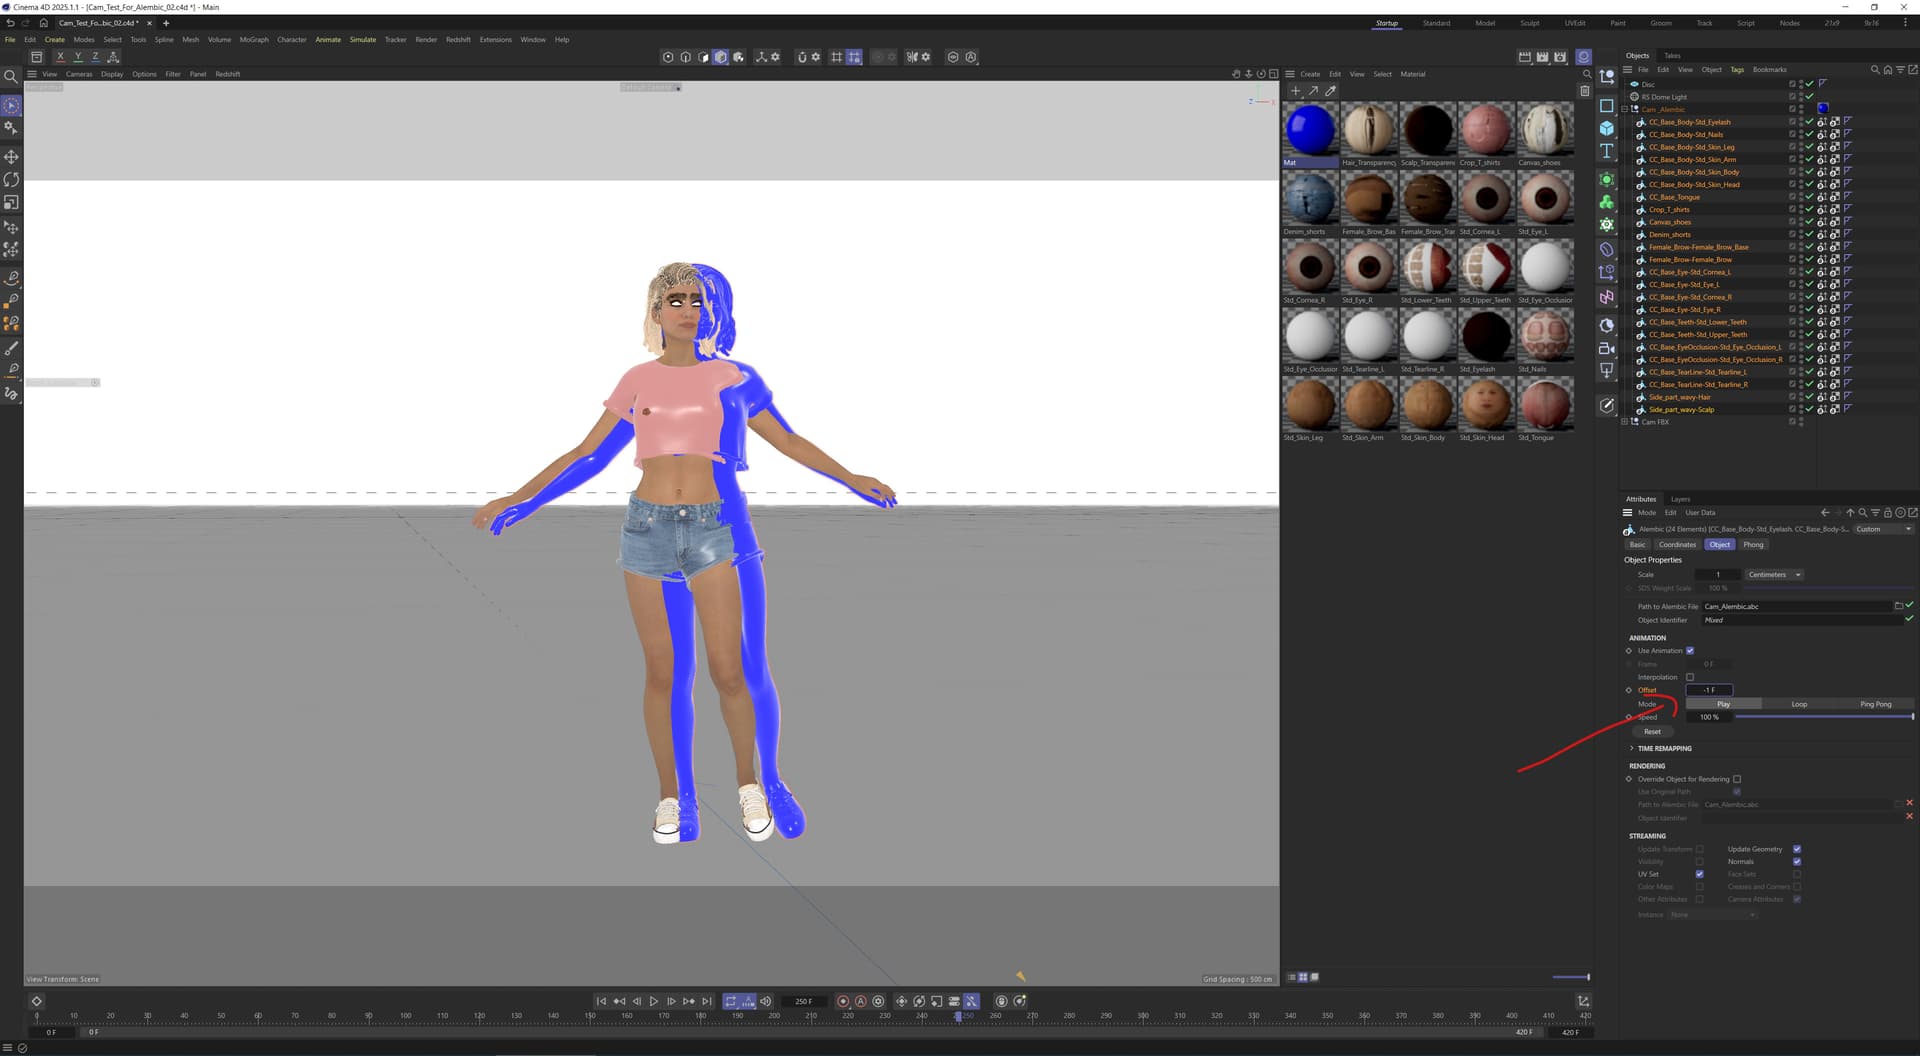
The frame offset can also be easily adjusted in C4D (even for fractions of a frame which means using interpolation) but it does not work. For example, at frame 250 (30 fps) there is no offset I can choose to get both figures congruent. Actually, an offset of 0 (i.e. no offset) gives the best result (same pose, but Alembic is shifted to the right). Since I don’t know how to screen-record, I’m enclosing screen shots.
Note: I export Alembic from iClone separated by materials so I can use the materials/textures with the FBX for the Alembic parts of the character in C4D.
So I guess, it would be possible to keyframe a position adjustment for the length of the animation in C4D, but surely that can’t be the most desirable solution.
This is pretty much C4D specific issue then, which has to be handled locally (5 cm offset in your case).
BTW, you are not going to see any difference on frame 0 while changing frames offset by 1. You’d start seeing a difference mostly on frames with fast movements. But again, frames offset by 1 might be Blender specific.
One thing for sure, is that iClone exports both FBX and Alembic pretty much synchronized. All issues have to be figured within the target app.
Here’s just another test with fast running motion in Blender (camera is attached to the root bone). It’s synced perfectly.
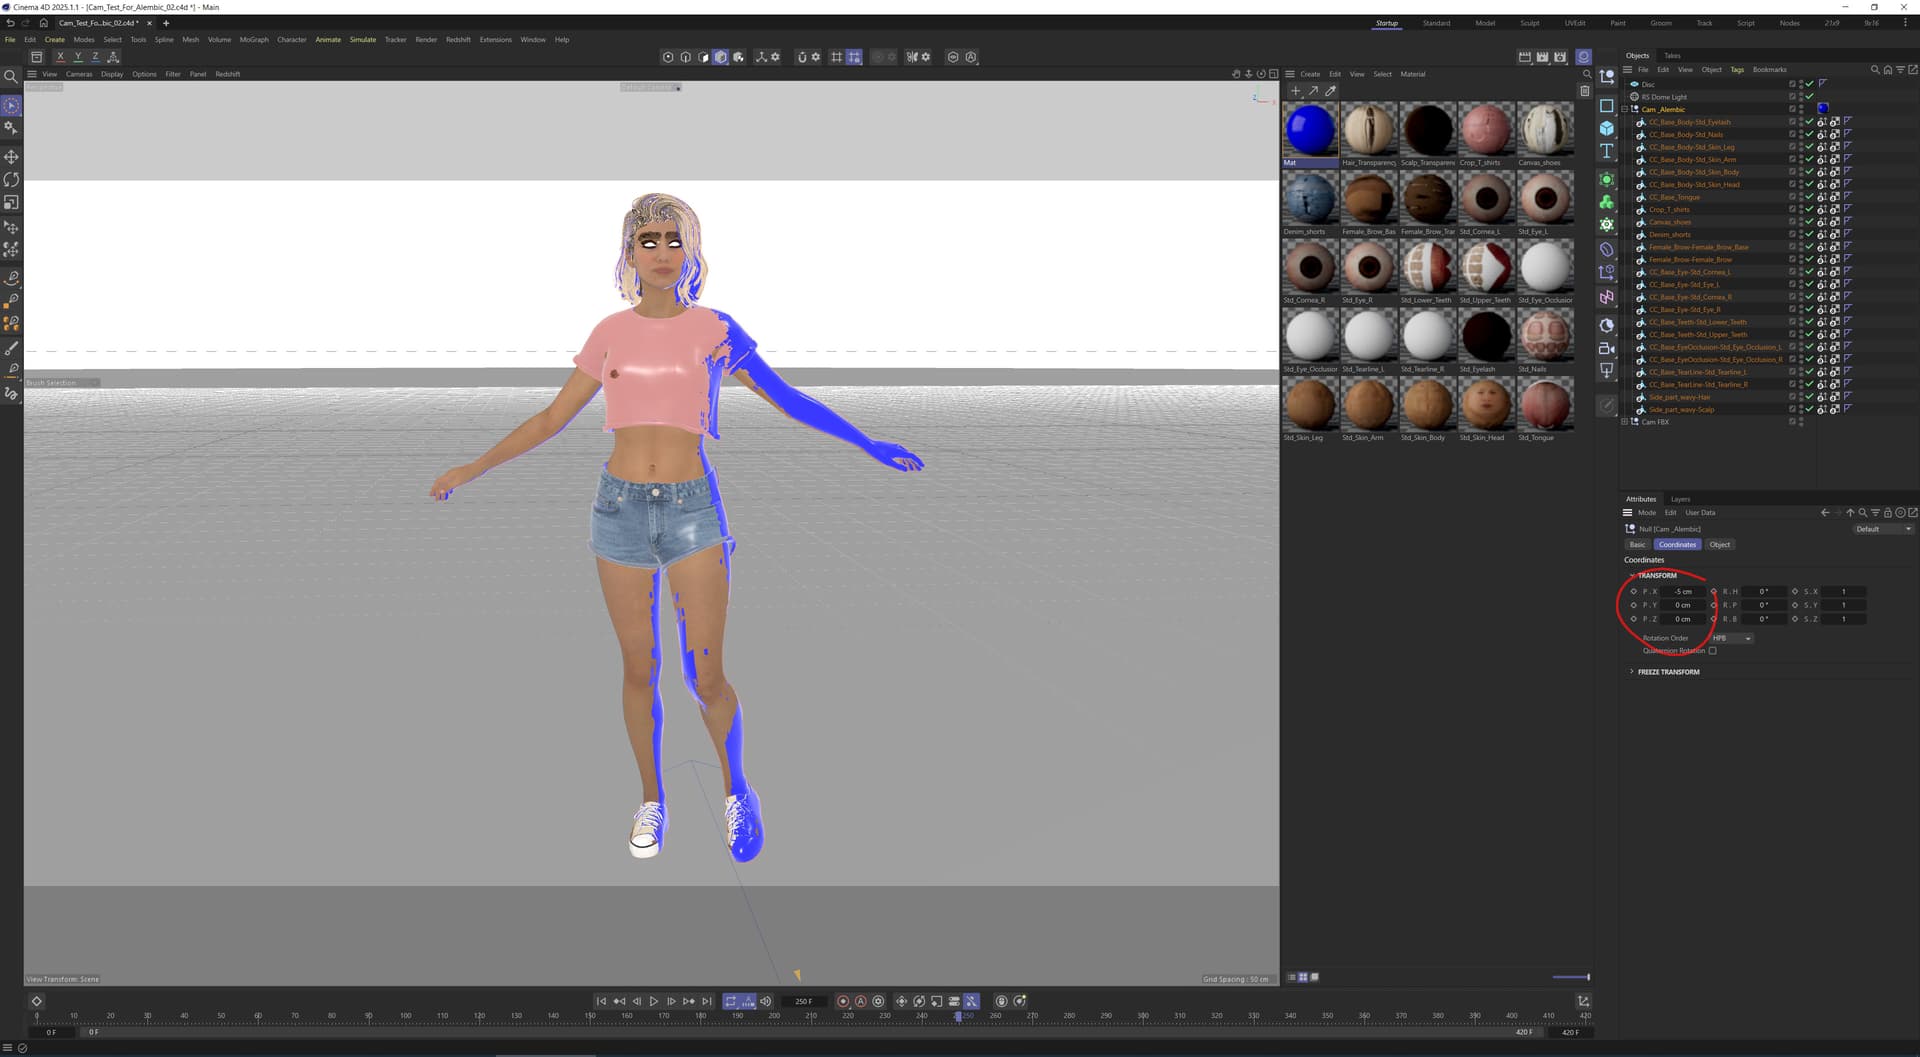
I don’t think that the problem is a frame offset (at least not in C4D); instead the divergence is apparently related to how far the character is removed from the original position (0, 0, 0) and not based on the speed of the motion (as in the case of a frame offset). Also the divergence is not constant: for example, on frame 250 (@30 fps) it is about 5 cm on X; at the beginning and end of the motion, there is no divergence. In other words, the divergence would have to be compensated for by keyframing the position (translation) for this particular animation between 0 and -5 cm on X for the entire length of the animation.
It is possible an issue for the C4D developers to look into. The problem is that, as far as I understand, I can’t send this file and the included assets to Maxon for troubleshooting because they contain Reallusion IP.
I tried a very simply animation with a moving box. That worked without noticeable divergence between FBX and Alembic export.
Then I also tried the Camila animation without baked softcloth physics (hair). Same divergence as the simulated version.
C4D only read Alembic from iClone when exported as Ogawa (HDF5 used to give me an error message in C4D (Unknown Format) but now it will simply not load (without error message)).
I also use Ogawa.
But again one frame offset can cause a great discrepancy depending on animation speed but not the distance from 0,0,0.
Here is the same animation where I blended a slow walk at the end in iClone and left a default 0 offset in Blender.
There is huge discrepancy throughout most of the clip because she is running, but very little at the end where she walks slowly (being about 15 meters from initial 0,0,0).
You really have to send a project to Maxon for troubleshooting (I see no reason why it would be a problem)
Perhaps the frame offset thing is particular to Blender? Meaning, Alembic files import 1 frame out of sync into Blender as your video clearly shows. I don’t see this here in C4D with my animations even fast ones, and even if I did, I could just put in a frame offset as I did in the screen shots above.
Anyway, I may have found a “fix” to compensate for the divergence in C4D without having to keyframe position offsets for the entire animation. But I need to render a full animation to be sure (“final” render, not a quick and dirty one, so it will take a few hours).
It has taken a bit longer than anticipated, but here is the result. I think the “fix” worked pretty well: the character is FBX, the dress (100k+ polys) simulated in C4D, and the hair is an Alembic from iClone.
And, oh yeah, the fix in C4D apparently is given a heading value of 1 degree (i.e. +1 degree for rotation around the vertical axis) for the Alembic null (group). So it appears that the Alembic is off by one degree which means the further it is from the point of origin, the higher the divergence which is why I originally thought it was dependent on the distance from the point of origin (which it kind of is).
That looks great.
Oh wow, 1 degree off, that would certainly progress discrepancy with distance. Seems to be a bug in C4D.
Meantime in Blender, for whatever reason they import FBX with 1 frame animation offset, which can be set to 0 on import to eliminate the need for any further adjustments in a project.
Looks great, Nirwana. As a side question: hair exported from iClone to C4D/Redshift takes forever to render, which is pretty annoying since it renders instantly in iClone. Have you found a way to make it render quickly, or even just faster?
Well, hair always takes “forever” in C4D/Redshift, no matter whether its iClone hair or C4D hair.
If you did hair with the Standard Renderer in C4D that would render faster than if you used Physical; I understand the reason is that the hair in “Standard” is a fake/post effect whereas for Physical (and Redshift) C4D renders actual geometry, which takes longer.
I guess the reason why hair renders faster in iClone is somewhat similar: iClone does not use ray-tracing. Also, while hair renders faster in iClone, there may also be render issues with hair in iClone (such as shadow problems and flickering). I’m willing to accept longer render times for better quality.
As to making iClone hair render faster in Redshift, you may want to use the Sprite node for transparencies and not the opacity channel. Depending on the hairstyle, you may notice a slight increase in render speed and a somewhat different look to the rendered hair. Some experimentation with the settings in the Sprite node may be necessary.
BTW: Unless the scene is very trivial otherwise, the impact of the hair render on the overall render time of a frame is (IMO) not that bad. What GPU are you using for your Redshift renders?
Hey Nirwana, I hadn’t tried the Sprite node yet as you made it sound like it might not make that much difference, but I just tried it and it was amazingly faster! You undersold it! LOL Thanks for the heads up, this is going to be a big boost to rendering and gives me a lot more items I can work with in the future. I’m using a Ge Force RTX4070 Super, so it’s a pretty good (I think) GPU. I’ve only just recently in the past few months jumped into Redshift, and I’m still learning.
BTW, I viewed your cloth sim with particular interest as I just went through a long and painful crash (sometimes literally) course in cloth simulation, and it was quite the education. I tried to follow tuts I found online, but you seem to get only partial info, so I ended up doing a lot of trial and error. Ultimately, the whole things seems to be a real balancing act between the mesh density and the Scene Settings/Simulation, which kind of surprised me. It seems in a lot of ways that the cloth settings have only a marginal effect compared to the Substeps and Iterations. I was able to come up with a good result in the end, but it took a while.
Well, maybe a little.
The thing is that any improvement in render speed depends on the scene, the number and type of transparencies, the GPU (the faster the GPU, the smaller the difference), and a number of other factors. So the difference can range from barely noticeable to fairly substantial.
The Sprite node also has drawbacks/limitations so it is not useful for just any type of transparency. It works quite well if you have lots of simple meshes with the same transparency/opacity map (e.g. leaves on a tree) or if you have (potentially) a number of transparencies on top of each other (e.g. several layers of strands of mesh hair). However, if you want to use want procedural opacity maps or create more advanced materials, you may run into problems with the Sprite node.
Yes. Same here, and it’s still ongoing even though I have been at it for a while now.
I’m not aware of any tutorials for complex C4D cloth simulation for animated characters, so, yeah, it is a lot of trial and error and figuring things out for yourself.
While I have been asked by viewers of my cloth-sim videos if I could do a tutorial, I have declined; there is a reason why simulation tutorials (not just for cloth) usually show only relatively simple set-ups: Since the simulations take a long time, doing them “live” is not feasible and doing them off-screen, sort of works against the idea of a tutorial that shows what happens if you tweak this or that setting. (And I’m not putting many hours of work into a tutorial that may be watched by a grand total of three people.)
Why would that surprise you? It’s pretty much the same when you do cloth sims in iClone.
With regard to the number of substeps/iterations, you may have discovered that more is not always better and may in fact cause the simulation to “freak out”. Also, the settings that work for one sim may not be ideal for a different one.
I’d be interested in seeing that.
BTW: I have a number of cloth sims on my channel (with a playlist of their own), if you care to have a look.
Some additional thoughts about cloth sims:
While I primarily do “tech demos”, meaning the cloth sim is the reason for creating the animation in the first place, you create more narrative work. For projects like "Auroratrek " or “Quest of the Key” I would probably not want to use simulated clothing for the following reasons:
It will add a lot of time to create the scenes (as you have probably found out) thus dragging out a process that already takes a long time for projects like yours.
Putting in that time may come at a cost to the time available to work on other aspects of the animation and, depending on the kind and style/look of the animation, may not add enough to justify the additional time spent or may not be appreciated by viewers. (In my experience, cloth sims are primarily appreciated by those who have tried something like that themselves and have an idea of the difficulties involved, not by your average YouTube or Vimeo viewer to whom the story and emotional appeal of an animation may be far more important than its more technical achievements.)
If characters wear items of different flexibility (such as cloth, leather, metal (buttons, armor)) and you want to simulate all that, things get really tricky fast.
The motion of the characters may need be altered so as to prevent the character’s body mesh intersecting with itself and thus pinching the cloth and messing up the simulation. However, the new position of limbs may not be desirable for the scene/story or look of the character. Problematic areas are the armpits, arms vs. torso/breast(s) (particularly on female characters), the crotch area, thighs; any area where cloth interacts with the character’s fingers (you may need to use simplified collider bodies for the hands to prevent fingers from poking through cloth, getting caught in it, and messing things up.
In my experience, most of the garments available on the RL platforms need modification in order to be simulated successfully, such as subdividing, re-meshing, sculpting, and welding. I have started to look to garments created with Marvelous Designer available from other 3D platforms. However, while these tend to be more detailed than iClone clothing (which is usually too low-poly), their poly count is sometimes too high (mid-to-high 6 figure poly count, in a few cases even exceeding 1 million). Which means that these garments may also have to be modified (some of these modifications would best be made in MD, a license for which adds to the expense of doing cloth sims). What I am trying to say is that very few 3D garments I buy work out of the box for simulation and modifying the mesh can often mean that you lose the use of the textures that came with the garment (which, in turn, means you may need to re-texture the garments and/or create new materials for them). This is an additional investment in time and, potentially, money.
I’m sure I’ll learn the limitations of the Sprite node soon enough–like a lot of things in 4D, they’re great, until they’re not.
Yes, lots of simple cloth simulation tuts–look, a flag!–but not a lot for animated characters. Maybe they’re trying to tell us something LOL. I got a newer GPU, so I can actually preview a sim in near real-time, but it’s still a ton of fiddling and I ended up starting over several times, even after I kinda knew what I was doing.
The balancing act didn’t surprise me as much as discovering how much was governed by the Scene Settings. I spent a ton of time in the Cloth settings with really no hope of getting what I wanted, only to discover that changing the Scene Settings was so crucial. I guess I thought the Cloth settings would be pretty sufficient. And, yes, the “lmore is not better” was a little surprising, too, as is the notion that each sim is probably going to need a lot of individualized attention. I think(?) I at least get the concept of what things affect what.
All of your points against using cloth sim are well taken, and trust me, you are preaching to the choir on most of them! LOL I’ve been at this animation biz long enough to know I need to think about return on investment of time and money. My work with the sim in this case was probably half that my new(ish) GPU is fast enough to preview the sim in realtime and render pretty quickly, so it was just kinda fun to do it, but also just thinking ahead about possible future scenes for my characters when it might be raining or snowing and they might be wearing hoods and cloaks. If I made no headway, then I would probably just not write a scene in the rain or snow. In any case it would probably be only for a scene or two, because, like The Incredibles: “no capes”, which I suspect was really because they didn’t want to sim cloth for the entire movie any more than I do.
In any case, here’s a sample sim I worked on. It could be refined more, and there are some annoying bunchy areas, but overall I think it’s a step in the right direction.
I think this kind of cloak sim should be doable within a reasonable amount of time if the cloak is the only garment being simulated (looking at the video I think that the hood is not actually dynamic, which is probably a smart move). What is the poly count on that cloak? Triangles or quads?
I’m a bit of a “purist” in the sense that garments made of cloth are usually 100% dynamic (even if I may help it along with a cloth belt or two). So when you have 3 or more layers of cloth being simulated, things get interesting.
My current workflow is that I create the animated character in iClone on my “iClone” machine (which has only RTX2080Tis), import the FBX export from iClone into C4D on that machine, set up the sim and do the first, say, 90-120 frames (i.e. 3-4 seconds at 30 FPS), to check for any immediate problems (such as garments disintegrating).
Then I transfer the C4D project, including the FBX export file from iClone plus the texture folder from iClone via USB-SSD to one of my two other C4D machines, usually to the one that has an RTX4090 for the heavy lifting…
There are several reasons for doing it this way:
a) that machine is faster and the GPU has more VRAM (the RTX2080Ti only has 11 GB of VRAM which has, on occasion, proven to be insufficient for some simulations;
b) the faster machine does not have iClone;
c) it frees up the first machine to do other stuff;
d) even though it is faster, the machine with the RTX4090 consumes significantly less electricity than the one with iClone/C4D which does make a difference on sims that run for 3 to 4 hours per attempt (I never see real-time or close-to-RT sims because of the number of polys and the sim settings; a fast sim is one that takes “only” 2-4 seconds per frame (on the RTX4090)).
This:
And this:
are examples of sims that take hours to run (plus the render time of course).
When it comes to rendering, I normally use the Cloth Surface (with thickness) and the smoothing deformer on the simulated cloth to get a more cloth-like look.


")


