I’m having trouble with some Hair Builder 1 styles in iClone 8.61
It am new using iClone so maybe is not about the version, maybe not a bug, only my inexperience, do not know.
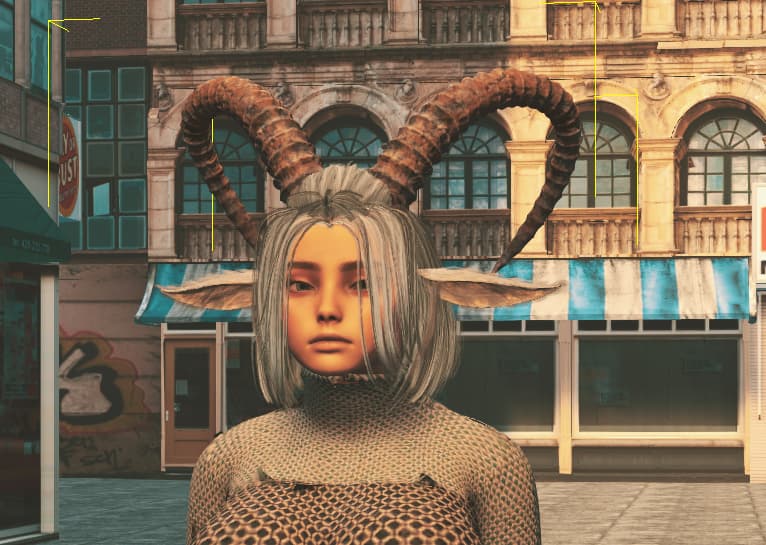
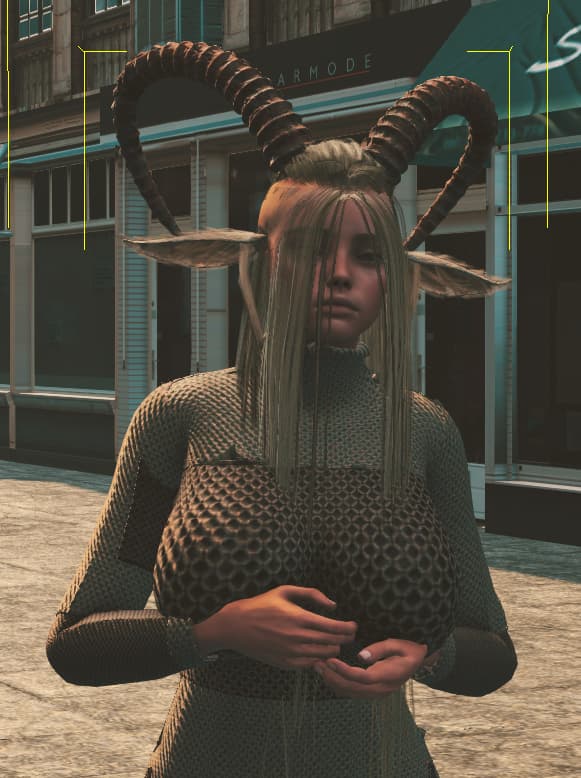
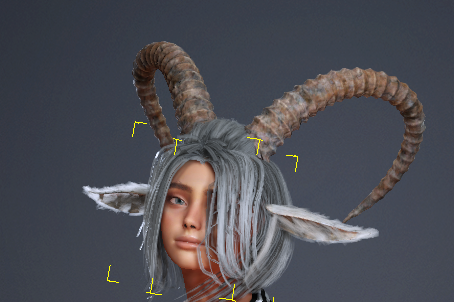
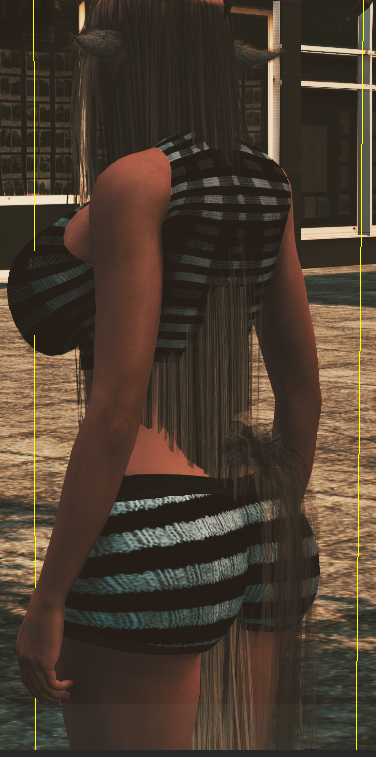
I’ve noticed that the Long Bangs element—and a few other hair parts as well—stretch a lot when I apply a motion. During playback the bangs suddenly become much longer, deform, and even pass through the character’s body.
I tried different things ChatGPT says it is about physics, I tried different configurations, without success.
Has anyone else experienced this?
Is there a recommended fix—weight map adjustment, physics settings, or something specific for Hair Builder 1?
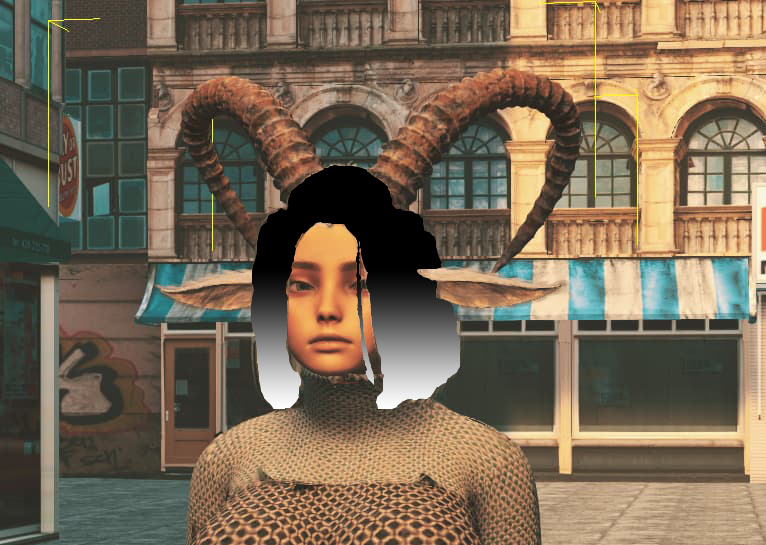
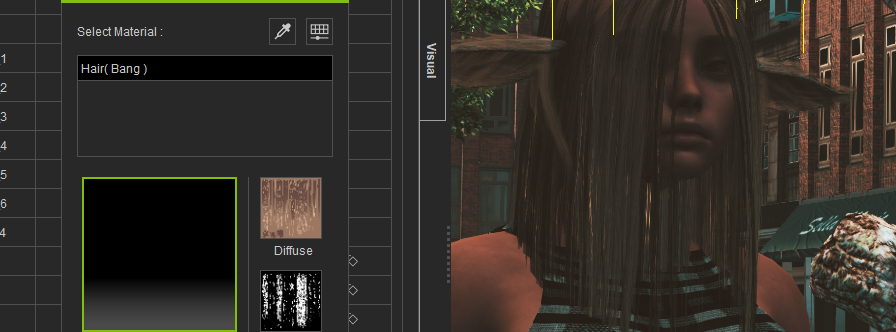
I don’t know what your hair UV map looks like, but I can show what the hair should look like - when you apply physics map to base color, or blend channel for checking.
If top portion uses a separate material, that material should not have physics applied at all.
If everything was made as a single material, then all top portion should be black (#000000) and every card root on UV should be completely black to about 30 - 40% uniformly (to firmly pin hair roots) and then a gradient from black to white further down. That 60-70% portion can have more white or more black portion depending on the level of dynamics you want to have.
However, in iclone continues having same issue. I updated the char in CC5, redo all the job in iclone as the weights were not correct there. Checked collisions… nothing works
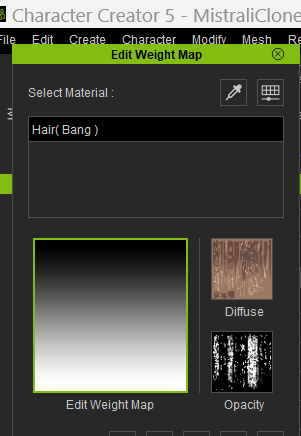
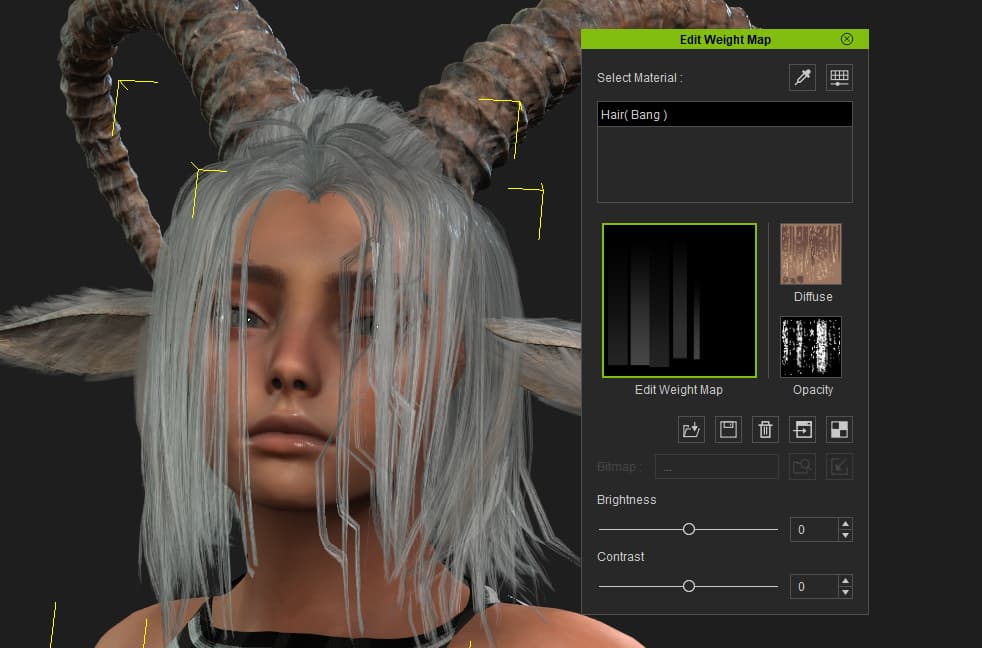
You made a basic gradient which does not correspond to cards unwrapped on your UV map. Which makes a lot of cross overs where some roots are not pinned with black - thus freely pulled down by gravity.
The picture I have shown is a virtual map representation. That is how the “Correctly built” weight map would have looked if you apply it to the hair material.
In reality, to make such a map you have to work with UV map cards stack individually and properly apply a gradient to each stack. Have a look at weight maps for default RL hair in Hair Builder content folder.
Generally, you may paint such a map in Blender. But there are a lot of “ifs and buts” as well trial and error… Here is a starting point I made some time ago.
I am really very beginner with Blender, so I deleted hair and added it again. It works perfect. The issue is that I personalized colour and moved sliders of bang wide, lenght and etc. I am a bit dissapointed. I can change the color in iclone but can not modify hair propierties.
I copied the hair builder 1 settings from the original hair to my modified hair. It works so much better now but there are some hairs of the bang that have this artificial shapes, can’t understand why.
I do not know how you customized the hair, but probably that is because the hair you copied the map from has differently unwrapped hair cards than your customized hair. Each new hair should have an individual physics weight map created in accordance with the new UV unwrap map (if it was modified from the original).
If you cannot create a new map in Blender, then at minimum what you should do, is to open a UV map for your hair in Photoshop or similar editor, overlay it with the weight map you copied from other hair and identify where the cross over occurs which causes abrupt hair behavior during simulation. And then draw custom B/W smooth gradients to correct “troubled” areas.
I retouch all in CC5, with better comprehension and, this time, it worked well. Also so I had a very silly noob problem, I didn’t attach the hair to the character, thought that was automatically done and, in CC5 all motions work properly so I didn’t pay attention to it.
Thanks for all 4u2ges, and sorry for my late answer, I had a lot of work and I have small children, I am just back in my project
I get the same problem, but only when I use the character in a specific set I downloaded from Marketplace. The rest of the hair is fine, it’s only the bangs.
I couldn’t figure it out so just turned off the physics for the bangs, but left physics on for the rest of the hair. Would be nice to have physics turned on, but I can’t work it out.
If I use the same character in another scene it behaves properly, so it’s obviously got something to do with the scene rather than the hair or character
I fixed some weeks ago redoing all the weights maps, what suggest that, somehow, when personalizing the hair, all weights are lost. Something that should not happen, as far as I understand.
I made some tests. If you only change the color, to an original reallusion hair element that works well in CC5 and iclone8, it stills working fine. As I fix the problem thanks to the advise of 4u2ges, I would say that you changed the hair with sliders or you created a new one. In any case, you must edit weight maps, reassign original ones and put them darker, should fix the issue. In any case, if u can make new ones as 4u2ges said, would be perfect. I think reallusion should do a fix, update or a tutorial with that.
It is true that maybe is a reallusion bug. The weightmaps unassign when sending them to iclone. The hair works well in CC5 but not in iclone 8 and you must check where they are in CC5 and reassign them in iclone, so that is an error.
In any case, if this is not a but, when moving the sliders it should show a pop up window with a message “if you move this slider you will need to reassign weight maps”, or something similar.
There is no correlation between changing hair element color with Material + and hair physics behavior. You have to present a “hard” evidence of the behavior change - before and after with screenshots or videos.
Regarding morphs sliders tweaks (I assume that is what losdra1 meant when was referring to “sliders”). The only way hair physics might be affected, is when you bring hair element closer to the head mesh. I recommend inspecting Head/Neck Collision shapes and tweak them accordingly.
Bottom line - any physics enabled cloth/hair must always be outside of collision shapes at the animation start/default pose and not too close to the body mesh.