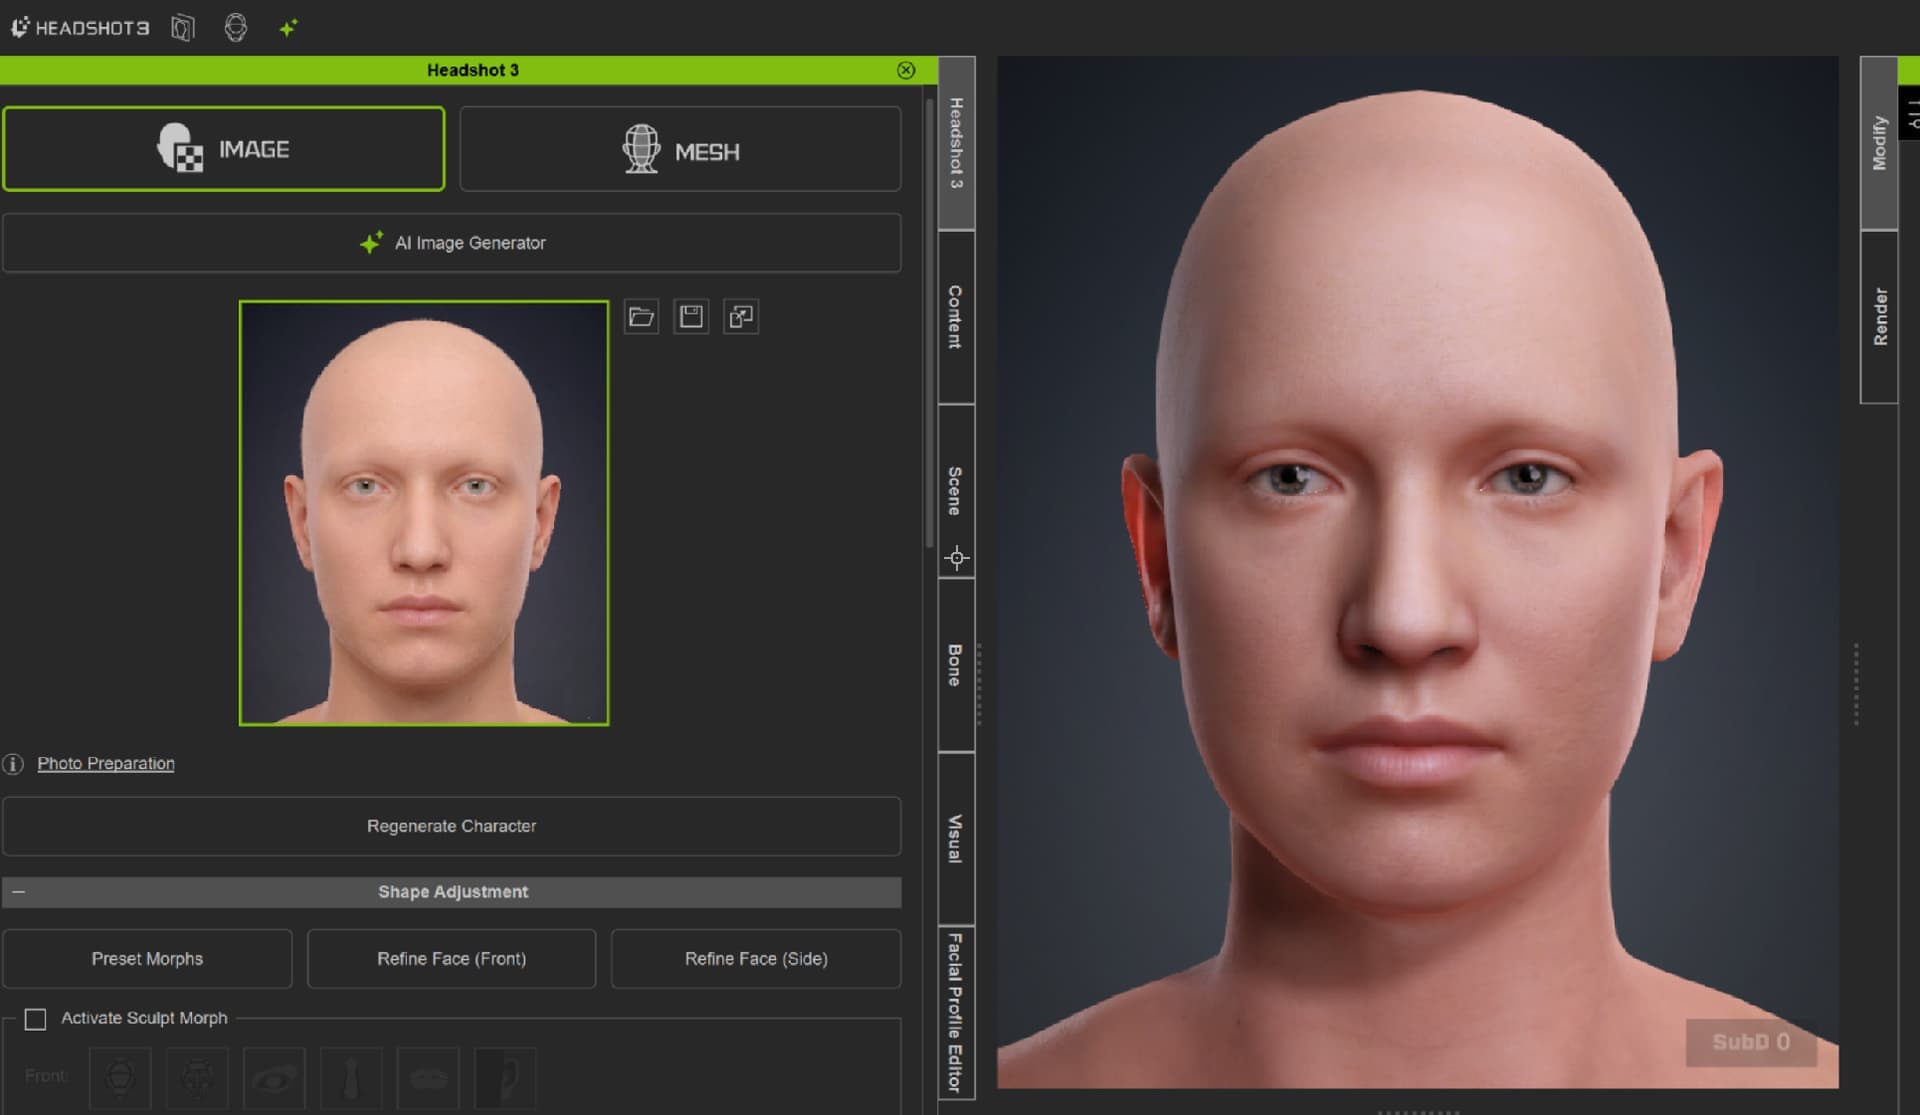
I’m just wondering if anyone else has run into this with Headshot 3.
I noticed this sometimes with Headshot 2 as well, where the likeness can come out pretty good, but the skin tone gets read wrong from the image.
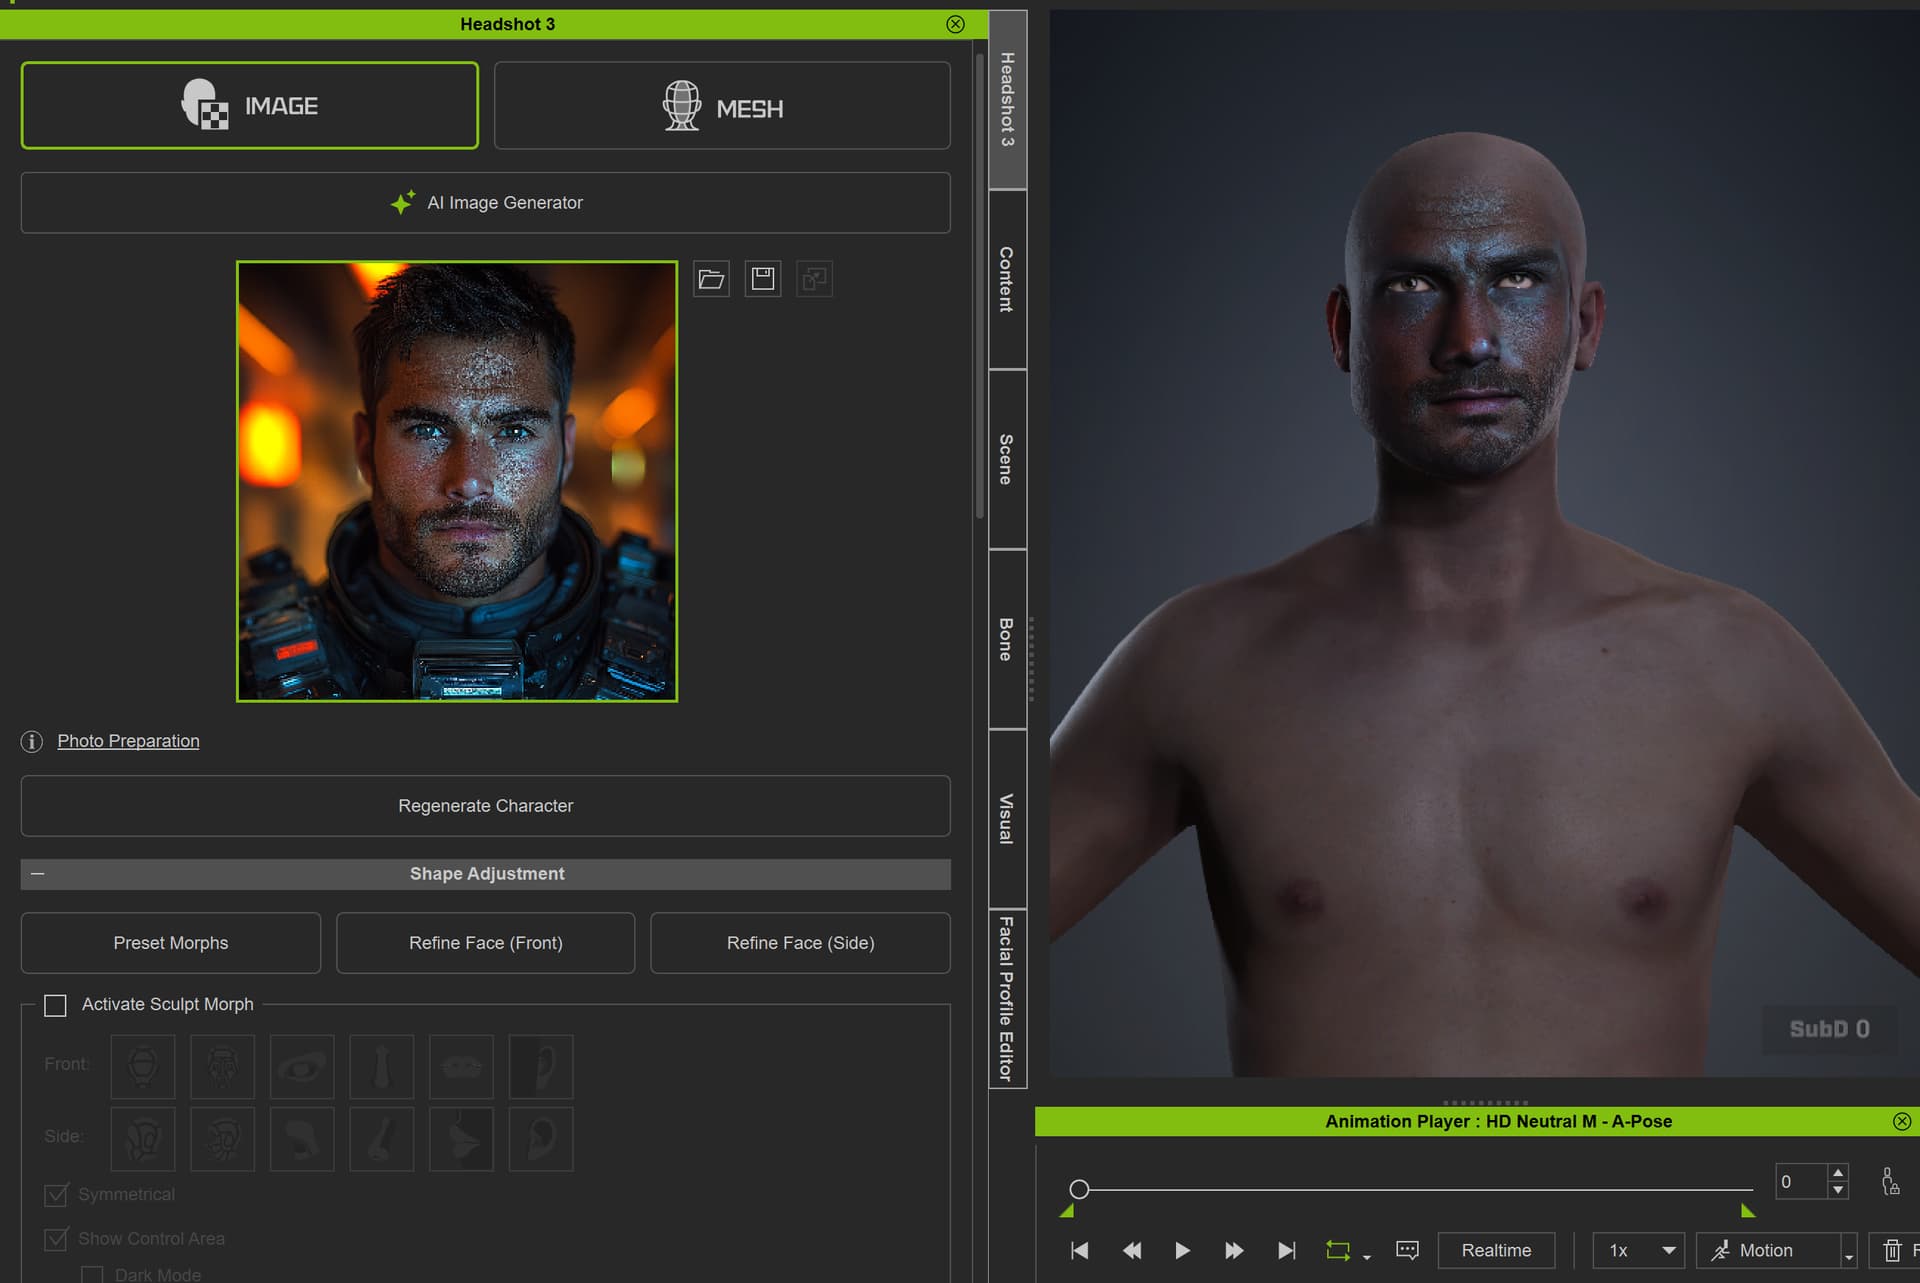
For example, if the reference image has strong lighting, like orange/warm lights, blue shadows, or a more cinematic look, Headshot seems to sometimes bake that into the skin. So the character can come out way darker, more brown/purple, or just not matching the actual person in the image.
I tried changing the body skin color after, but that mostly seems to affect the body/back of the head, not the face texture that came from the image.
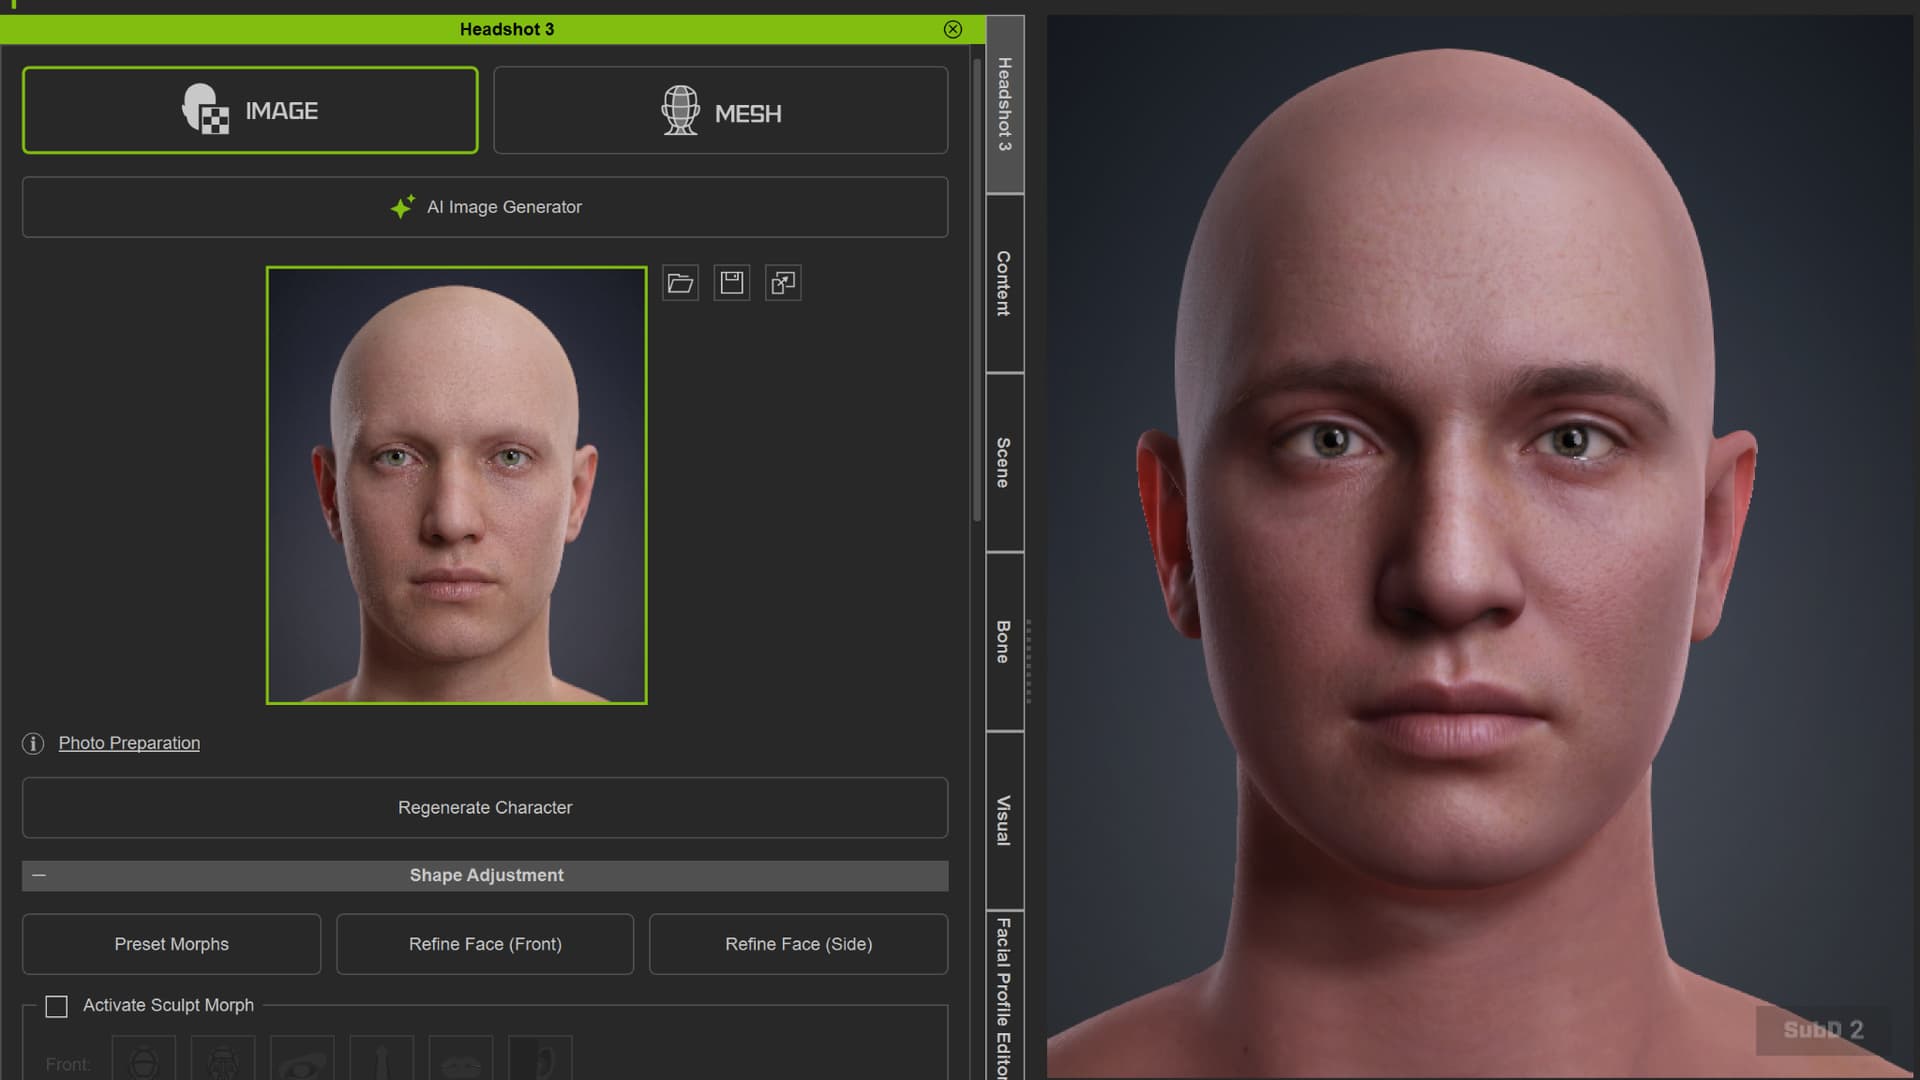
The way I fixed it was by taking the same reference image and correcting the skin tone outside of Headshot first, then putting it back into Headshot and regenerating. That gave me a much better result.
So I’m wondering:
Has anyone else had this happen?
Is fixing the reference image before importing it the best workaround?
Or is there a way inside Headshot 3 to adjust the generated face texture/skin tone properly after it has already been created?
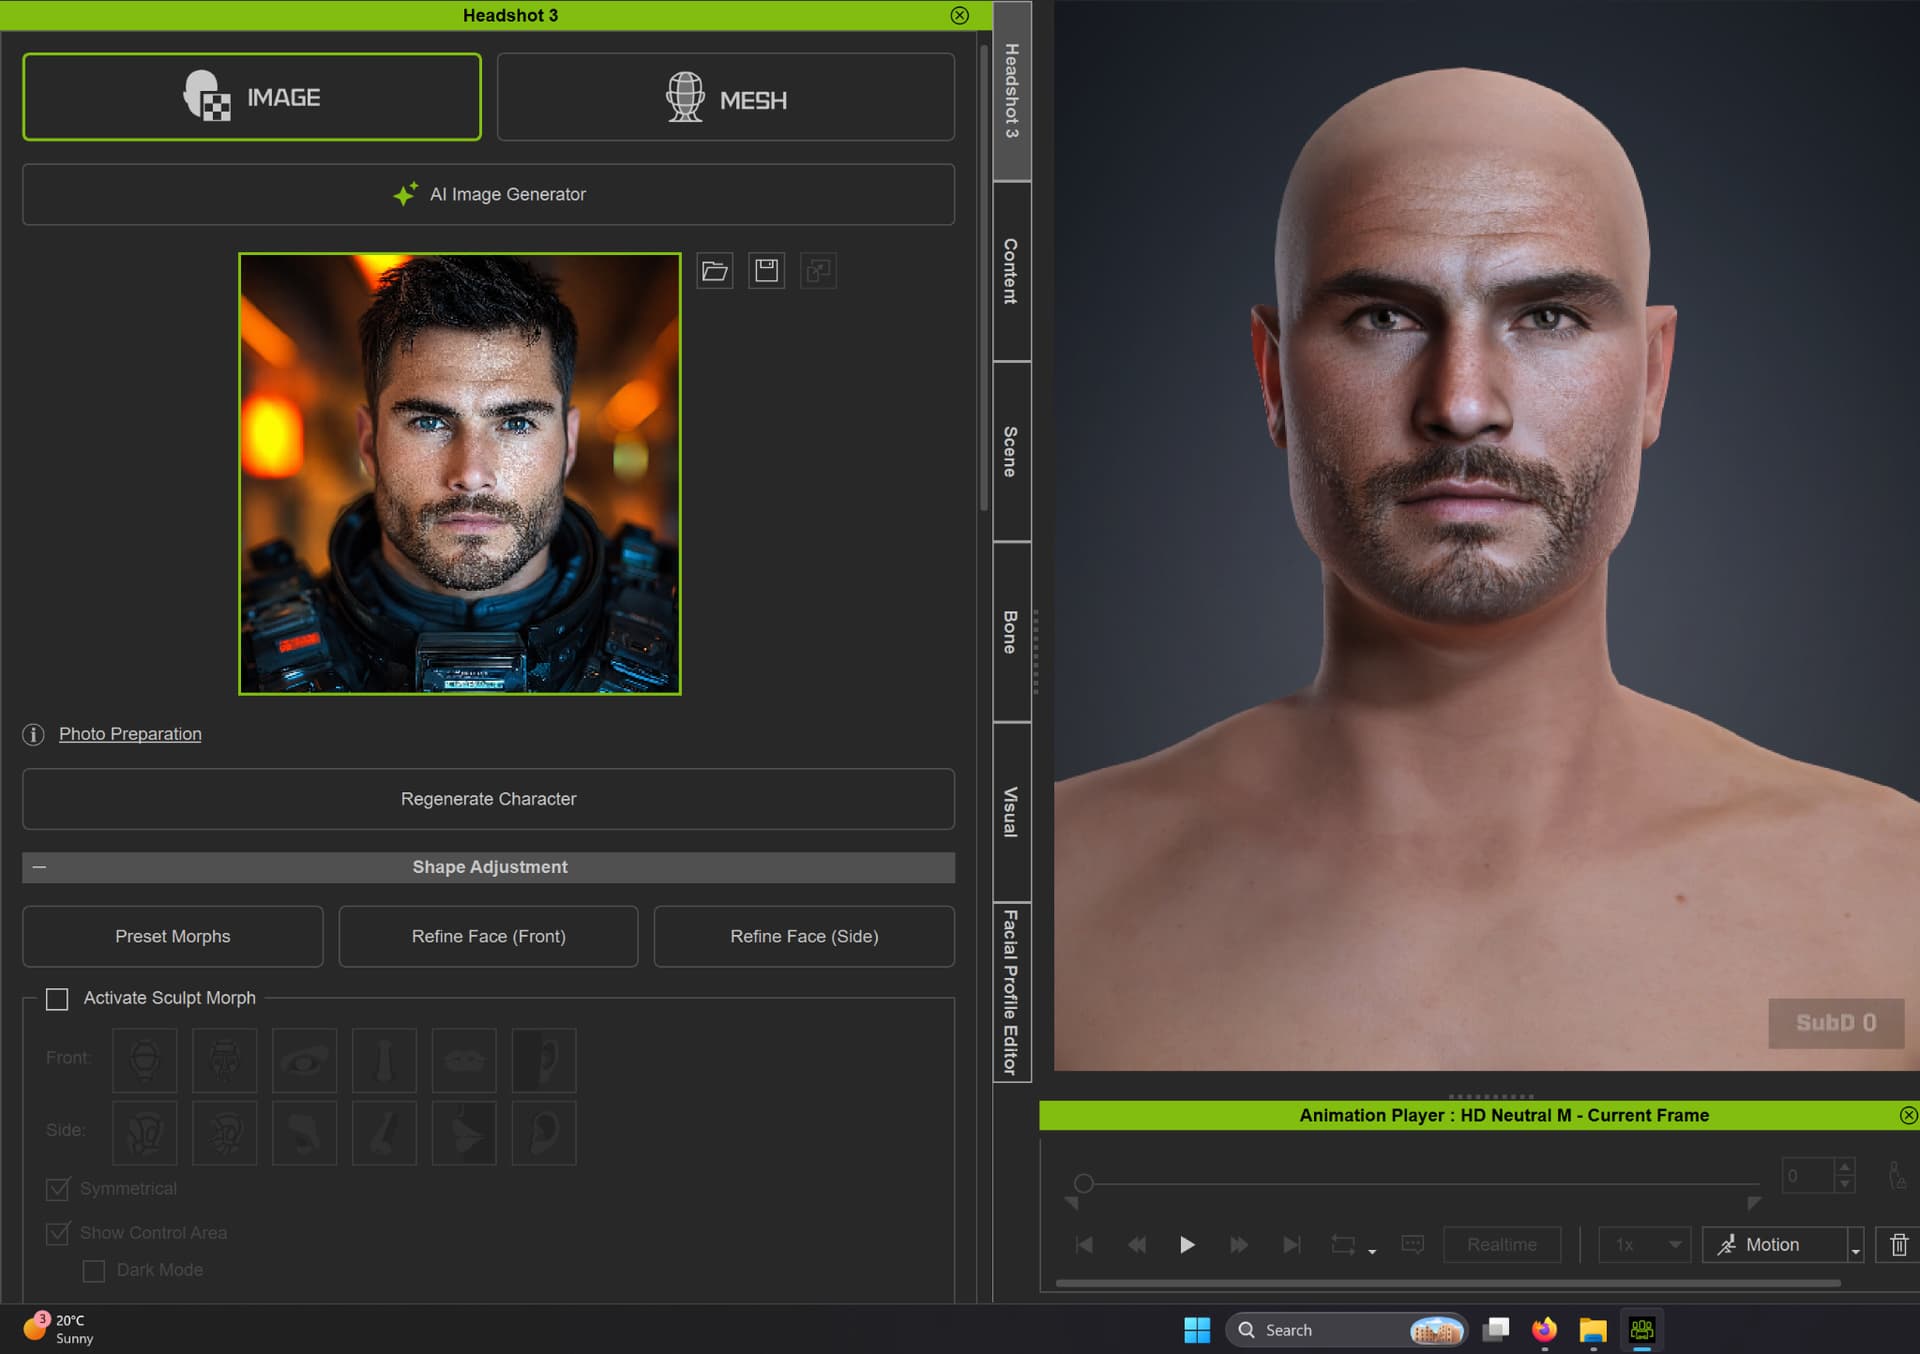
I’ve added screenshots showing the darker result before, and the better result after I corrected the reference image with Ai first.
It is indeed best to have a “boring” picture with basic neutral lighting. I haven’t tried it myself, but Headshot 3 has some AI tools built in that allow for corrections of the original photo.
I did another test though, just to see if it was only dramatic lighting causing it. I took a screenshot of the default/base male in Character Creator, so a much flatter beige skin tone, and ran that back through Headshot.
Even then, Headshot still made the result pinker/darker than the reference image. So it seems like it’s not just picking up cinematic lighting, it also seems to shift the color on its own a bit.
I know Headshot 3 has some AI tools for correcting or adjusting the source image, but I’m hoping there is also a non-credit/manual way to adjust the generated face texture or skin tone inside Headshot after generation.
I don’t really want to rely on paid AI credits just to correct basic skin tone matching, especially if the likeness is already good and only the color needs adjusting.
So I’m still wondering if that’s normal Headshot behaviour, or if there’s a proper manual way inside Headshot 3 to correct the face skin tone after it generates.
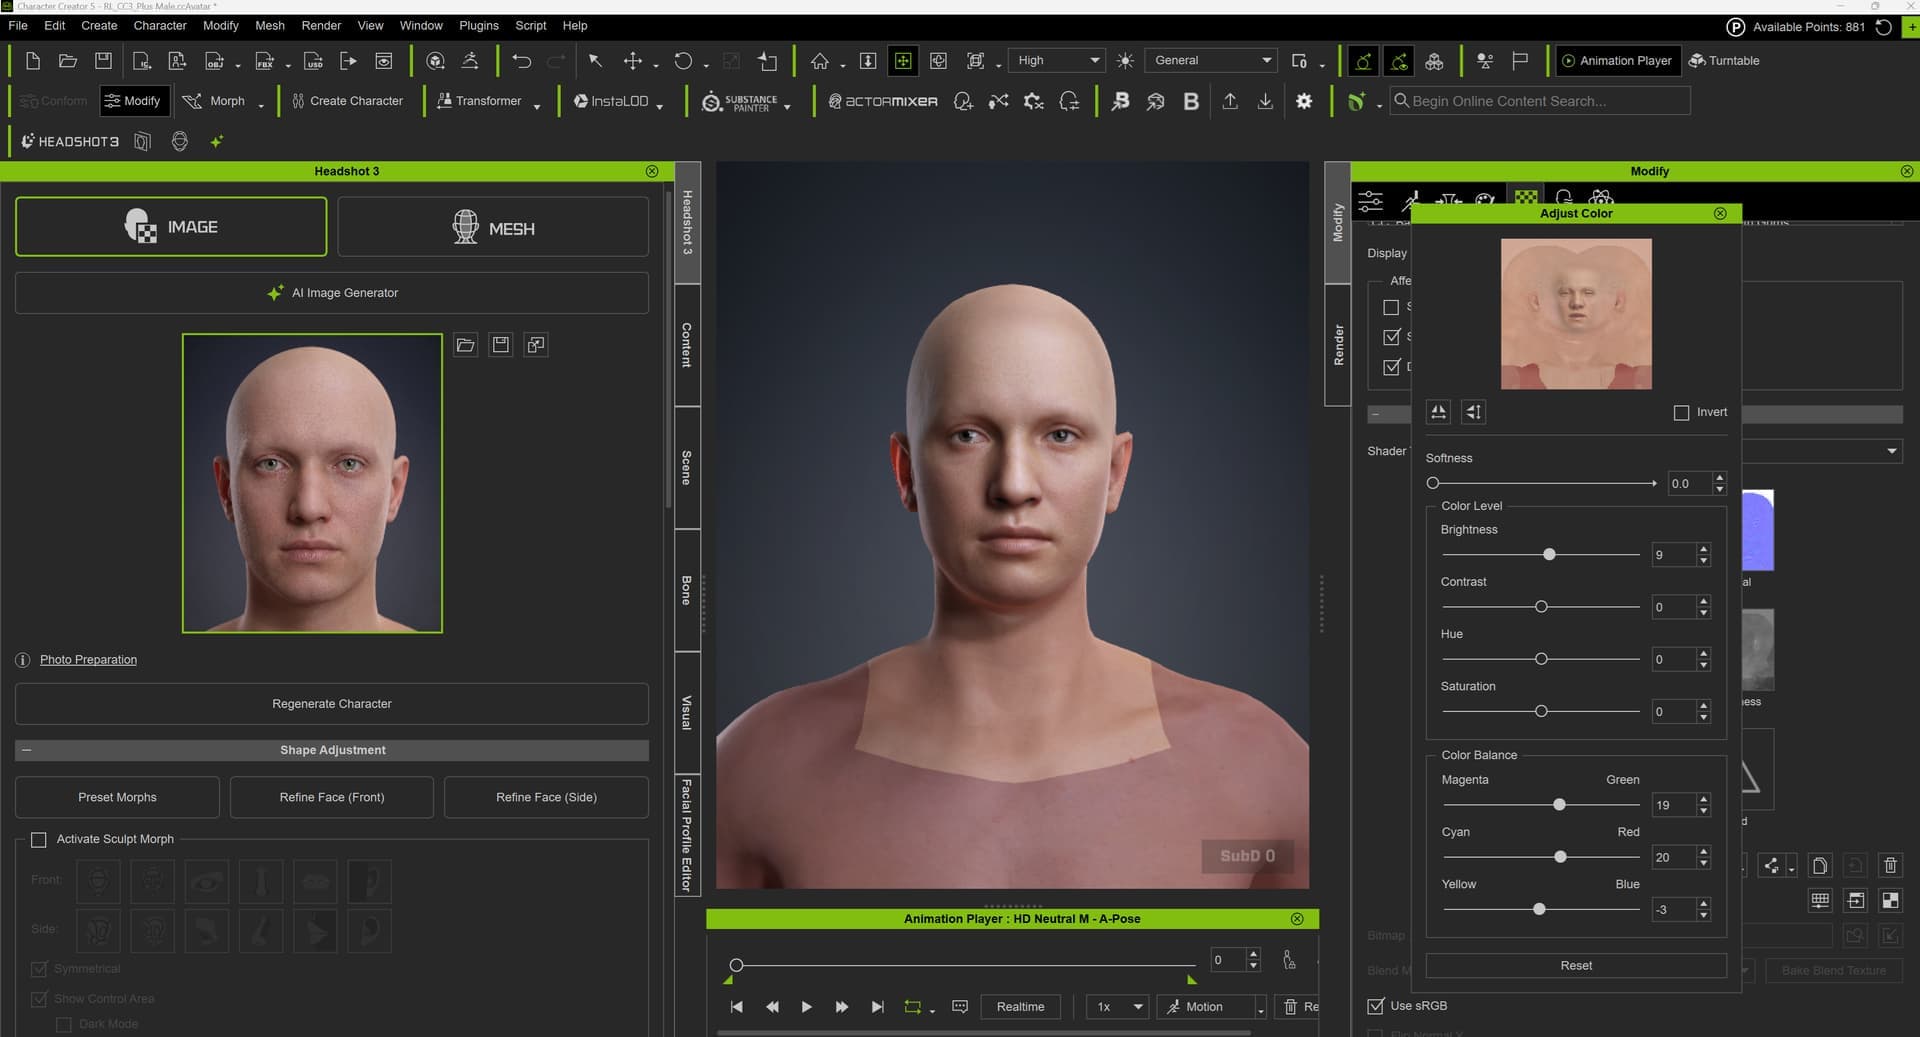
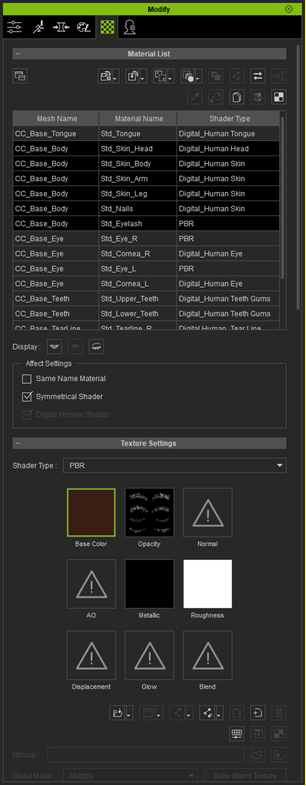
I tried a few of the suggestions, and the one that got me closest to the color I wanted was using the Adjust Color tool in Modify. I adjusted the base color, then used the same settings on the head, body, arms, and legs so everything matched. That turned out a lot better.
Removing shadows from the source image still doesn’t fully correct the color for me, and after a certain point it starts removing details from the image.
When using the Adjust Color in the Modify panel, you can hold down Shift or Cntrl and click to select multiple materials at once. Then all are affected when you use the tool. This lets you make identical changes to all the Body materials simultaneously.